Search results for: Как это свободные отношения больше в insta---batmanapollo
...if you want solid, safe, and long-lasting results. How To Install Deck Foundations Installing Concrete Pillars (With Footings) Concrete ...
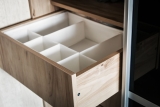
...This is no exception when it comes to installing drawer slides. So, we’ve created a handy guide below for you to understand how to install drawer ...
...Member to the Side Frame Members using 90 degrees angle brackets. Install the brackets using 1 1/2″ galvanize wood screws. Installing the planks: ...

...sure that you find a metal color that complements both of the grain colors of your hardwood flooring. Install a threshold piece = You also have the ...

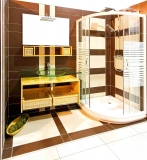
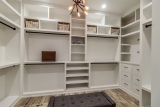
...can go further, towel rails installed in the walls, overhead installed spotlighting, open shelving units with plants on them. Did you know that you can even ...
...door unit. Some screen and door units installation methods vary slightly but they all come with installation instructions and the appropriate mastics or ...
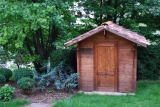
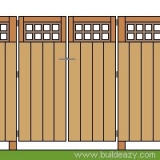
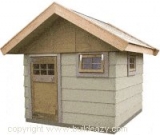
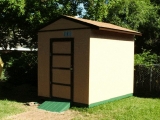
How to measure, make and install a shed door These instructions on measuring, making and installing a shed door are suited to the Buildeazy free plan ...
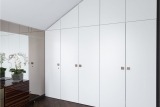
...after installation. This means that if your cabinet door measure 11.5 inches wide, you have to leave a space of about 1.75 inches. Install the sliders with ...
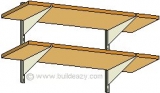
Introduction This section explains how to install the most common and basic forms of open shelving, consisting of either solid lumber boards or specifically ...

...can picture the cage’s interior and perhaps sketch it out to give you a clearer idea. Once you have this in mind, you need to cut and install ...
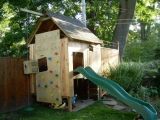
...step-by-step instructions is in both metric (mm) and imperial (inch) dimensions. The design includes a trap door entry, a climbing wall, a swing, and there ...
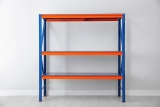
The Best Garage Shelving
$33.79
...to install, this unit is suitable for 12”, 16”, or 25” spacing of wall studs. The unit can be easily installed on a concrete wall. To ...
![The Best Router Table Plates – [Reviews et Buyer’s Guide]](https://static.buildeazy.com/wp-content/uploads/thumbs_dir/table-plate-1z59ee3wpc4ol6m3ufc5vmjf98vp23ounow7duwlg12s.jpg)
...use. – Make sure the bits are carefully installed and are in great condition. – Avoid keeping your fingers close to the but or the routing ...

...saws come with stock blades which are OK, but very lack luster when compared to quality blades from reputable manufacturers. I would always recommend ...

About Lattice A wood lattice consists of diagonal or vertical and horizontal strips of wood (laths) cris-crossing to make a grille like pattern. Lattice is ...

...structural support, their gapped installation also comes in handy during rainy days – allowing the rainy to easily drain through. To install the ...
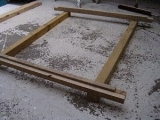
...Nail a temporary spacer to the bottom of the door frame to keep the side jambs parallel. Installing the playhouse door Step 1. Assemble Lay the door frame ...
...the cleat in place with 1.25-inch finisher nails. Do the same for the front panel. After installing the sides, the next step is to install the bottom piece. ...

...CNC 3018 with a new control board and an integrated driver chip. It is very easy to install, and both the manual and the software can be found easily ...

...basic of carports. Because each site is different, and individual preferences vary, we have given options for post installation and options for bracing. The ...

...wide aluminum ranch slider has been chosen for this tutorial in order to be more precise with detail, but the same principals apply should you wish to ...

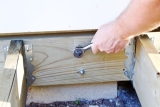
...completely dry, you can then install it. When you have finished installing your plywood, go over any screws or nails with sealant to make sure they remain ...

...with at least one light installed in the ceiling, sometimes more. If your garage has only one light or two not-so-bright lights, you will benefit ...

...the jamb; they never had to be taken off. Fitting the lockset The installation kit Note 1: New locksets (lockable door handles and latch) usually come with ...

...of the stairs depends on how steep you want the slope to be. Two stringers should always be installed on either side of the stairs. Carriage stringers are ...
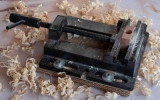
...with plenty of clearance. It’s easy to install and position with its large mounting brackets. The slotted base will be adaptable to most drill ...
...happy with the result, we cut out a few holes for where our electrical wires would need to pop through. Step Ten: Installation Now you can install your ...
...– If necessary, fill in any gaps between pieces of wood with caulk. Install The Door And Window Frames – Now it is time to install the door and ...
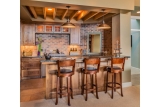
...to be placed in to give it that real bar look. When preparing the bar top, you’ll need to install plywood cut-to-size first and then install an oak ...

...than the thickness of the board to be inserted into the groove. This joint is commonly used to install backs into shelf units and book cases. Dado ...

...the groove. This joint is commonly used to install backs into shelf units and book cases. Dado Joints are made by cutting a groove in a board, but in ...
...(1″ x 3″) battens to the door slats covering all of the joins. See fig.5. Installing the door Door Installation Add the hinges to the ...

...one speed on others. Install the blade Once you know what you plan to cut, it’s time to pick out a good blade and go to work. Thankfully, changing ...
...wedges (shims) should leave 0.75 inches of space on the sides and about 0.1875 inches of space at the top and bottom. The next step is to install the door...
...size=”2″ class=”” dropcap_color=”#fa5738″]4 Step Then, install shade slats at the top – you will need about four ...
...waste. The position of the shower waste and the hole in the stand floor was determined by the hole in the shower tray. Stage 6. Install the shower tray ...
- 1
- 2
- 3
- 4
- Next Page »