Contents
Introduction – Plan drawings
Introduction
This project was inspired by the heap of spare bricks just lying around the place doing nothing.
“Why not make a brick and concrete path?” came a whisper from somewhere.
“After all, there’s no path to the front steps but there are plenty of bricks.”
Couldn’t argue with that one.
Only thing was, a lot of the bricks were different sizes – both width and height as well as length. I didn’t really want to spend forever sorting them out and cutting them.
The decision was made to lay them as they come, which meant there would be gaps between the bricks of varying sizes.
If un-uniformity is uniform it should look good!
Oh well! Here’s to a rustic-looking brick and concrete path.
Anyway, regardless of what your bricks might be like, this is how to make a brick and concrete path.
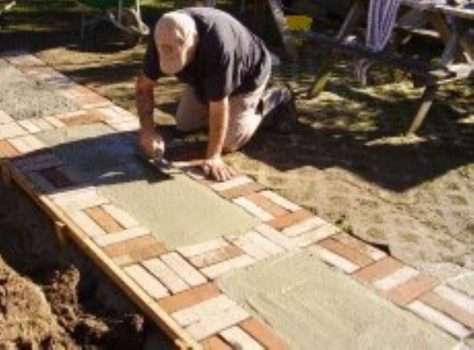
The plan is for three tiers of bricks to go around the edge and for exposed aggregate concrete to go in the middle.
Because the bricks varied a little in size, it was decided to use a concrete bedding underneath. This made it a bit easier to make the tops of the bricks level, since a slightly higher brick could easily pushed into the concrete (while the concrete is still wet, of course).
Below is a plan drawing and there is a more in depth account and photos on successive pages.
Preparing the ground
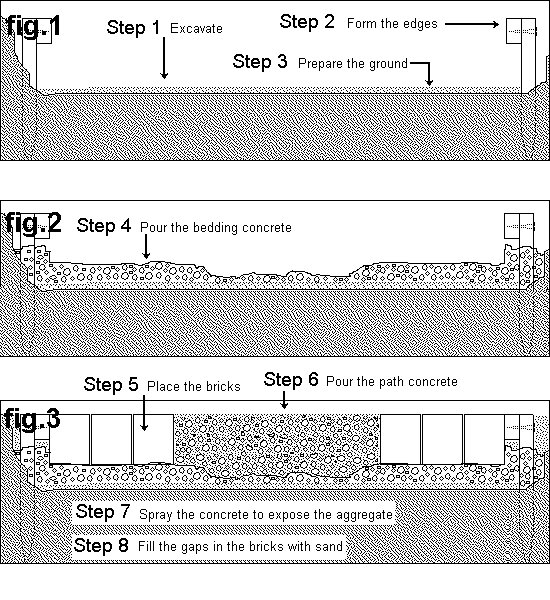
Step 1:

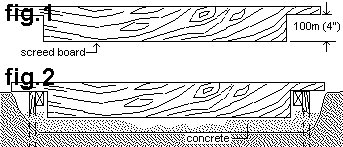
- Excavate the ground to a depth of at least 50mm (2″) below the bricks.
- For example: It the bricks are 100mm (4″) thick, then excavate to a depth of 150mm (6″).
- Also make sure that the excavation is a few inches wider than the proposed path to allow for a bit of room to work.
- If the ground is not firm, then you will need to go deeper.
Step 2:
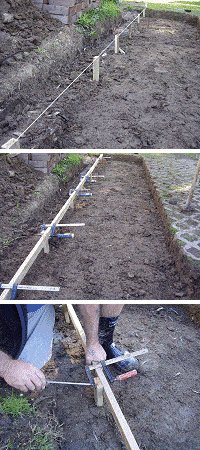
- Put up string-lines showing the proposed finished height and width of the path.
Offset the string-lines 25mm (1″) each side of the proposed path to compensate for the thickness of the formwork. (The formwork is the temporary strips of wood at the sides which acts as a guide and holds everything in place until everything sets.) - Hammer pegs into the ground along the outside of the string-lines.
Hammer the pegs in until they are the same height as the string-line.
Space the pegs about 900mm (3ft) apart. - Clamp 50mm x 25mm (1″ x 2″) formwork to the inside of the pegs. Ensure that the formwork is flush with the tops of the pegs.
- Screw through each peg into the formwork.
Once screwed, you can then take the clamps off.
Step 3:
- Once the formwork is in place you can get a more accurate assessment of the excavation heights.
- Make any necessary digging adjustments.
- Spread a thin cover of fine aggregate over the excavation area.
- The next step is to pour a bed of concrete up each side of the path excavation for the bricks to sit on.
- You can get information on how to mix concrete here.
- Before pouring any concrete, dampen the work area using fine spray from a hose.
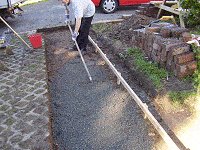
Step 4:
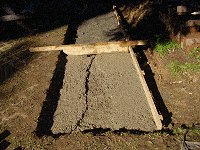
Make a screed board that is able to slide up and down the formwork and screed the concrete bed to the required height.
The bricks and the concrete
Step 5:

Pour the concrete
- If the consistency of the concrete is right, you should be able to lay the bricks on top of it soon after pouring and screeding.
- The concrete should be of a consistency to hold the weight of the bricks yet still soft enough to be able to push a brick in a little if so required.
- If the concrete is too soft/runny (i.e. the bricks sink into it), it might pay to wait a while until the concrete firms a bit.
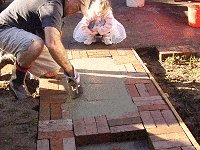
- Lay the bricks on the screeded concrete hard against the formwork.
- Once all the bricks are in place, leave overnight for the concrete to harden somewhat.
The next day
- Dampen (with fine spray from a hose) the work area and the bricks.
- Pour concrete into the middle cavities.
- Try not to splash too much on the bricks.
- Any slashed or spilled concrete on the brickwork must be wiped off with a damp cloth or sponge before the concrete sets.
Step 6:
- Fill the cavities to the top with concrete. Make the concrete level.
- Smooth over the level concrete with a trowel or float. Hold the blade flat against the surface and sweep it back and forth in arcs.
Tip: you will probably not get it near perfect in the first going-over, but that doesn’t matter. Leave it until it dries a bit or until all the excess surface water has evaporated and then re trowel.
- A novice may need to go over it another two or three times to get a nice smooth finish, letting it dry a bit before each going over
Step 7:
Exposing the gravel/aggregate
- To achieve an exposed gravel/aggregate finish, hose away the surface concrete to expose the gravel/aggregate.
How?
- Let the concrete set for a bit. There should be no moisture on top and the concrete should be hard enough to scratch your name in it with a stick without the scratch imprint closing up (not that you would do that, of course).
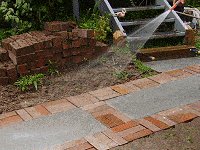
- Begin the hosing procedure. Set the spray nozzle to slightly above medium (a bit like a strong shower).
- Spray over the surface with the hose starting at the highest point (do not hose uphill). Walk along the side of the path at a steady gait while spraying the concrete. It doesn’t take long and you should notice straight away if the hose spray is too strong or not strong enough.
Note: The required spray pressure will be dependant on how hard the concrete is at the time of spraying.
Step 8:
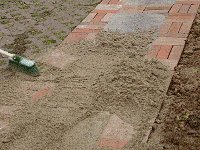
- Give the concrete a couple of days to cure and then pour sand over the whole path. Sweep some of it into the gaps between the bricks.
- Leave the loose sand on top of the path for two or three days and give it a brush every now and then.
- Slowly the sand will fill and compact between the bricks.
- You can then sweep and clean the path properly.
- Take off the formwork (if you haven’t already done so), pull out the pegs and fill up the sides with soil.


