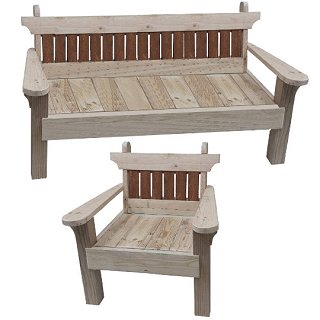
Chair and bench
The chair and bench set would look good in any garden. Made out of mostly 140mm x 35mm (1-1/2″ x 5-1/2″) wood, they are very solid
$5.00
This is a $5 USD downloadable file. Two plans are included in this downloadable file: A comfortable garden chair and a matching bench.
There are 19 pages in the downloadable PDF file.
The step-by-step building instructions are written in both metric (mm) and imperial (inch) dimensions.
Included are plan drawings, cutting list, pictures, and instructions.
This garden chair and bench were originally designed as projects for novice woodworkers.
The chair and bench set would look good in any garden.
Made out of mostly 140mm x 35mm (1-1/2″ x 5-1/2″) wood, they are very solid and deep with decent size arm rests. You can laze back and do whatever you do when you sit in such a seats.
Wood sizes and sourcing the materials
Three different size woods are used in this project. They are:
North America (standard):
1-1/2″x5-1/2″, 1-1/2″x7-1/2″, and 3-1/2″x3-1/2″ treated Lumber.
Australasia (metric):
140mm x 35mm, and 190mm x 35mm, and 90mm x 90mm treated timber.
There is also a bit of 25mm x 25mm (1″x1″) strip required.
At the time of writing some Lowes stores in North America stocked 1-1/2″ x 5-1/2″ and 1-1/2″ x 7-1/2″ Pressure Treated Lumber in 8ft, 12ft, and 16ft lengths.
Bunnings in Australia stocked 140mm x 35mm and 190mm x 35mm treated timber in various lengths up to 6 meters long.
90mm x 90mm (3-1/2″ x 3-1/2″) should be available in most places


AARON –
We failed making this type of chair in 2017. And I guess we’ll do another one on the next coming days! 🙂
IAN –
Good day
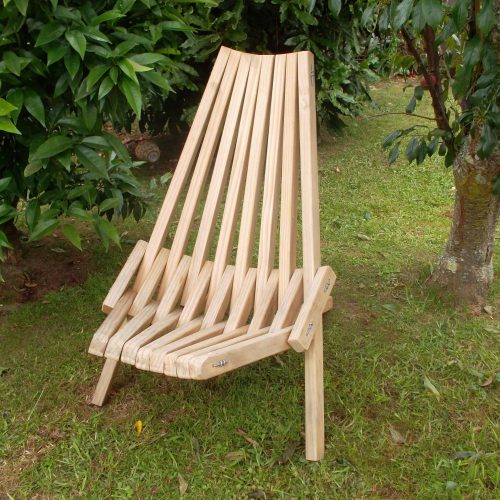
My wife wanted me to build her a chair so she could sit outside and watch our daughter while playing on the jungle gym.
So she search the internet for picture of chairs and found your plans. And handed me the plans.
This is the product of the plan.
Thanks, she is so impressed with the results that it has ended in the entrance hall of the house.
Kind Regards Ian Stanley
JESS –
Great experience, thoroughly enjoyed it.
I have used a hand saw a few times but never power tools. My reluctance to use power tools was because I was intimidated by them-never used them in my life and always thought I wouldn’t be able to cut the wood properly.
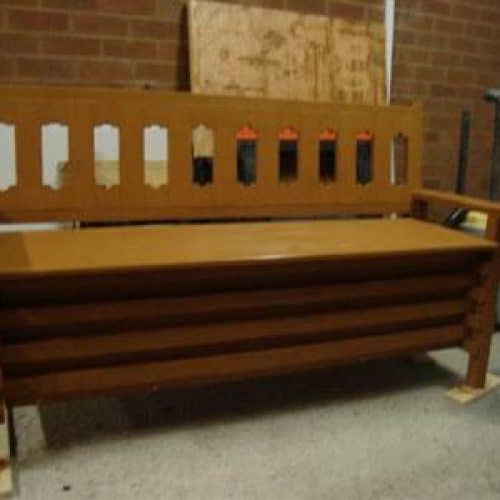
The initial project that I was going to complete was an outdoor bench, but due to time constraints halfway through we had to change the project to a chair.
The project was pretty easy, however due to my lack of confidence in my ability to use power tools, I still found it challenging. I also had to get used to reading the building plans.
Les’ calming attitude helped a lot with calming my anxiety.
The first session I was dropped in the deep end and I learned how to use the circular power saw, we both thought I wasn’t able to use the mitre saw due to my small hand span. We later found out that I could… but more of that adventure soon.
The first step was to create the legs, using the circular power saw the progress was slower-me being a perfectionist also didn’t help.
At the start I found it difficult to cut a straight line using the circular power saw. If your initial cut into the wood is straight, then generally the rest of your cut is straight. If you push the saw through too fast it will vibrate a lot in your hand. You just need to guide the saw, with hardly any pressure. Slow and steady wins.
Halfway through the first session we realised I was able to use the mitre saw, however I was still scared to use it. The second session Les was having none of that and encouraged me to try it.
I thought why not, I came here to challenge myself.
I loved it! You don’t have to worry so much about cutting a straight line. You line up the cut before you start, make sure the piece of wood is flush against the back, release the safety and start by guiding the blade down and gliding the blade towards you if the wood is thick.
The mitre saw made it so much easier and faster! I have been converted.
The best way to describe the drill driver is temperamental. I didn’t realise that with driving it is all about being in line with the screw not the drill driver itself being straight. If I wasn’t in line with the screw it would make a horrible noise. If I was in line with the screw it would work smoothly. Funny when I thought Les wasn’t watching is the time that I drilled perfectly.
I have to say my favorite tool was the jigsaw, and no not because I love completing jigsaw puzzles. I think this was the only tool I knew the name of. As soon as I made the first cut I knew this was my tool.
The blade in a jigsaw is more flexible than other saws, which can be a bit strange. I had to cut a rounded edge on the arm of the chair. It is not easy to manipulate the blade, again it is all about guiding the blade. It takes a lot of cuts to get what you want, you need patience with this tool. But the patience pays off with the finished product-a cut that you can be very proud of.
Unfortunately due to time constraints, I wasn’t able to complete as much as I wanted of the project. Les had to complete a lot of it. The parts I did complete I am very proud of. Completing these sessions has given me the confidence to say yes I can use power tools. I can’t wait for my next project. One that I will complete 100% of it!
Cheers
Jess
Video: https://www.youtube.com/watch?v=wNUlRHWShcE&feature=youtu.be