Contents
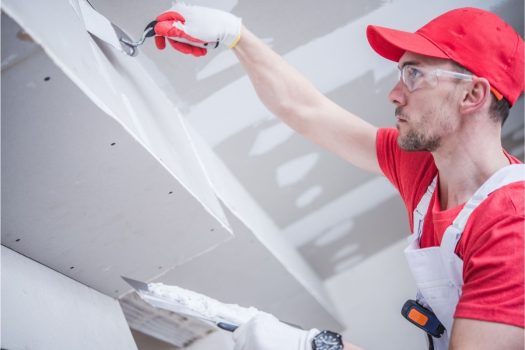
While you might think that a large hole in drywall might be better fixed by a professional, you can do it yourself if you know how to.
The majority of us, at some point, may have had to deal with a small hole under 6 inches wide, but anything more significant? Absolutely not! While it can look intimidating at first glance, you can repair it with the know-how, producing professional-looking results too.
So before you call in the professionals, take a look at this simple guide on fixing holes within the drywall. You may be surprised by how easy it is to do.
Before You Start
There are several items you will need to get started. These are:
Equipment
- Framing square
- Pencil
- Tape measure
- Drywall saw
- Wood saw
- Screwdriver Drill
- Drywall screws
- Utility knife
- Drywall knife
- Sanding material
- Lint-free cloth
Material
- Plywood
- Drywall that matches the same thickness
- Drywall joint tape
- Drywall joint compound
- Primer
- Paint
The Simple Method
In this article, we shall look at a reasonably simple method to repair some drywall holes. You do not need to go all out when it comes to this problem, as a simple solution is all it takes to produce excellent results.
You will need to cut a patch of drywall from a spare piece and attach it with screws and wood backing strips to secure it.
You will then apply a joint compound to disguise the seams and help secure them firmly in place. If done to a high standard, you will be unable to see where the hole or any of the seam lines are.
Once completed, it will be a permanent repair that is strong and cannot be redone – unless you create another hole, but then the cycle repeats itself…
Be Safe
While repairing drywall is entirely safe, you must ensure that there are no wires or plumbing where you are about to work. To check, use a flashlight to take a look.
If you find that there is something to be concerned about, then it may be best to call in those professionals. It is much better to be safe than sorry.
If you do not see anything, then you are welcome to carry on with the first step of preparing the hole to be repaired.
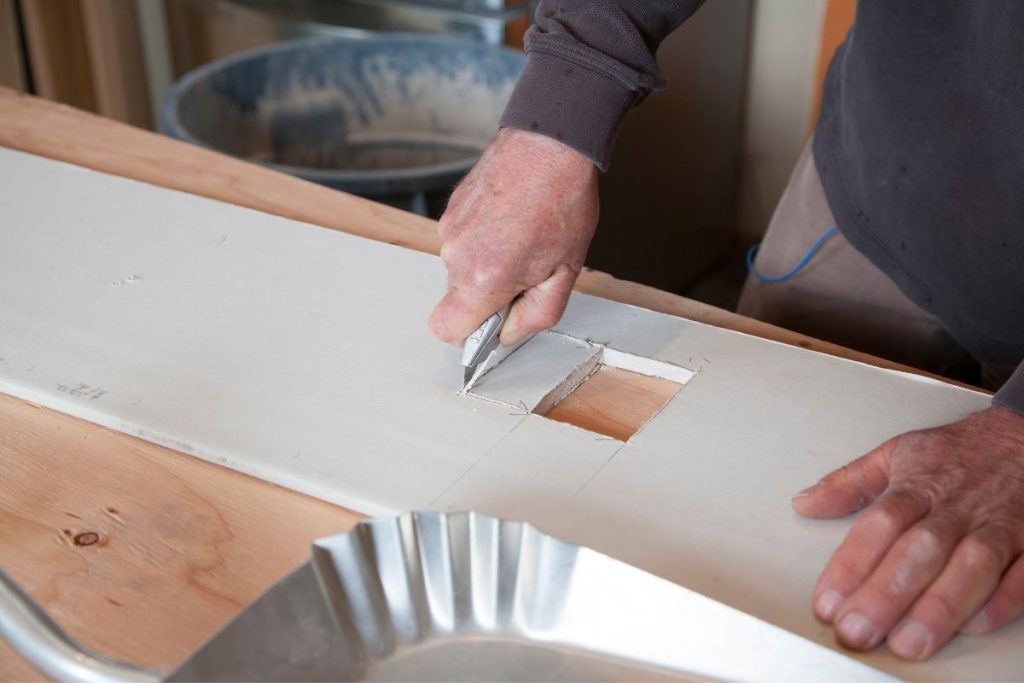
Step 1 – Cut The Edges
This might sound counterintuitive, but you must create straighter lines to work with. Using a framing square and a pencil, outline where you will need to cut the drywall to make the job easier.
Use a drywall saw to remove the material efficiently.
Step 2 – Backing Strips For Support
Once you are happy with the cutting of the edges, you will need to cut two pieces of plywood around 3 inches longer than the longest side of the hole. If it is a square shape, place them alongside the width length instead of the longest side.
You will want to place a strip inside the drywall, so it is centered. Both edges will need to be secured with a drywall screw.
Do the same for the bottom of the hole. If you find the hole is bigger than 10 inches, use more backing strips.
Step 3 – Installing New Drywall
When choosing drywall, it must be the same thickness as the existing material if you want it to blend in. If you choose the wrong thickness size, the hole cover-up will not work.
Cut a piece of drywall from the new piece and try to match it up to the hole as much as possible. While it does not have to fit snuggly, it must be as close to the hole shape and size as possible.
Secure the piece of drywall to the backing strips using screws, but keep them around an inch away from the edges, and space them around 6 inches apart.
Step 4 – Covering The Seams
Now that you have the drywall fixed into place, you can start working on the seams and attempting to make it all blend into the wall.
Using drywall joint tape, cover the seams and overlap each corner. There must be no bulging, and it should remain flat for the best effect.
Step 5 – Drywall Joint Compound
Once the tape has been placed correctly with no wrinkles, you can apply a thin layer of drywall joint compound over the top using a drywall knife.
It should be thin enough that you can still see the mesh of the tape, so do not feel like you need to cover it completely.
Once it has thoroughly dried, scrape the compound using a knife to remove excess and clumped-up areas. Once you are happy with the results – but do not go overboard – apply another thin layer of drywall joint compound.
This time, however, extend over the original layer and feather it out using a knife. This means it will blend into the wall better.
Once it is dry, start scraping at the compound again and add a third layer in the same fashion as the second. Let it dry but do not scrape.
Step 6 – Sanding The Compound
Once it is completely dry, gently sand the drywall joint compound to remove any rough edges and make it look like it is all a part of the wall.
Do not over-sand, however, as you do not want to be able to see the mesh through the compound.
This will cause a lot of dust, so use a lint-free cloth to remove any excess, or if you prefer, use a wet-sand sponge to avoid most of the particles.
Step 7 – Finishing Touches
The drywall is fixed; hooray! However, you have not finished just yet. To make the drywall area match the rest, add a coat of primer using a paintbrush.
Once the first coat of primer is dry – keeping in mind this may take a few hours – apply another coat, and then a few more as needed.
Once the priming step has been completed, you will need to match the repaired area with the rest of the wall. To do this, either do a complete paint job or try to match it with the current color.
In this case, it may just be easier to paint the entire wall, otherwise the color will never quite match, and it will forever annoy you!
Final Words
While it is easier to call in the professionals, you can give repairing drywall a go yourself and achieve great results.
Even though it may take a lot of time to do so, the skills will prove invaluable if you need to repair drywall again, or if you want to get into a business that deals with such a task.
It is also essential if you build a house and must stick to a budget. Doing something like this yourself is inexpensive and can save you money. This is especially handy if you want to spend money elsewhere on jobs you cannot do yourself.


