Contents
Wood is one of the most versatile materials you will find on this earth. We can make many objects out of it, ranging from furniture to pieces of art.
Despite its various uses, wood has a glaring drawback: it ages, and if left for a very long time, rots away.
Craftspeople can get around this issue by stabilizing the wood.
This is done using methods that make the wood stronger, not just on the outside, but on the inside too.
You’ll learn how to stabilize wood in this post, including the things that you will need, and the reasons why it’s important to stabilize wood.
Why Is It Important To Stabilize Wood?
Stabilizing wood is done to make wood pieces stronger and tougher. This helps to avoid cracking or warping problems later down the line.
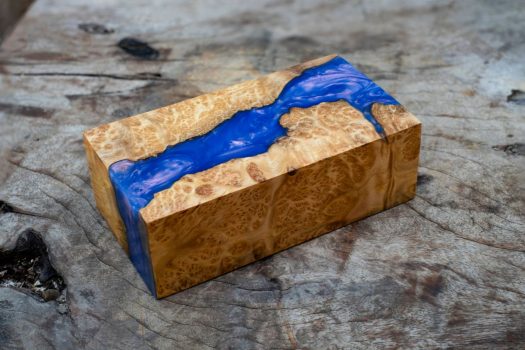
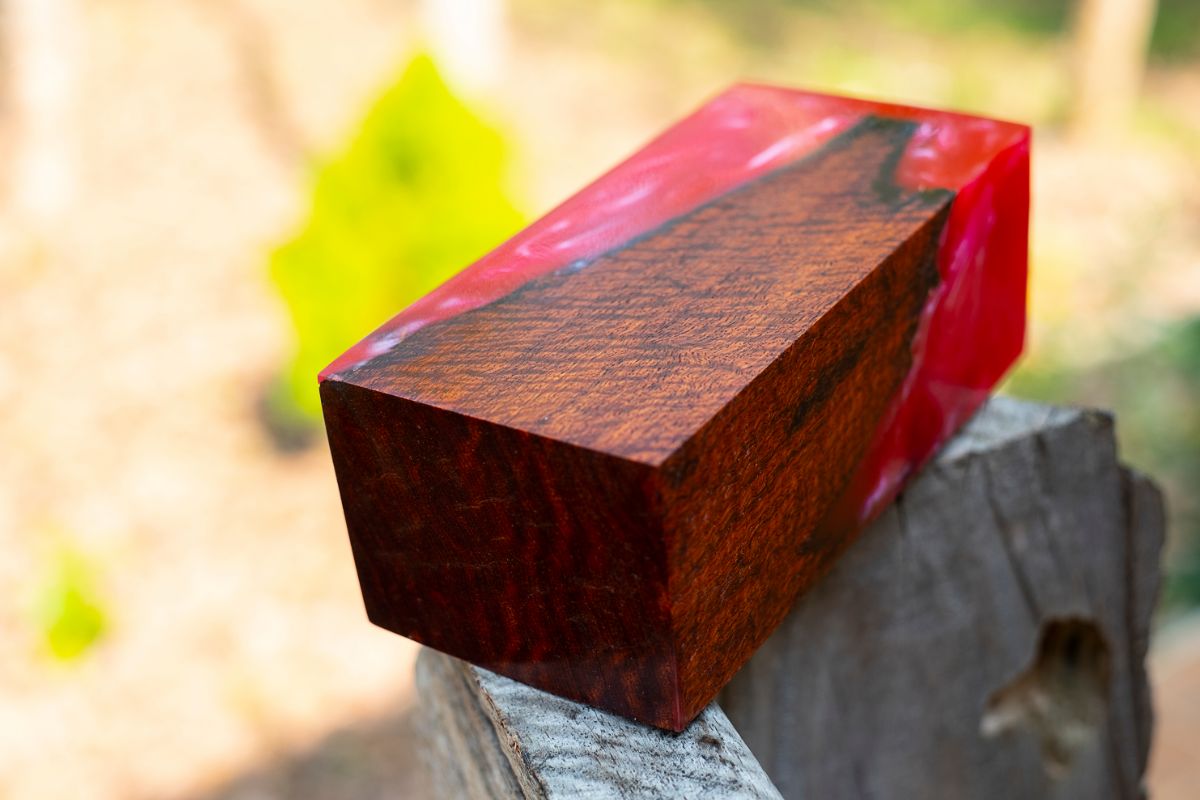
Stabilization can also give the wood a pleasant glossy appearance, which is ideal for furniture or art pieces on display.
Stabilizing wood is a method that processes softer wood to transform it into a usable piece of wood suitable for a variety of projects.
Understanding how to do the process means that you won’t need to dispose of any spare pieces of wood, as you can treat the blanks to get the most out of your wood supplies.
Put simply, the stabilization process involves placing your wood pieces and resin into a vacuum.
This chamber will remove the air pockets inside the wood, giving you a stronger, more durable piece.
You can then polish the wood to give it a glossy finish, which stands up reasonably well to water.
Knife producers tend to use stabilized wood pieces to make their knife handles. The process helps defend the handles from any problems later on.
For instance, kitchen knives are often exposed to water and other liquids, but stabilizing the wood means that the handle will stand up to water damage well.
How To Stabilize Wood?
Now that we’ve covered why stabilizing wood is so important, we can get into the process itself.
You Will Need
Here are the things you will need to prepare beforehand.
- Safety equipment for eyes and hands
- Vacuum stabilizing device
- Stabilizing Resin
- Color dye
- Air compressing device
- Oven which can handle 200°F temperatures
Instructions
Follow these steps to stabilize your wood pieces.
Dry Your Wood
Start by gathering your spare pieces of wood and ensure that they are as dry as you can get them.
It’s best to use a moisture meter to check how much moisture is inside each piece.
If you have one, make sure that your blanks have under 10% moisture within before you start stabilizing them.
If any of your wood pieces are damp, leave them to dry out fully before you start the process.
If your wood is wet, cut them into larger pieces and place them in a drying rack to dry.
Drying them in a rack should take a few days, no less than this. Don’t attempt to dry the pieces too quickly, as this can make the wood crack.
Dyeing – Optional Step
You can dye your wood pieces simultaneously as you stabilize them.
All you need to do is purchase your chosen fast stick dye, then use ¼ resin for every quart of resin you have.
More resin will give you a bolder, visible color, so experiment with a few pieces before and see which finishes you prefer.
Begin Stabilizing
After your wood supplies are dry and can be stabilized, you can then begin the stabilization procedure.
- Prepare your vacuum stabilizing chamber and make sure that you have set it up as written in the manufacturer’s instructions.
- Put your wood blanks in the internal chamber of the stabilization kit. Use an anti-float plate to prevent your blanks from floating as the process continues.
- Take your resin and pour it over the blanks until the wood is fully immersed. Cease pouring the resin when the wood has an inch of resin on top. You don’t need to worry about wasting the resin, as the liquid can be used repeatedly.
- Seal the chamber fully according to the guidelines, then fix any vacuum lines in the vacuum compartment.
- Gradually turn on the vacuum device, beginning with the lowest power level. Slowly raise the power to its highest setting. Make sure that you do this slowly! Increasing the power too quickly will make the resin bubble up and become messy.
- Leave the vacuum on for between half an hour to an hour. You can stop the vacuum after the resin has finished foaming and the blanks are emitting only a few air pockets.
- After the resin has finished bubbling, switch off the vacuum chamber and carefully take the lid off.
- You might notice that the wood hasn’t soaked up a lot of the resin, but this is normal, as the wood won’t take up much of the substance inside a vacuum chamber.
- Leave the pieces to soak for another hour.
- Once they have finished soaking, take the anti-float plate off and see if the pieces float.
- If the wood pieces float, the vacuum process has failed and you will need to start the process again.
- If the blanks don’t float, the procedure went well and you can take your wood pieces out of the chamber.
- Clean the wood pieces to remove any resin residue.
- Pour the leftover resin from the vacuum into a bottle or container to use in the future.
- It’s best to clean the vacuum immediately after you’ve finished using it. Resin is viscous and difficult to clean, so it’s best to do it as soon as possible.
Curing The Wood
Use aluminum foil to wrap the wood, then put the blanks into your oven, set to 200°F.
Make sure that the oven is set to the right temperature before you put the blanks in.
Too little or too much heat will spoil the curing procedure, wasting your time as a result.
If your wood pieces are smaller, they will need to be baked for half an hour.
Larger ones will need to be baked for longer, so change your baking time as required.
Check the resin after half an hour to make sure it has cured sufficiently. The resin should feel solid and appear crystallized if it has cured.
If the resin is wet, wrap it in the foil again and bake for a longer duration.
Once the resin has dried, leave the wood to rest out in the open for one or two days.
Once a maximum of 48 hours has passed, the blanks will have been stabilized and ready to be used.
The Bottom Line
Now you know how to stabilize wood!
Stabilized wood is important to avoid it deteriorating later on. Just bear in mind that different kinds of wood will reach different hardness levels when stabilized.
No matter what kind of wood you use, stabilization will make your blanks durable and harder, perfect for many types of uses!


