Contents
Bats are beautiful creatures, and giving them a home in your garden can be really beneficial: Did you know that just one small brown bat can gobble up over 60 months or 1000 mosquito-sized insects per night?
So not only are they great at getting rid of all those pesky bugs we hate so much, but they are also essential pollinators that help keep our flowers thriving.
So why would you not want them flying in your gardens in the evening? But how do you even go about creating a bat house?
Well, that’s what I am here for.
Through this article, you’ll learn how to construct a bat house, and don’t worry, even the most novice carpenter will be fine to follow these instructions.
So there are no excuses! Let’s get going!
Why Build A Bat House?
Contrary to popular belief, most bats usually don’t set up camp in caves.
They are likelier to set up their home in trees, under bridges, and in older buildings.
This is where they prefer to give birth and tend to their baby babies.
So when creating a bat home, you’ll want a space that reminds them of their natural habitat, between a bark and a tree trunk.
It will be the perfect spot for them to rear their young.
Bats like warm, narrow spaces, which is why the homes are small and usually painted darker colors to retain heat.
So why do we make these homes instead of letting them find their own natural habitat?
Well, many bats struggle to find suitable homes in the forest.
Creating a home for them provides them with safe cover and a place to raise their young.
Things To Think About Before Building A Bat House
There’s no point in building a bat house just for it not to be used because it’s not in the correct placement.
Here are the requirements for placement of a bat house:
- Sun Exposure – make sure that the bat house will have excess to plenty of sun as bats like the heat.
- High Ground – your bat house needs to be a minimum of 15 feet from the floor to protect them from potential predators.
- Close To A Water Source – ensure water is close by as bat mothers do not like to leave their young for long periods of time.
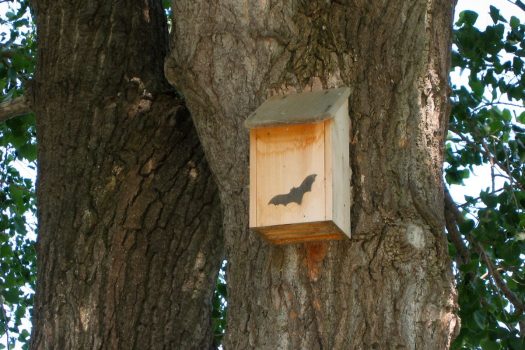
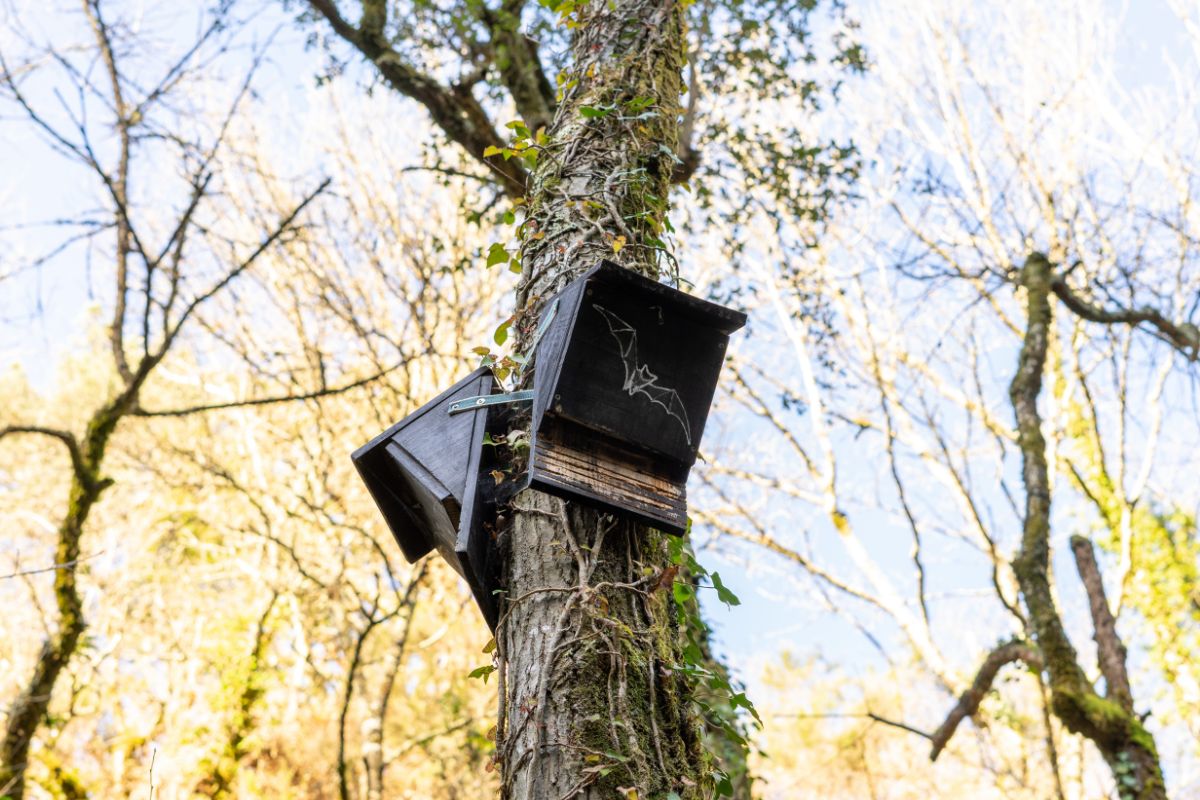
- Don’t Mount The House On Trees – it is too open for predators, branches can get in the way, and it’s too shady to get enough heat. Instead, try mounting on buildings or poles.
Everything You’ll Need To Make A Bat House
Supplies
- ¼ sheet of plywood. (do not use pressure-treated wood)
- One piece of 1” x2” x8” pine
- Between 20 and 30 1/4th coated deck Phillips Screws
- One pint of dark water-based stain
- One pint of water-based primer
- One quart of flat water-based paint
- One tube of paintable latex caulk
- 1” x3” x28” board for the roof
- Black asphalt shingles
- Between 6-10 7-8” roofing nails
Tools
- Table saw
- Caulking gun
- Reversing drill
- Phillips bit for drill
- Tape measure
- Scissors
- Staple gun
Step By Step Guide
1. Cutting The Wood
First, you’ll need to refer to your plan and measure, then mark where you’ll need to cut.
Make sure you clamp down the wood when using the saw. Make sure your blade is adjusted to the proper depth for your wood width.
2. Groove The Back Piece
This is the most challenging part but also the most important.
You need to ensure that the smooth surface of the plywood has a rougher surface than the bats will need.
The best way to do so is to make grooves into the plywood. Your grooves should be approximately half an inch apart from each other.
I would opt to use your electric saw for this part. Otherwise, it can become quite tedious.
You can then choose to further roughen up the surface with a hand saw if you don’t think the job so far is adequate.
3. Staining The Inside Of The Bat House
Bats are nocturnal creatures that enjoy the dark, so you’ll need to recreate this too.
Make sure no sawdust residue is left on the wood, especially in the newly cut grooves.
Then stain the wood (stain, don’t paint) and wait patiently for it to dry. You may need a couple of coats before it’s dark enough.
4. Caulking And Screwing On The Sides
Before you begin to add your side pieces, you’ll want to apply caulk.
You’ll do this to seal the bat house, which will keep all the heat inside it.
Then you can grab your power drill and attach the side pieces to the back.
Pre-drilling the holes you’ll need is also a good idea since the board may split otherwise.
5. Caulking And Screwing On The Top Pieces
The next job is to attach the top pieces of plywood to the house. Caulk them first and make sure it fits nice and snug.
Then drill the pieces following the advice mentioned above. Don’t forget to measure the ventilation slot, though.
This should be about a half inch wide.
6. Caulking The Sides And Adding The Roof
We don’t want the heat escaping, or the bats won’t home here.
Ensure any gaps are caulked around the sides, and then add a final piece of wood from the roof.
7. Prime And Paint
Priming and painting the house will ensure it can withstand the elements outside. The prime helps prevent the wood from molding.
Then you’ll want to paint it with a good few layers of dark paint to help keep that darkness for the bats and preserve heat.
8. Mount The Bat House
As mentioned earlier, you should mount your bat house on a large pole or building, not on a tree.
It should be somewhere with plenty of sun exposure and as close to a water source as possible.
Final Thoughts
And as simple as that, you are done! Soon enough, you’ll have a family of bats settling into their new home!
Remember to be patient as they may not come straight away, and it won’t be until early spring that the bats start hunting for a new home.


