Contents
Restoring wooden furniture is a DIY craze that many people are getting involved with. There is nothing better than creating something beautiful using your own two hands.

Removing the grime and dirt built up by wood can be an incredibly satisfying experience, so if you want to try your hand at this, we’ve got you covered.
To find out more about restoring wooden furniture, we’ve compiled a step by step guide of how you can best achieve this. Simply keep reading below, then get started!
The Items You Will Require
In order to get started with restoring your furniture, you will need to purchase the following items:
- Tack Cloth
- Wax Polish
- Wood Restorer
- Wood Dye
- Fine Glasspaper
- Sanding Block
- Wax And Polish Remover
- Chemical Stripper
- Dust Mask
- Paintbrushes
- Work Gloves
Step By Step Guide
Now that we’ve covered some of the items that you’ll need to get started on your journey to restoring your wooden furniture, let’s take a look at the steps that you’ll need to take.
Step 1
Before you get started, you need to think about the area that you’re working in. We recommend that if you’re restoring your old wooden furniture, that you do so in an outside area.
Restoring furniture can be incredibly messy work, and you don’t want it getting all over your floors.
If you must work inside, then make sure that you cover your floor in a plastic sheet of some kind to protect it.
Step 2
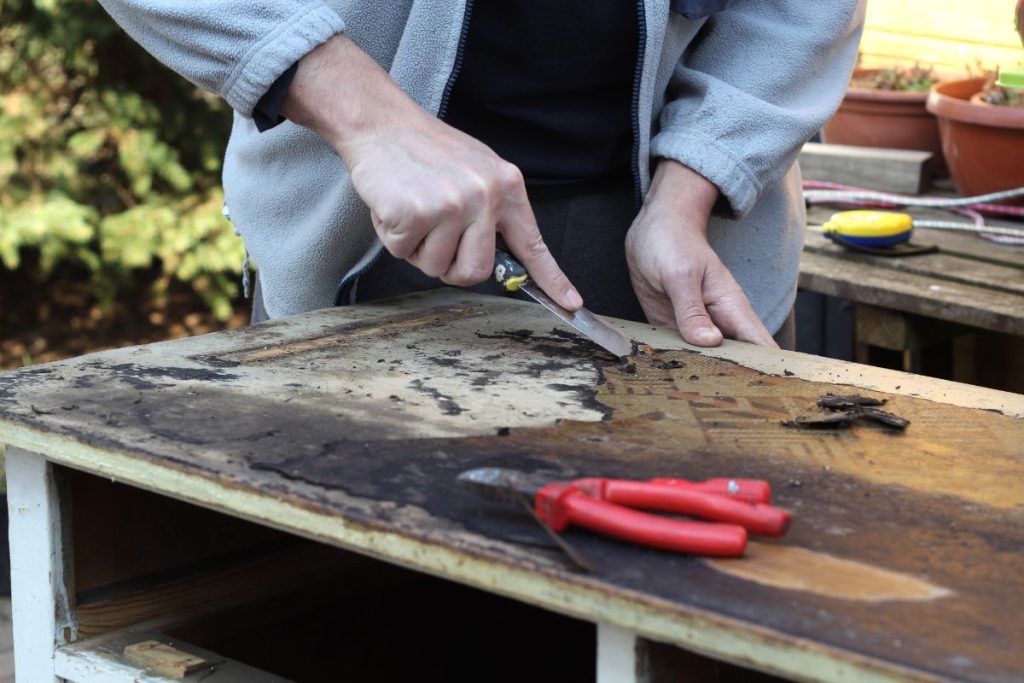
The next thing that you need to do is to leave the stripper that you’ve applied on for an adequate amount of time. There’s no point applying it, only to get started 10 minutes later, as it won’t have had enough time to dissolve into the surface.
For best results, make sure that you’re leaving it on for 30 minutes. If it hasn’t fully dissolved by the end of this timeframe, then the chances are that the wood that you’re restoring is particularly thick. If this is the case, then spread it over the surface again and leave for longer.
Step 3
Next, take a pad of steel wool, and soak it in white spirit. This will neutralize the wood. You can then go ahead and polish the wood with the steel wool, taking care to go with the grain of the wood, not against it.
Different kinds of strippers will need different kinds of neutralizers, so take care to always read the bottle properly to make sure that it’s suitable.
If you don’t find the correct neutralizer for your stripper, then the chances are that the process won’t be successful. So obtaining the right one is important.
Step 4
Next, you will need to wipe the entirety of the table, or the piece of furniture that you’re working on with a rag. By wiping it with a rag, you’ll be able to remove any of the leftover residue with a simple rag.
You can work on different areas of the furniture by applying some wax to a cloth, and approaching very small areas, one at a time. Leave the wax on for a while so it can soften, then rub away with the cloth.
Step 5
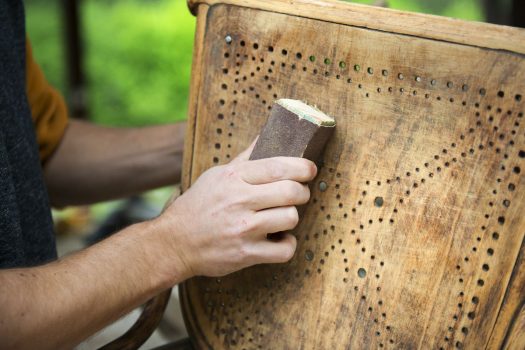
After you have applied the stripper, leave the table overnight for 24 hours before approaching it again. Then you can go ahead and grab your sanding block, and begin to sand the rough surface areas made apparent by the stripper.
Make sure that you take a vaccum over the surface once you’re done, so that there aren’t any bits and pieces left before you move on to the next stages of restoration. Also, take care to wipe the surface of the furniture with a piece of tack cloth.
Step 6
Working in good lighting, look carefully over the piece of furniture that you’re working on to identify any potential problem areas.
If you furniture has been sitting next to a window for several years, then the chances are that certain areas of it have become damaged through bleaching from the sun.
You can resolve this issue simply by applying some wood dye to those pinpoint areas. This is where your paint brushes will come in handy, for finer more detailed work.
Step 7
After you have taken all of the previous steps in restoring your wooden furniture, you can go ahead and apply the finishing oil to the surface.
This will take approximately 10 – 12 minutes to seep through the furniture fully. Make sure that you don’t leave it for too long, as it can become tacky.
Wipe it off carefully with steel gauge wool, and then you can apply another coat. Repeat this process to make it as shiny as possible.
Step 8
The final step in restoring your wooden furniture to its former glory is to apply an extra coat of wax to make it extra shiny.
Put this wax over the entire surface of the wood, then leave it for a while before rubbing it off again with a good cloth.
In future, make sure that you don’t place your wooden furniture too close to the windows of your house, to avoid it acquiring sun damage.
You should also never place it directly next to heat sources, as this can change the shape of the wood itself.
Final Thoughts
For those just getting started out with DIY, restoring old, wooden furniture can be a fun way to get started.
It’s incredibly easy to do, and as long as you acquire the correct materials, the restoration is actually a very easy process.
Take care to avoid placing furniture in areas that acquire too much sunlight in future, as well as placing them away from direct sources of heat.


