Pattern and directions
This scrollsaw pattern is designed to be used in conjunction with the Buildeazy free plan ‘How to make a mailbox stand’ but would also be ideal for use in other projects as a decorative corbel in a structure such as a gazebos or a porch.
Below are the plans with a few directional notes.
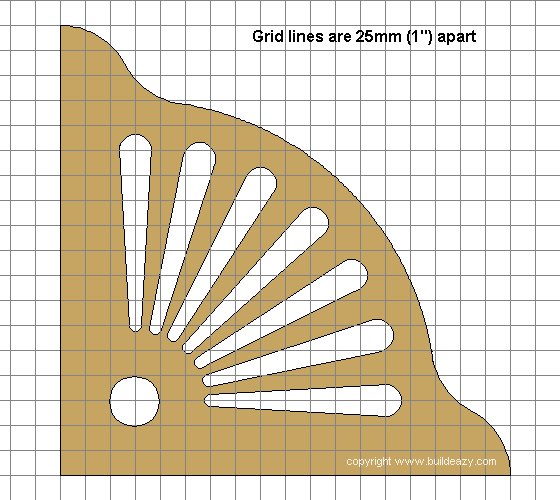
The plans are in two formats, firstly a plan with dimensions followed by instruction notes and secondly the pattern in grid format.
Allow a moment for the images below to load.
Instruction notes
Step 1.
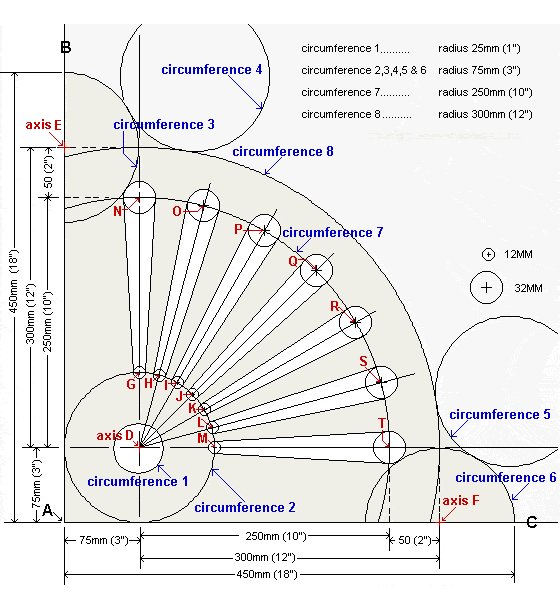
- Mark out the pattern on a piece of 18mm (3/4″) thick plywood using the plan above and the notes below as reference.
- Axis D is the center point for circumferences 7 & 8.
- Axis E is the center point for circumference 3.
- Axis F is the center point for circumferences 6.
- N, O, P, Q, R, S & T are points on circumference 7 that are equal distant apart and are the centers for 32mm (1 1/4″) holes.
- G, H, I, J, K, L & M are points on circumference 2 that are equal distant apart and are the centers for 12mm (1/2″) holes.
Step 2.
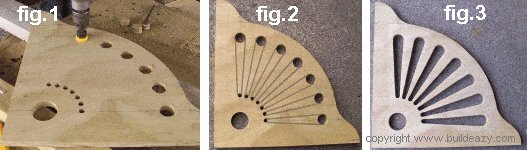
- Cut out the outside edge of the pattern and drill the holes as shown in fig.1 below. Refer to plan and notes above for hole sizes.
Step 3.
- Mark between the holes as shown in fig.2 above and cut out as shown in fig.3 above.
- And finally, just a bit of sanding.
Note: The grid drawing below is another alternative for marking out the pattern.