Contents

[su_row class=””]
[su_column size=”1/2″ center=”no” class=””]
During woodworking, nothing beats a powerful wood router that makes your carpentry processes easy and swift. However, for woodworkers who use hardwood perched together with glue such as plywood, there is always a lingering question of “can you use a router on plywood?”
Well, the answer is simple. Yes, you can use a router on plywood. Typically, a router will work on edges of plywood such as Baltic birch and ApplePly.
[/su_column]
[su_column size=”1/2″ center=”no” class=””]
[/su_column]
[/su_row]
[su_note note_color=”#eefce2″ text_color=”#333333″ radius=”3″ class=””]
Apple Ply is high-quality plywood made from solid hardwoods (Maple and Birch) that offer nearly void-free layers with beautiful edges. Additionally, it has excellent machinability which means you can easily make any piece of furniture or other projects without worrying about durability!
[/su_note]
However, if you don’t execute the work on a desktop or tabletop, you may risk the glue n the plywood from slightly dulling the router. Below, we’ve outlined just how this is possible.
Tools And Materials
Before you begin to work on plywood using a router, you must first know the right tools and materials to use. In addition to a good quality wood router and of course, the plywood, you will need:
[su_list icon=”icon: arrow-circle-right” icon_color=”#4f8901″]
[su_row class=””]
- Router table – You want a router table to help support the router and make it easy to cut at the right angles.
- Bench top router table – A surface top table comes in handy when using a router on plywood as it facilitates flexibility during the routing process. Using the surface top table, you will be able to easily make difficult grooves and cuts.
- Adjustable router planer – To flatten your wood, an adjustable router planer comes in handy.
- Other tools – As with all other woodworking projects, you need safety tools as well. So, when using a router on plywood, make sure you have safety goggles, hearing protection, and bar clamps.
[/su_row]
[/su_list]
[su_divider top=”no” style=”default” divider_color=”#444″ size=”3″ margin=”15″ class=””]
How Can You Tell If Plywood Has Voids?
[su_divider top=”no” style=”default” divider_color=”#444″ size=”3″ margin=”15″ class=””]
Amongst the top obstacles to using a router on plywood is having voids in the plywood. Voids in plywood are referred to as the large holes you will spot across the plywood sheets. To tell if plywood has voids, observe the surface and sides of the wood. If they do have voids, you will notice large bubbles or gaps along the breadth side of the plywood.
[su_youtube url=”https://www.youtube.com/watch?v=Kce-tR4BsYc”]
[su_divider top=”no” style=”default” divider_color=”#444″ size=”3″ margin=”15″ class=””]
What Can You Do With A Router?
[su_divider top=”no” style=”default” divider_color=”#444″ size=”3″ margin=”15″ class=””]
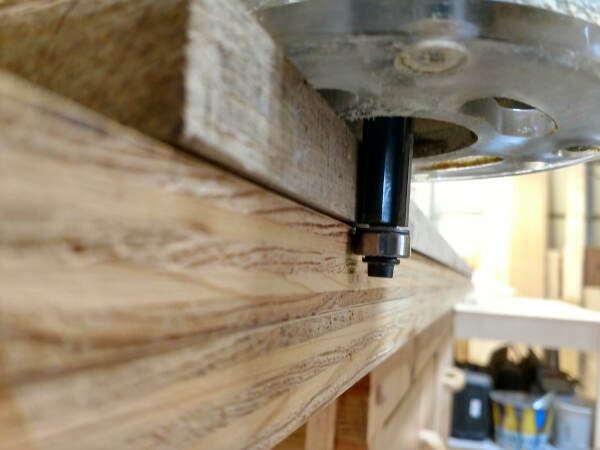
Generally, a router is used in woodworking and carpentry, particularly in cabinetry. It is used to hollow out sections of plastic, metals, and wood. When using your router on plywood, in addition to hollowing out the wood, you can also use it to make other fine cuts which include making edges, creating grooves, and designing decorative patterns.
[su_divider top=”no” style=”default” divider_color=”#444″ size=”3″ margin=”15″ class=””]
How to prevent Tearout on Plywood
[su_divider top=”no” style=”default” divider_color=”#444″ size=”3″ margin=”15″ class=””]
[su_list icon=”icon: arrow-circle-right” icon_color=”#4f8901″]
- Plywood is made up of several layers, with the top layer often being a different type of wood than what makes up the rest of it. The second you turn your router on and start to cut this board, that top layer will be ripped away from the lower layers causing tearout in your workpiece. You can prevent this by using plywood or veneer edge tape before routing. This forces all cutting action to go through only one layer at a time preventing damage due to tearing out any layered edges below it.
- Another way to prevent tearout is by using a higher bit depth. Meaning that you should always use a router with the most shallow depth available for your tool, as this will be safer on all types of plywood and not cause any damage from tearing out layers below it.
- Routing against the grain instead of along it on boards that contain multiple varieties of wood in their construction. This will minimize any chance of these different grains lifting up and causing potential damage due to tearout after being routed over several times during cutting operations.
- If your project requires an end-grain cut (like in edge joining) then taking these extra steps may not be necessary since there’s only one layer of wood at the end which makes it much easier to work with than over the top of several layers such as in face routing.
[/su_list]
Ultimately though if you want to prevent tearout completely on any board or shape, simply add tape! Having good plywood router bits also helps but take care when working with them so they don’t cause damage.
How Do You Finish The Edge Of Plywood?
[su_divider top=”no” style=”default” divider_color=”#444″ size=”3″ margin=”15″ class=””]
Like with any other type of woodworking and carpentry, the purpose of finishing your plywood is to make it aesthetically pleasing and attractive. There are three common methods for finishing the edge of your plywood. These include:
[su_list icon=”icon: arrow-circle-right” icon_color=”#4f8901″]
- Painting over the edges – You can finish the edges by coating them with paint. Whilst many people opt for this method, it may be a little difficult to get enough paint to fill and coat the entire exposed wood layers.
- Cover the edges – Alternatively, you can choose to cover the edges in a method known as edge banding. The process uses a thin material that seals the exposed and raw edges on the plywood. During the application process, one side of the plywood is fitted with a heat sensitive adhesive whilst the other side acts as a barrier against moisture and dirt.
- Fill the edges – The last option is to fill the edges rather than painting over or covering them. In this process, putty is used to cover cracks in the wood – resulting in masking and smoothing out the edges. This makes the process more cost-cutting, effective, and neat. In fact, you can even use this process (with the putty) to seal any voids in the plywood. Putty is a wood grain filler compound made of a combination of different materials such as clay, polyurethane, epoxy, and lacquer. In general, the putty will come in a neutral color to easily blend in with the plywood. However, you can also add tints and dyes to it to match the color or grain of the wood – should you want to.
[/su_list]