Contents
Trying anything new can be hard, especially when it comes to carpentry or home improvement tasks.
Using powered tools, like wood routers, can also be tricky, and whereas hand tools can get the job done safely and neatly, power tools can add a whole new dimension to the job, namely the safe and effective use of the tool.
This specific article is designed to remedy this, instructing you how to do a plunge cut using a hand wood router. But before we do that, what exactly is a wood router, and how are they used?
What Is A Wood Router?
A router is considered one of the most versatile power tools, and is capable of making any number of different cuts during carpentry, thanks to the wide range of different sized and shaped head attachments that can be incorporated during use.
The Types Of Routers
There are different types of routers, each allowing for different uses and functions. Some of these include D handle routers, double knob handle routers, and plunge routers.
What Are Wood Routers Used For?
As mentioned, wood routers are incredibly versatile, and can be used for a number of tasks.
These can include cutting dadoes, rabbets, and grooves, decorative shaping and molding, template routing, mortising, lamination, and edge jointing.
The most common use for routers is shaping the edges of wooden constructs, which is why they are such a commonly used tool in cabinetry – that is, the making of cabinets.
They can also be used for cutting joinery, thanks to their small rotating bit that is capable of creating a number of different shaped joints.
They are also used for carving designs into the surface of wood, and for creating delicate inlay work on your wooden creations.

Choosing The Right Router
When looking for the best router to do a plunge cut, there are certain things that need to be taken into account.
Router Motor
One of the things to look out for is the type of motor that the router has.
It is best to opt for the ones with a higher horsepower, as these won’t burn out during particularly tricky jobs, nor will they struggle to get enough speed and power.
Router Size
There are also two main sizes of router you can buy – large production routers, and smaller trim routers.
For the best all round performance, choose the former, as these come with a series of bits, and include the router styles, the standard, and the plunge routers.
These are better for more demanding jobs, while the smaller trim routers are designed mainly for cutting laminate, and light woodworking tasks.
What Is A Plunge Cut?
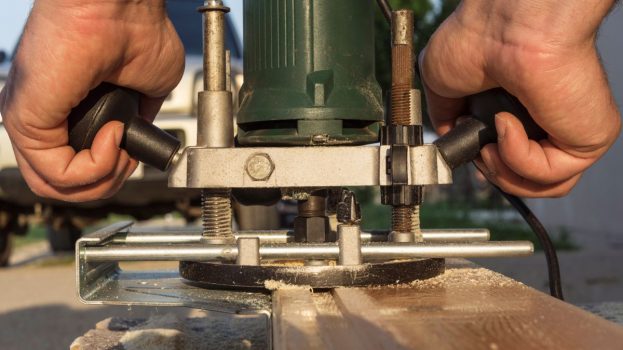
Plunge cutting is a common action in woodworking, and involves any action where a rotating blade of bit is ‘plunged’ downwards into the surface of the material you are working on.
It is called as such because of the nature of the cutting motion, wherein the blade or bit is literally lowered into the wood.
How To Plunge Cut With A Router: The Steps
When it comes to using a wood router to do a plunge cut, there are several steps that need to be followed to do a good job and do it in a safe manner.
Step One
The first step is to get a jig.
This is a device that secures a piece of wood or material in place, and provides a guide for the power tool that is operating upon it.
This will ensure that the wood doesn’t start moving when the cutting begins, or that you don’t lose control of where the power tool is when working.
This is not just to ensure a good, finished product, but to also ensure your safety, as loose materials and unsteady machinery is a recipe for disaster.
Step Two
Step two requires you to examine the base, checking the three particles. In most cases a ¼ inch piece of plywood is used as the base, often with a cut down the middle for the entry of a straight bit.
Beside the bit are a set of two small ‘fences’, both of them 2” x 4”, and are positioned in one straight line atop the router base. These are for marking the length of the bit, and the depth to which it will enter the piece of wood.
Step Three
The next step includes making a series of cuts before diving straight in. This will make it easier for the router to get some traction on the surface of the wood, and will ultimately encourage a cleaner cut.
Once you have done this, you can then proceed to cut into the wood.
Step Four
When it comes to cutting, move back and forward in a smooth but direct motion, not pressing on too hard, but keeping a firm hand on the tool to keep it in place and where you want it to be.
Continue this firm yet smooth motion until you have completed the desired length of the cut.
Step Five
The final step is to clean the wood down, removing the burrs from the surface of the wood. These burrs are little chipped pieces of wood, and accumulations of wood that have been collected during the routing.
It is perhaps best to keep an out for burrs when making the cut. These can be troublesome, can hinder the flow of the cutting motion, and can even clog the router in some cases.
Final Thoughts
And there we have it, everything you need to know about using a router tool to create a plunge cut in a piece of wood.
The most important thing is to read up on the proper techniques, and ensure you are approaching the task with an eye for safety, and a proper understanding of how the tools work.