Contents
Making a circle with a given radius
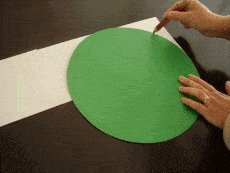
Some of the Buildeazy woodworking projects include pieces that may have one, two or even three rounded or curved edges, such as the piece in the image below (fig.1).
This article explains how to make curved shapes such as those shown in the plan drawing below (fig.1).
Note: There are other ways of transferring various shapes from plan to wood. This particular method is aimed at those who have little knowledge of curvilinear forms i.e. curves, circles, that sort of stuff.
The drawing below is a ‘Chair Frame Detail’ plan from the How to build a Cape Cod Chair project.
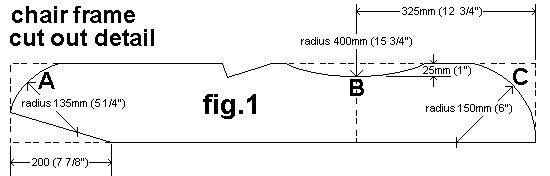
In the above piece, there are three curved edges.
Each curve is part of a circumference (the outer boundary of a circle).
Each curve has a different radius.
Curve (A) has a radius of 135mm (5 1/4″),
Curve (B) has a radius of 400m (15 3/4″),
Curve (C) has a radius of 150mm (6″).
What is a radius?
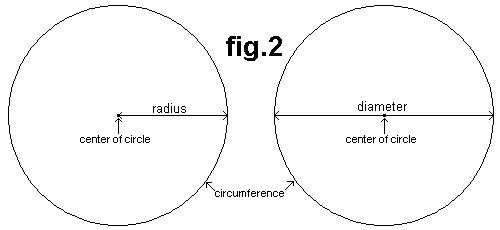
- A radius is a straight line from the center of a circle to the circumference (perimeter).
- A diameter is a straight line across a circle through its center. The diameter is twice the length of the radius. The diameter is two radii.
Note: Radii is the plural of radius.
INSTRUCTIONS
- Cut three circles (each with the given radius) out of card in order to mark the curves A, B & C on the template (fig.1).
How? – Example: (A) in fig.1
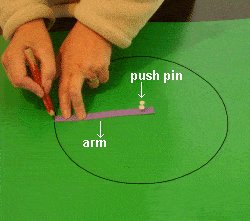
How to make a circle with a 135mm (5 1/4″)radius.
- Make a rotatable arm by cutting a strip of card or a thin piece of wood about 10mm (3/8″) wide by 150mm (6″) long, which is slightly longer than the radius.
- Insert a push pin through the arm 135mm (5 1/4″) from one end. Pin the arm to a sheet of card.
- Rotate the arm in a circle using the push pin as the pivot point.
- Hold a pencil at the end of the rotating arm to mark the circumference (perimeter or outside edge of the circle).
- Once marked, remove the arm and cut out the circle.Mark and cut the other two circles (B & C in fig.1) with their given radii in the same manner as circle (A) was marked and cut.
Note: Radii is the plural of radius. One radius; two or more radii.
Transferring the profile to the template
Transferring the profile (shape) to the template
- Once the three different size circles have been cut out of card as shown on the previous page, they can be used to mark the curves on the template.
The template
- For the template, cut a piece of card 975mm (38 3/8″) long x 150mm (6″) wide.
- Cut the angle cuts (i.e. not the curved shapes) as per dimensions shown in the ‘Chair Frame Detail’ plan in the How to build a Cape Cod Chair project.
- The card template should so far look like this…


Next – Mark and cut the curves
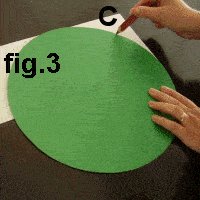
- Use the card circle with the 150mm (6″) radius to mark curve ‘C’.
- See fig.2 and fig.3.
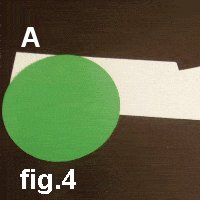
- Use the card circle with the 135mm (5 1/4″) radius to mark curve ‘A’.
- See fig.2 and fig.4.
- As the curves are marked, they can be cut. Use the card circle with the 400m (15 3/4″) radius to mark curve ‘B’.
- See fig.2 and fig.5.
- Once the curves have been marked and cut, the card template should look like this…
- Done! Simply lay the template on a piece of 150mm x 25mm (1″x6″) board the same length or longer than the template, pencil the shape of the template onto the board and then cut the board to shape.


