Contents
How to measure, make and install a shed door
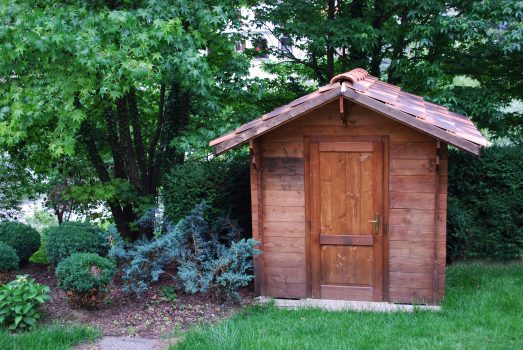
These instructions on measuring, making and installing a shed door are suited to the Buildeazy free plan ‘How to build a 8’x10′ storage shed‘ but the same principles can be applied to many shed designs.
Info: The rough opening
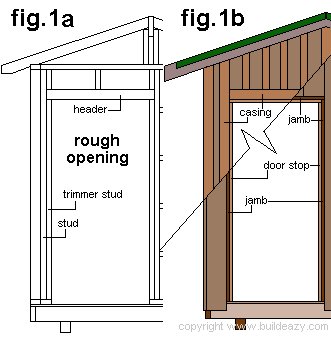
The rough opening fig.1a is the opening in a wall frame that allows for a door (or window).
The rough opening is trimmed (surrounded) by framing lumber which consists of trimmer studs on the sides and header (lintel) at the top.
The rough opening must be big enough to accommodate the door, the door jamb and a little bit to spare.
The jamb is the frame or trim that surrounds the door.
Preparing, measuring, making and installing the shed door
Step 1. The jambs
- Fix 25mm (1″) thick board (jamb) to the trimmer studs and header in the rough opening. Make the width of the board (jamb) equal to the thickness of the wall frame plus the thickness of the vertical siding boards, in this case about 125mm (5″) which will probably have to be ripped (cut lengthwise) from 150×25 (1×6) stock.

- When the vertical board siding and jambs are in place, the casing can be applied.
- The casing is the exterior 100×25 (1×4) trim surrounding the door opening. It is fixed to the vertical board siding and the edge of the jamb. See fig.1b and fig.2.
Step 2. Measuring for the door
- Measure horizontally (from side to side) between the two side jambs and deduct 12mm (1/2″). That is the required door width. In this case 900mm (36″).
- Measure from the head jamb (at the top) to the bottom of the siding boards and deduct 6mm (1/4″). That is the required door height. In this case 2075mm (83″).
Note: In this particular design the bottom of the door finishes below the floor thus eliminating the need for a doorsill (threshold).
Step 3. Making the door
Go to ‘How to make a shed door’.
Step 4. Installing the door

- Add the hinges to the horizontal rails on the door and then ‘hang’ the door in place by fastening the loose ends of the hinges to the casing (trim) surrounding the door opening.
- By fixing the hinges to the casing allows the door to be able to open 180°.
Step 5. Adding the door stop
- Fix 50×25 (1×2) wood (door stop) to the jamb around the inside perimeter (sides and top) of the door to cover the gap between the door edge and the jamb.
- Do not fix the door stop tight against the door on the hinged side. A little bit of play is needed to ensure the edge of the door does not bind against the door stop when the door is being opened or closed. See fig.2 and fig.3.
Step 6. Adding a drip cap
- A drip cap is a horizontal piece of molding that is fixed above the door to deflect any water from running inside.
- This can be shaped from 75×25 (1×3) stock and fixed to the casing directly above the door. See fig.3 and fig.4.


Thank you. It will be the first time I try to replace a door on an old metal shed. Wish me luck.