
Contents
It’s difficult for any painter to do without an easel – so if you’re looking for a great way to make one at home, you’re going to absolutely love this list!
We’ve collected some of the best plans for homemade DIY easels – from simple cardboard easels for your kids, all the way up to really professional-looking easels that any artist would absolutely love to own!
Easel Projects
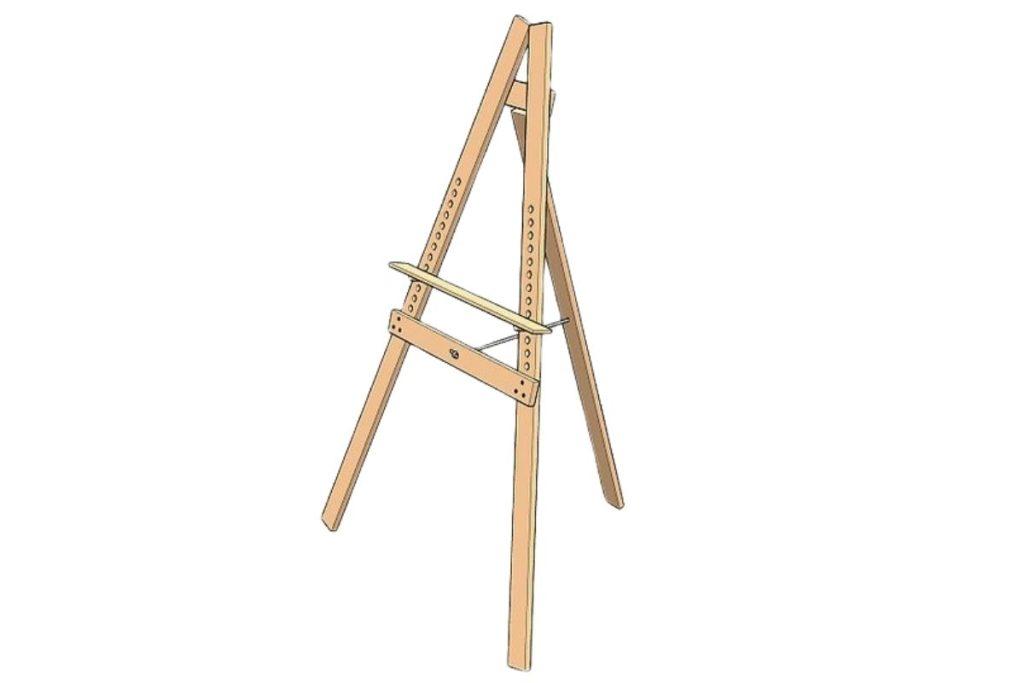
Build an Artists Easel

If you’re looking for a really sturdy easel that you can make at home then this project is a great idea! You’re going to use really thick sturdy robust lumber for this project, and it will be held together by carriage bolts.
These will provide plenty of structural support to the easel. A large 48 inch by 33-inch piece of plywood will provide the perfect backing to this easel.
The project comes complete with suggestions for using thinner pieces of wood if you want to make an easel that’s a little bit more lightweight. If you’re after something that’s even stronger than this is, then there are also suggestions for wood dimensions that’ll help you build an even tougher easel!
As the plans for this project say – if you’re going to build an easel that will be left outside you should use treated lumber galvanized bolts and galvanized nails when you’re building it.
If you follow these dimensions precisely, you’ll end up with an easel that has a plywood backing panel 4 feet wide, and over 2 and a half feet tall. This should be fantastic for many artists – but of course you can modify the dimensions to suit your purposes.
Easy DIY and Portable Painting Easel
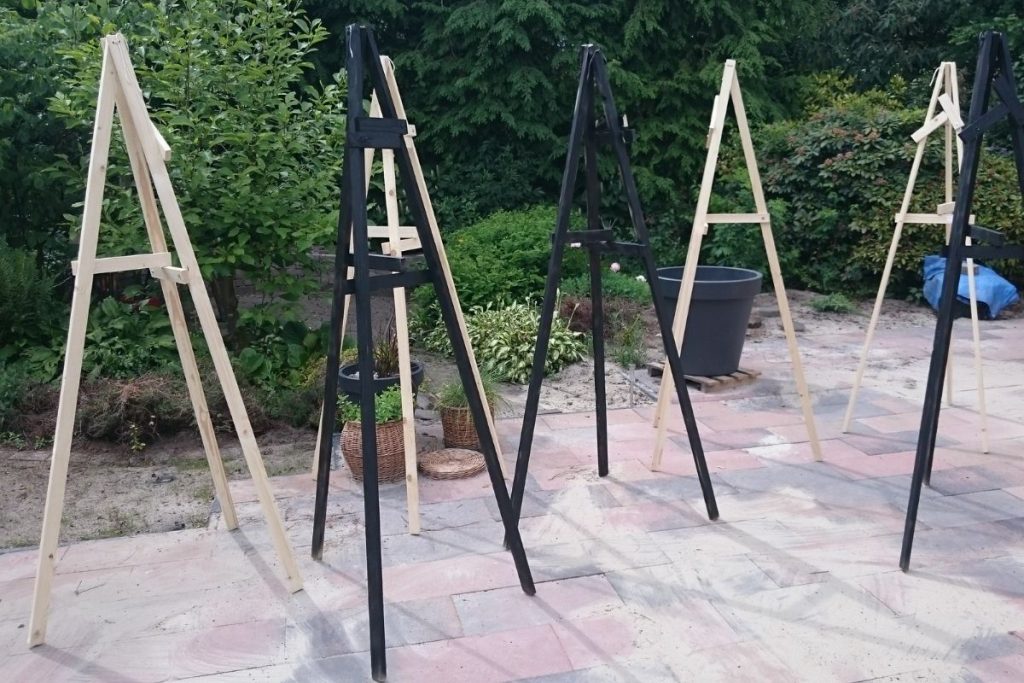
This guide will show you how to make a simple portable easel that is absolutely fantastic for displaying paintings. One great thing about these easels is that you can fold them up with ease, meaning that a lot of them can fit into a small space – for example in your car.
They’re pretty easy to build too, and the website includes extremely detailed instructions with photos, videos and a link to a PDF.
You can make these easels with just four pieces of wood and a handful of fixings and fasteners. It won’t take you long at all to build one of them, and in fact they are a great project to build a few at a time of!
They’re really lightweight too – and because there are no loose parts, you don’t have to worry about losing any part of the easels when you’re transporting them. And of course, you can easily hang paintings of many different sizes on them!
Quick and Dirty Easel for Kids
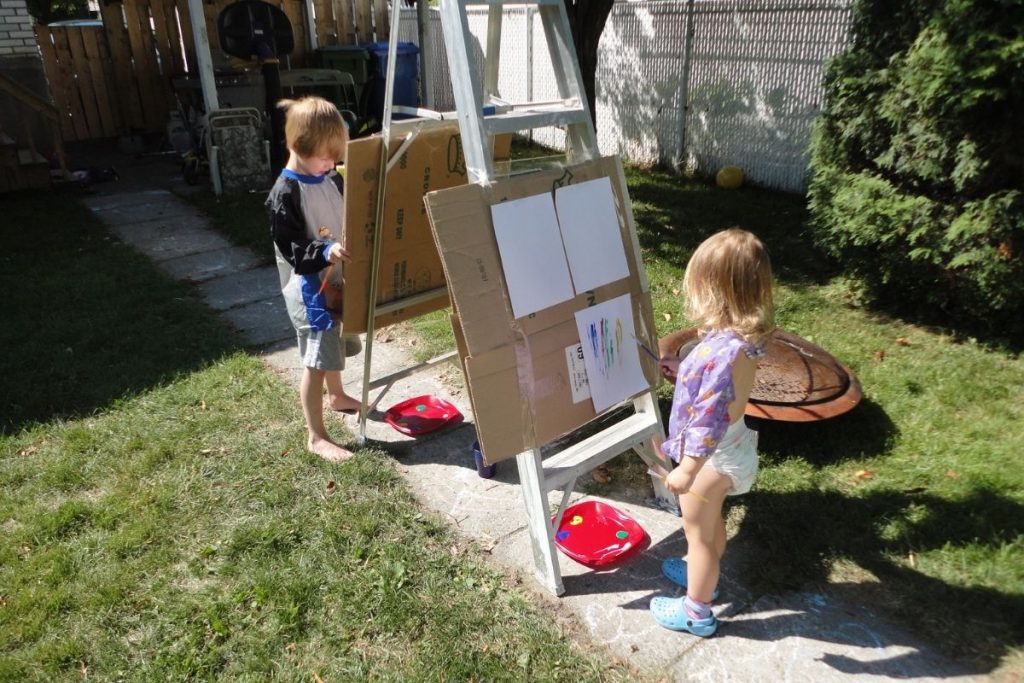
If you’re the sort of person that loves quick, simple and extremely practical solutions, then you are going to absolutely love this quick and dirty easel project. The author says that it’s for kids, but adults will also love just how much of a fantastic idea this easel is.
That’s because you can make this easel using just three extremely simple things that you probably already have lying around the house. You’ll only need a ladder, a few old cardboard boxes, and a little bit of tape. That’s it – easels don’t really come much simpler than this!
Of course, cardboard isn’t the most robust backing in the world for your easel – but it’s definitely something that will do in a pinch. And if you’re using your easel for spray painting projects, you might well find the cardboard provides all the support that you need.
Sure, it’s perhaps not the most aesthetically pleasing easel. However, considering you can have this one made in barely a few minutes – and also considering that you can use both sides of it – this is sheer genius!
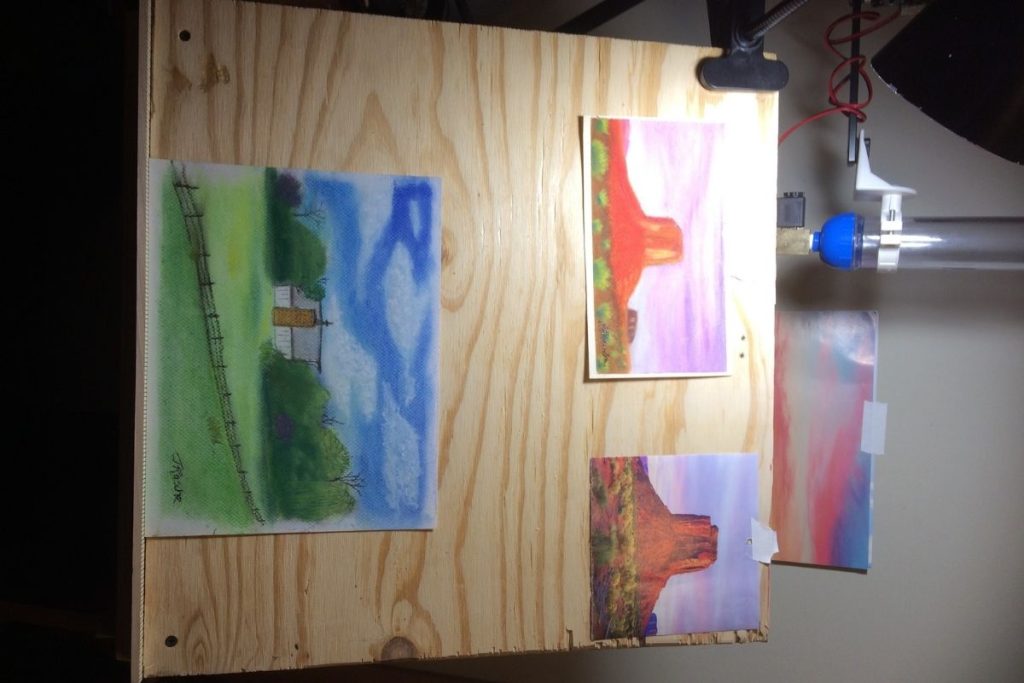
Wall Easel

Easels don’t have to just be for painting – they can also be a really unique and interesting way of displaying your art, as this project build will show you!
You’ll learn how to make some fantastically attractive easels that will display pictures of many different sizes on your walls. This will make a cool departure from the usual way you hang pictures on your walls!
One of the great things about this project is that it was made with recycled lumber – wood from a few old fence panels. Therefore, if you’ve got any similar scrap wood around, this could be a perfect opportunity to use it!
Of course, just as the author did, make sure that you clear out any nails that are in the scrap wood, as you certainly won’t want them in your easels!
You only need a few simple tools for this project too. A table saw, a router, some sandpaper, some dowels, screws, wood glue, clamps, a tape measure, and a hand drill, and you’re on your way!
In fact, you could probably get away with using a hand saw instead of a table saw, which means that this is a project that can be done with very few power tools indeed!
We Built Our Own Easels, and You Can Too! (Maybe…) – Vitruvian Studio
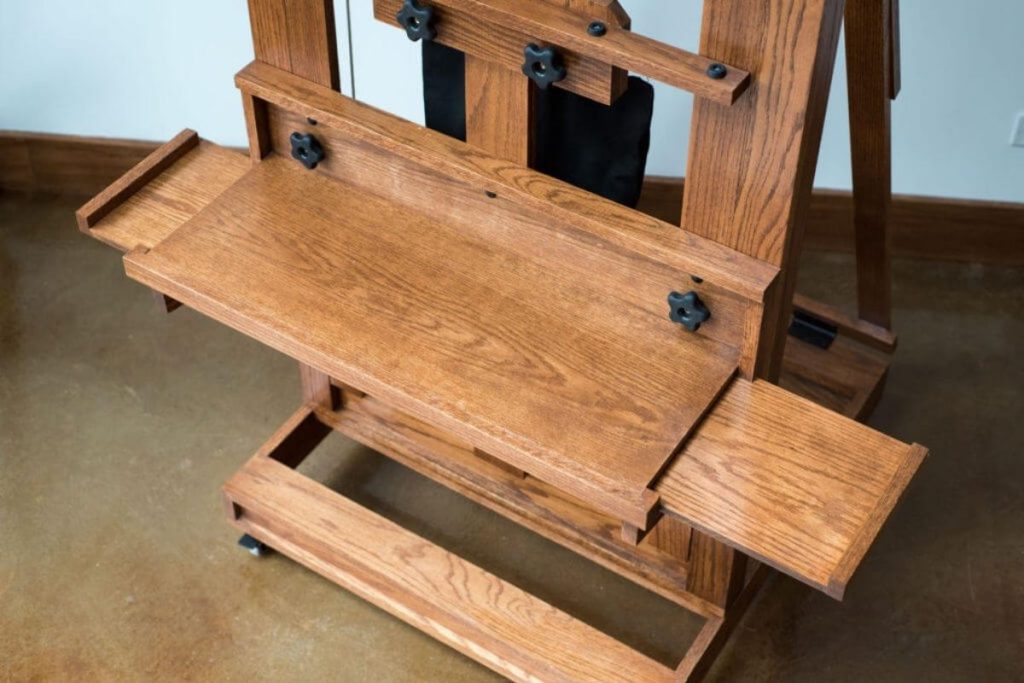
The author of this project says that they are not an experienced woodworker. This is still clearly a project that is going to require a decent amount of skill, however – as you’ll see by the pictures on the page!
The results are worth it, as you can clearly see. This project will show you how to make an absolutely astounding professional quality easel in your own home.
Surprisingly, however, according to the designer of this project you’ll actually only need relatively simple tools. You’ll need some woodworking experience too, but despite the attractive appearance of this easel you genuinely don’t need to be an expert woodworker in order to finish this project.
This is definitely a project for somebody who’s looking for an easel for really serious work. It’s extremely robust and thanks to the wheels on the bottom, can easily be moved from place to place. However, it’s probably not the right choice for someone who’s just looking for a quick and simple solution!
Wood Easel
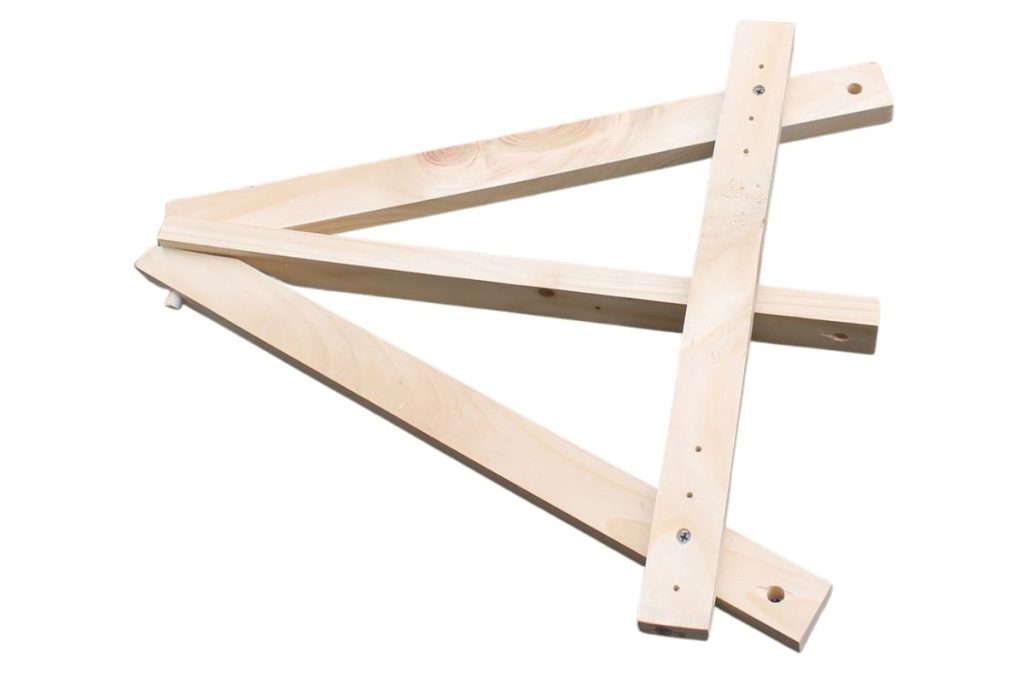
This definitely isn’t the biggest easel that you could build – but considering just how simple and inexpensive it is to build, and just how useful it is for such a small easel, it’s definitely a project that’s worth taking a look at!
And of course, being a small easel definitely has its advantages, and not least because this can be folded away for storage – or even completely disassembled with relative ease.
So, if you’re looking for an easel that isn’t going to take up lots of room when you’re not actually using it this project could be perfect for you!
If you’ve got a circular saw and a power drill, you can probably build this project in just around 5-minutes. You can still do it with a hand saw of course – it’ll just take you a little more time and effort to cut.
Once you’re done – depending on the exact size that you built your easel – you’ll be able to use canvases with dimensions of up to 16 inches by 20 inches. Perfect for the smaller artworks!
Camera Tripod to Art Easel
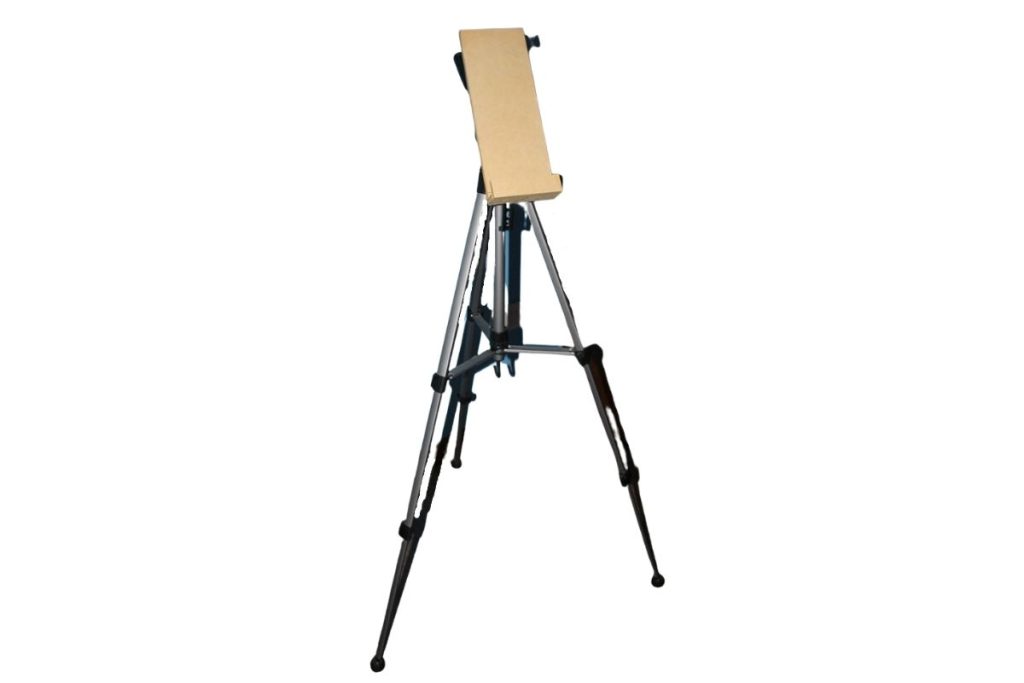
Some of the best and most unique engineering products are those that reuse things that you already have! That’s the case with this project build, which will show you how to quickly make an easel using a camera tripod!
Of course, this isn’t ever going to be the most professional looking easel no matter how much care you put into building it. But, if you’re on a really tight budget or just looking to flex your craft skills a little bit, this is a fantastic and simple way to build an easel with a small budget and very few tools.
You can use a hand saw for this job – but you’ll probably get the best results using a table saw that will let you cut angles accurately. That’s because you’ll need to cut a piece of MDF with angles along the side that will fit securely into the mounting hole on your tripod.
If you’ve got a tripod that’s just taking up space then this is a fantastic way to reuse it! Of course, it’s only going to be as sturdy as your tripod is, so don’t expect the most robust easel in the world – but it’ll certainly do!
DIY Cardboard Easel
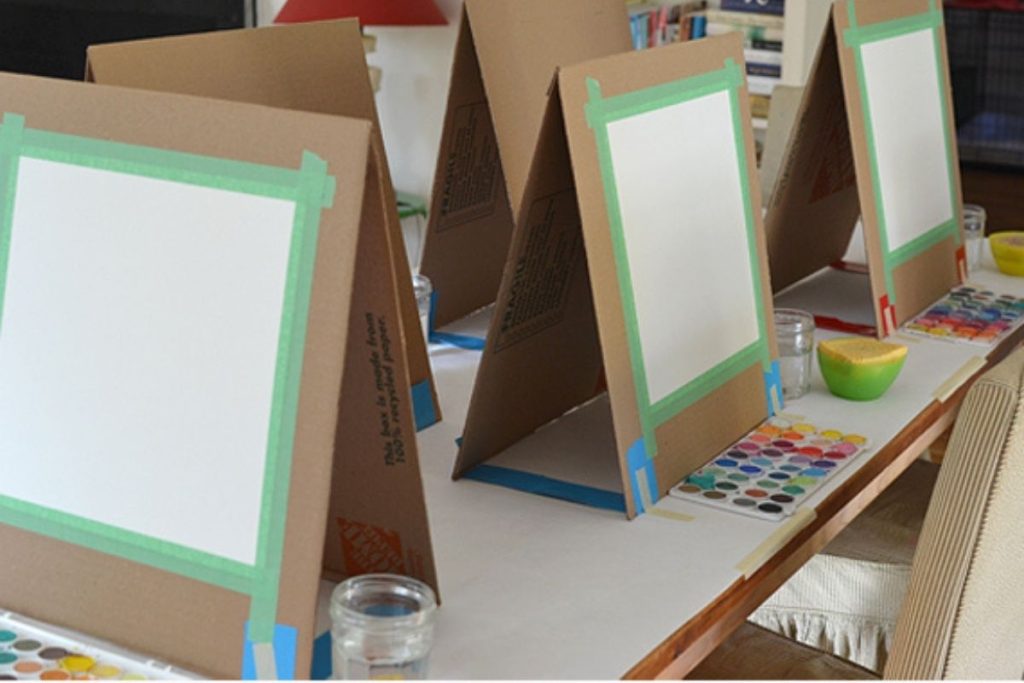
This really simple craft project is an absolutely amazing way to make a really cool easel for your kids! You’ll be able to make it with things that you’ve probably already have at home or can get really easily.
All you need to make this easel is some large cardboard boxes, some tape, and some Velcro with adhesive backing.
This is a great way to reuse some old cardboard boxes that you have lying around and of course a really inexpensive way to make something fun for your kids! They’re easy to store and of course, being made from cardboard boxes, there’s always plenty around to replace them if they get damaged!
They take a few minutes to make and, of course you can always recruit some little helping hands. In no time at all you’ll have the perfect little easel for a home art class!
Tabletop Art Easel
If you’re short on space or just looking to make an easel that isn’t going to take up room when it’s not in use, then you are definitely recommended to take a look at this project for a tabletop easel.
It folds away neatly when not in use thanks to the included hinges but is still more than robust enough for all of your painting needs! That’s thanks to the thick plywood sheets that you’ll use in its construction.
Exactly how thick these sheets are is up to you, as is of course the exact size of plywood that you use. This is a plan for a custom-built project that you can easily match to your needs, and to the desk that you’ll be building the easel for.
It’s simple to build, as you’ll only need really basic tools and a few pieces of wood. The only power tool that you’ll need for this job is a drill, but of course an electric saw will make the job of cutting the plywood to your size requirements a little easier.
And, because the easel has multiple supports, you’ll find that you can easily adjust it to different angles. You can of course build as many different angles as you like to the easel – as long as space allows for them!
How to Make an Easel – Wikihow
This guide to making an easel is absolutely fantastic – as it’s not just one plan, but three plans on one web page! This gives you a lot of great options in one place, and shows you how to build a traditional wooden artist easel, a cardboard easel, and even an easel made out of plastic piping!
This means that in one handy guide you’ve got three different plans for a really simple and creative easel, each of which can be built at home with very little time, effort and money.
The one made out of plastic piping is particularly novel as most easels are made out of wood. Using plastic piping for this build means that the easel will be extremely lightweight!
The cardboard one is also a really cool design, as it’s a great way to reuse any spare cardboard boxes – and a really fun project to make with hot glue too!
Stencil Easel
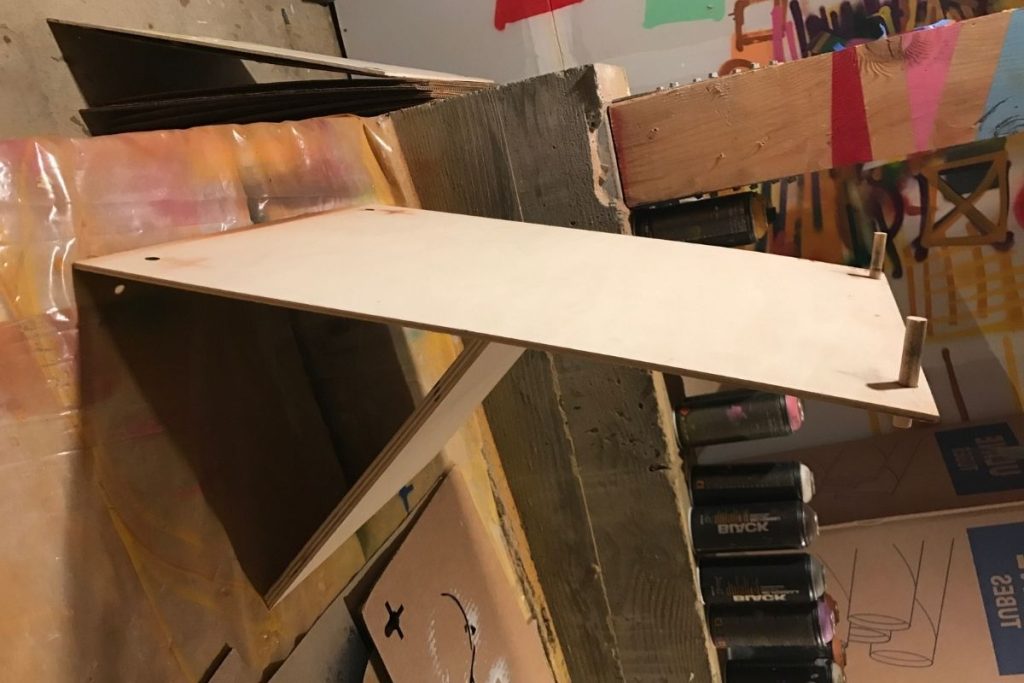
If you’re looking for a really simple easel that will help you when you’re creating stencil art, you’ll find that this project is not only easy to build but extremely useful! You’ll build this project easel using only three components.
You’ll need a sheet of plywood that’s 18 inches long by 24 inches high, another piece of plywood just under 15 inches long for a support, and two short dowel rods that are 3/8 of an inch in diameter.
The author of this project used a laser cutter to cut holes into the sheets of plywood. Of course, most people don’t own a laser cutter – so there’ll be absolutely no problem simply drilling these holes.
Given the angle that the easel sits at, you probably won’t be able to use clamps to hold it together while the glue is drying. However, you should hopefully be able to find enough random objects that will help you hold this in place while the glue sets!
This project is a really simple and inexpensive way for you to make a great easel for stencils, and all of your spray painting needs!
Kids Outdoor Acrylic Easel
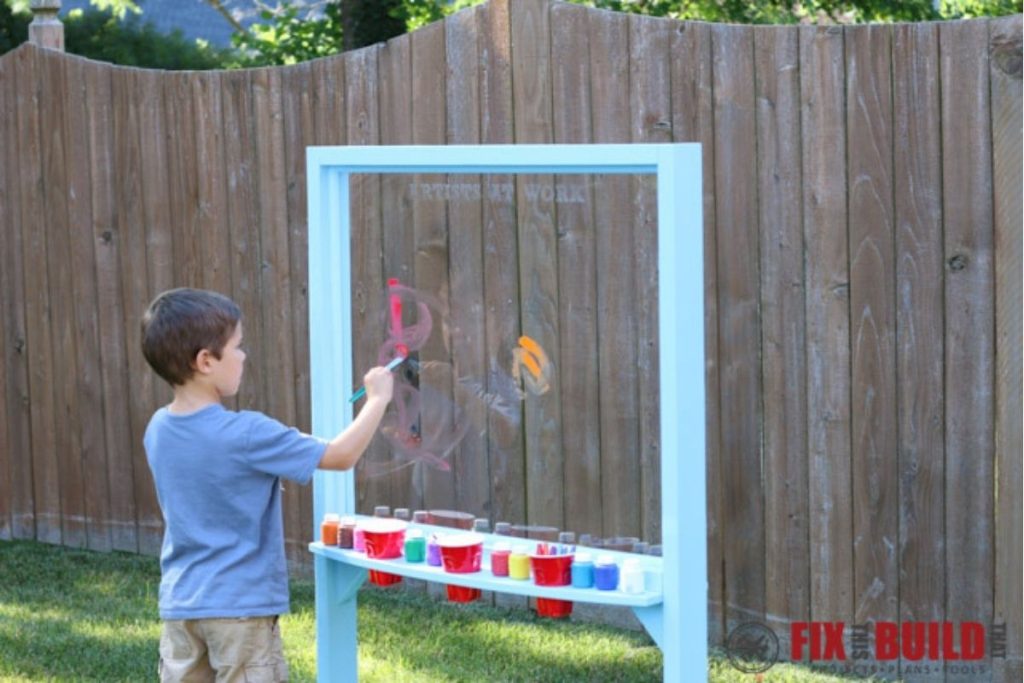
Now, this is definitely a really unique way to build an easel. You’ve seen ones made from wood, from cardboard, and maybe even from other materials – but this one is probably different from almost any other easel you’ve ever seen!
That’s because this easel doesn’t hold paper or a sheet of canvas – but is made from a large acrylic sheet that your kids (or adults – anyone can have fun with this!) can paint on, wipe off, and reuse again and again.
It’s made with tough plexiglass, which means that you don’t have to worry about it breaking, or any other safety concerns – your kids will be able to play safely with this easel to their heart’s content!
It’s perfect for keeping outside too, as the plexiglass won’t be affected by weather. And, you’re able to use a wide variety of paints on it, and should be able to clear them all off with ease!
How to Build an Easel – This Old House
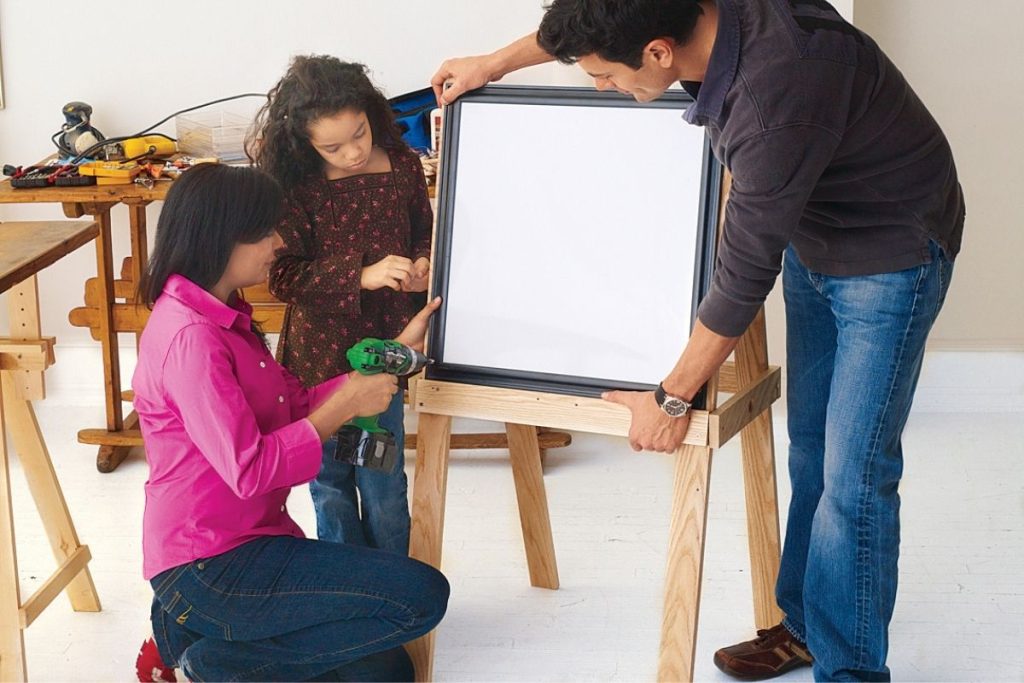
This is another fantastic project that will show you how to build an easel for your kids. It’s tough and sturdy enough to stand up too many years of repeated use, and the handy plastic trays provide storage space for all the tools your budding artists need!
What’s more, this is a really fun woodworking project that you can make with your kids! You’ll have to do some of the difficult cutting work for them of course, but there’s quite a lot here that they can help you with!
Another great thing about this is that it’s really easy to fold away for storage, thanks to the clever design of the side pieces and the hinges at the top.
Also, behind the drawing boards of the easel you’ll find space for a large roll of drawing paper, meaning your kids will always have a fresh and clean space for all their artistic ideas.
It’ll only take you a few hours to build this at home – maybe less if you’ve got some helping hands! You’ll need a hole saw bit for part of the job so make sure you have one of those at the correct size before you start work.
Conclusion
With so many creative ways to make an easel at home, you’ve got no excuse! Whether you are looking for something temporary and disposable, or something that will be a permanent place of a professional artists workshop, this list has exactly what you need!


