Contents
Introduction
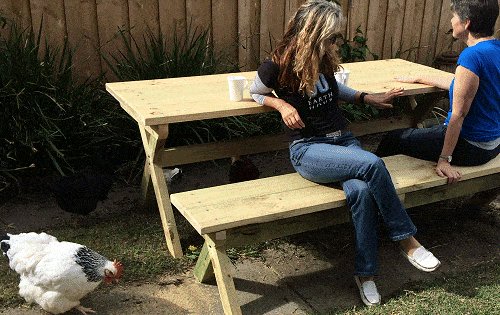
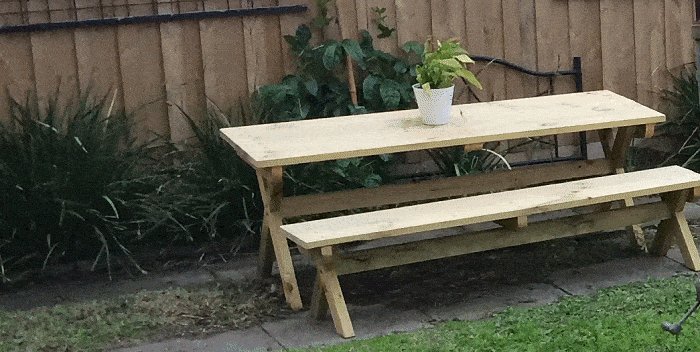
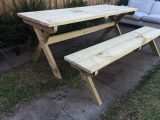
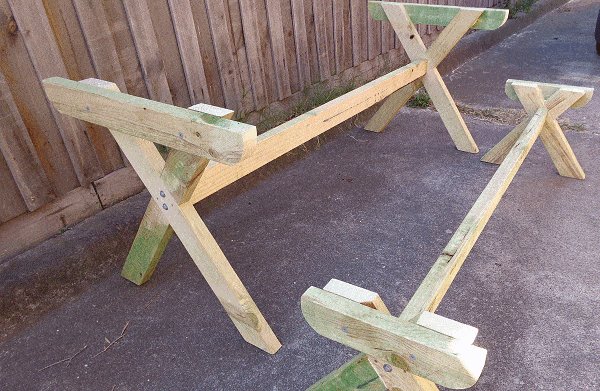
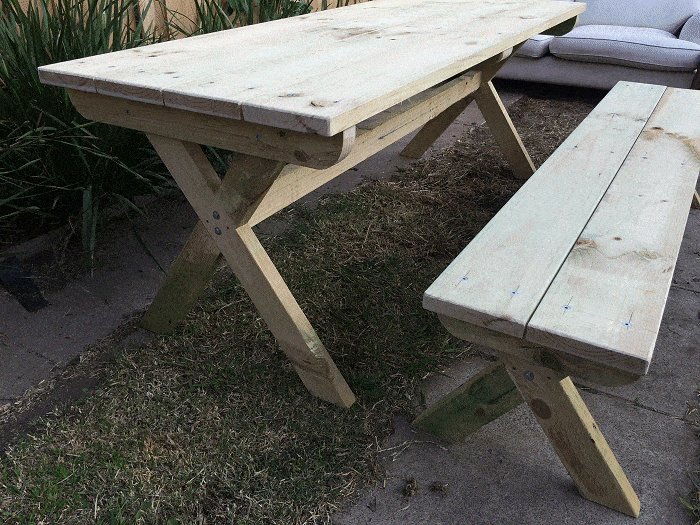
This is a good solid outdoor table with a separate stand-alone bench.
The plans allow for one bench, but it would be easy enough to double up and make two benches if you prefer a bench each side of the table.
Ft and inch version
This setting is ideal for a garden or lawn. It’s a stand alone cross-leg table 80″ long by 30-3/4″ wide with a separate bench seat 80″ long by 15-1/4″ wide. It is a good size table with a wider than normal bench.
The unit is made solely out of 2×4 and 2×8 treated lumber (nominal size).
Refer to page 7 ‘Wood and wood sizes’ for an explanation regarding the wood sizes.
Metric version
Here is a design that I think is ideal for a garden or lawn. It’s a stand alone cross-leg table 2m long by 770mm wide. There is a separate bench 2m long by 384mm wide, which is a good width (wider than most).
Premium Version
Cross-leg picnic table
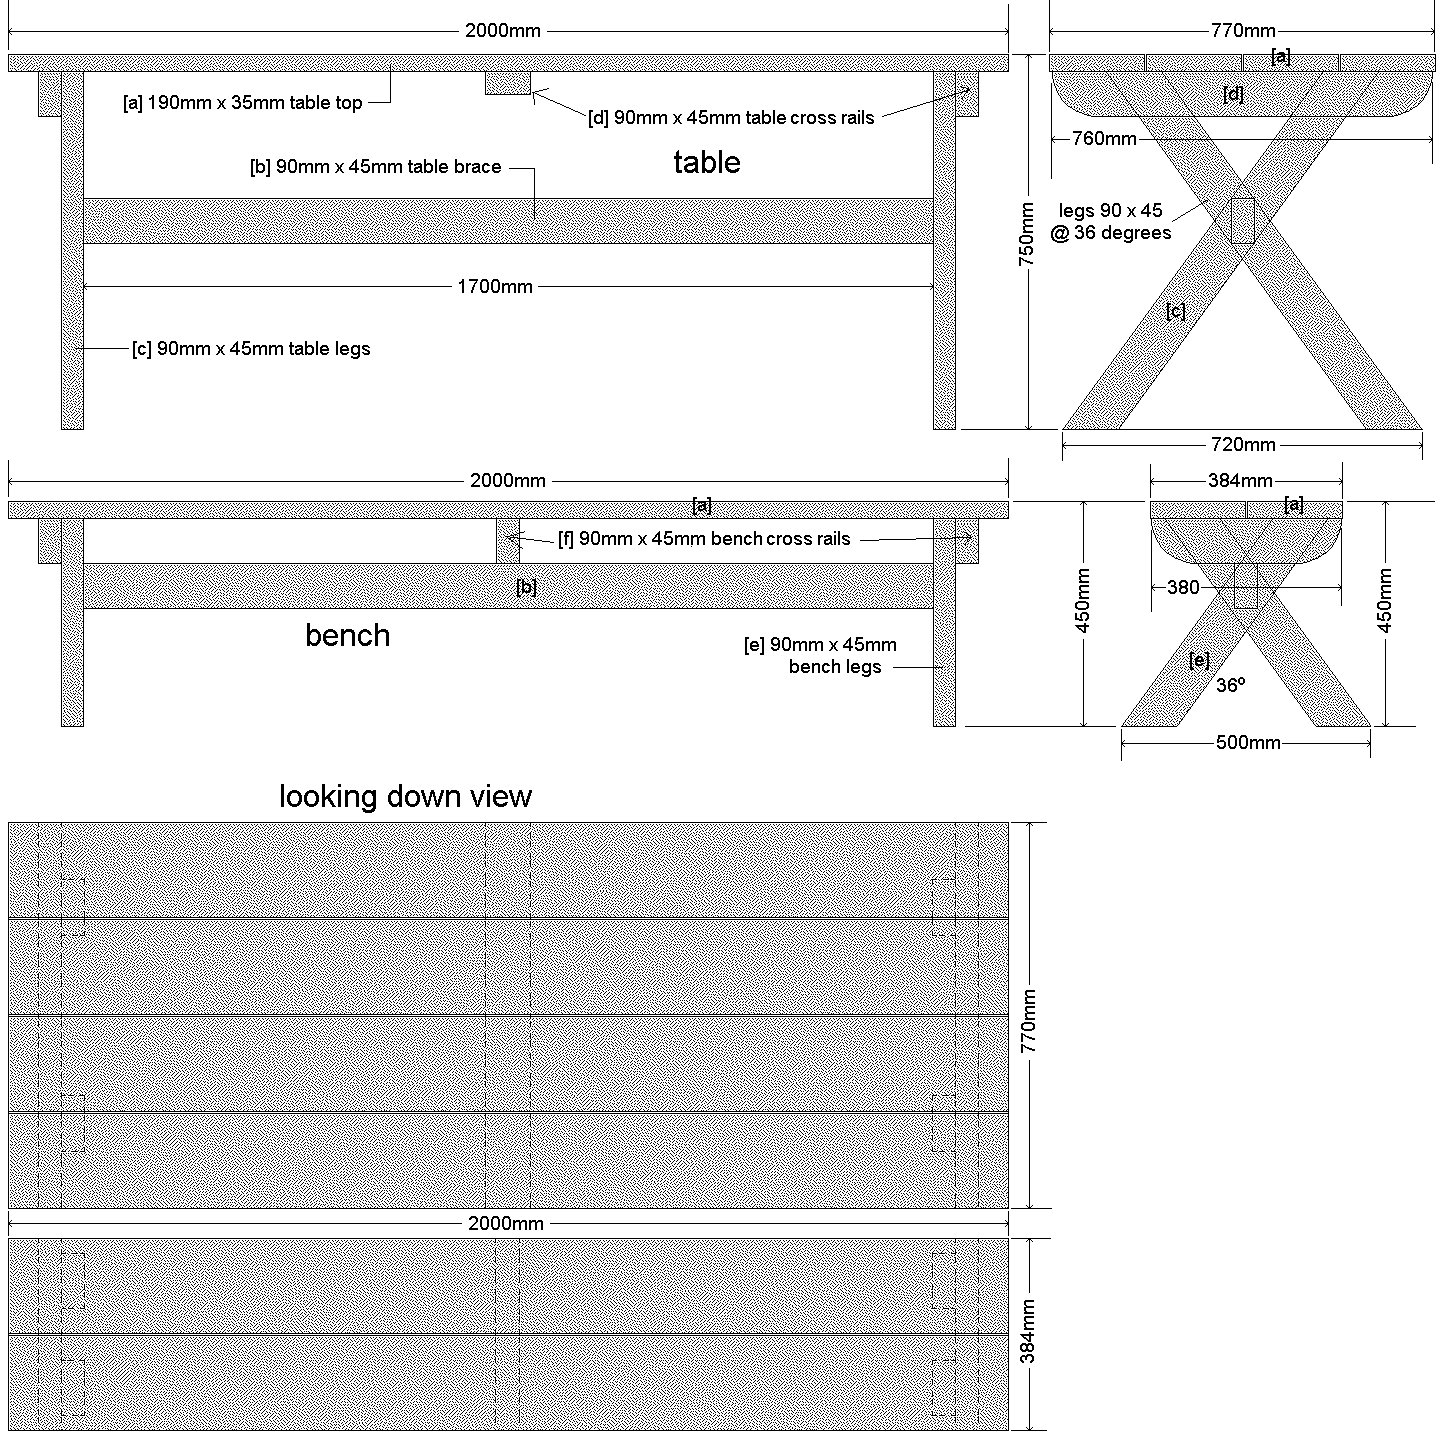
$5.00Identifying the parts

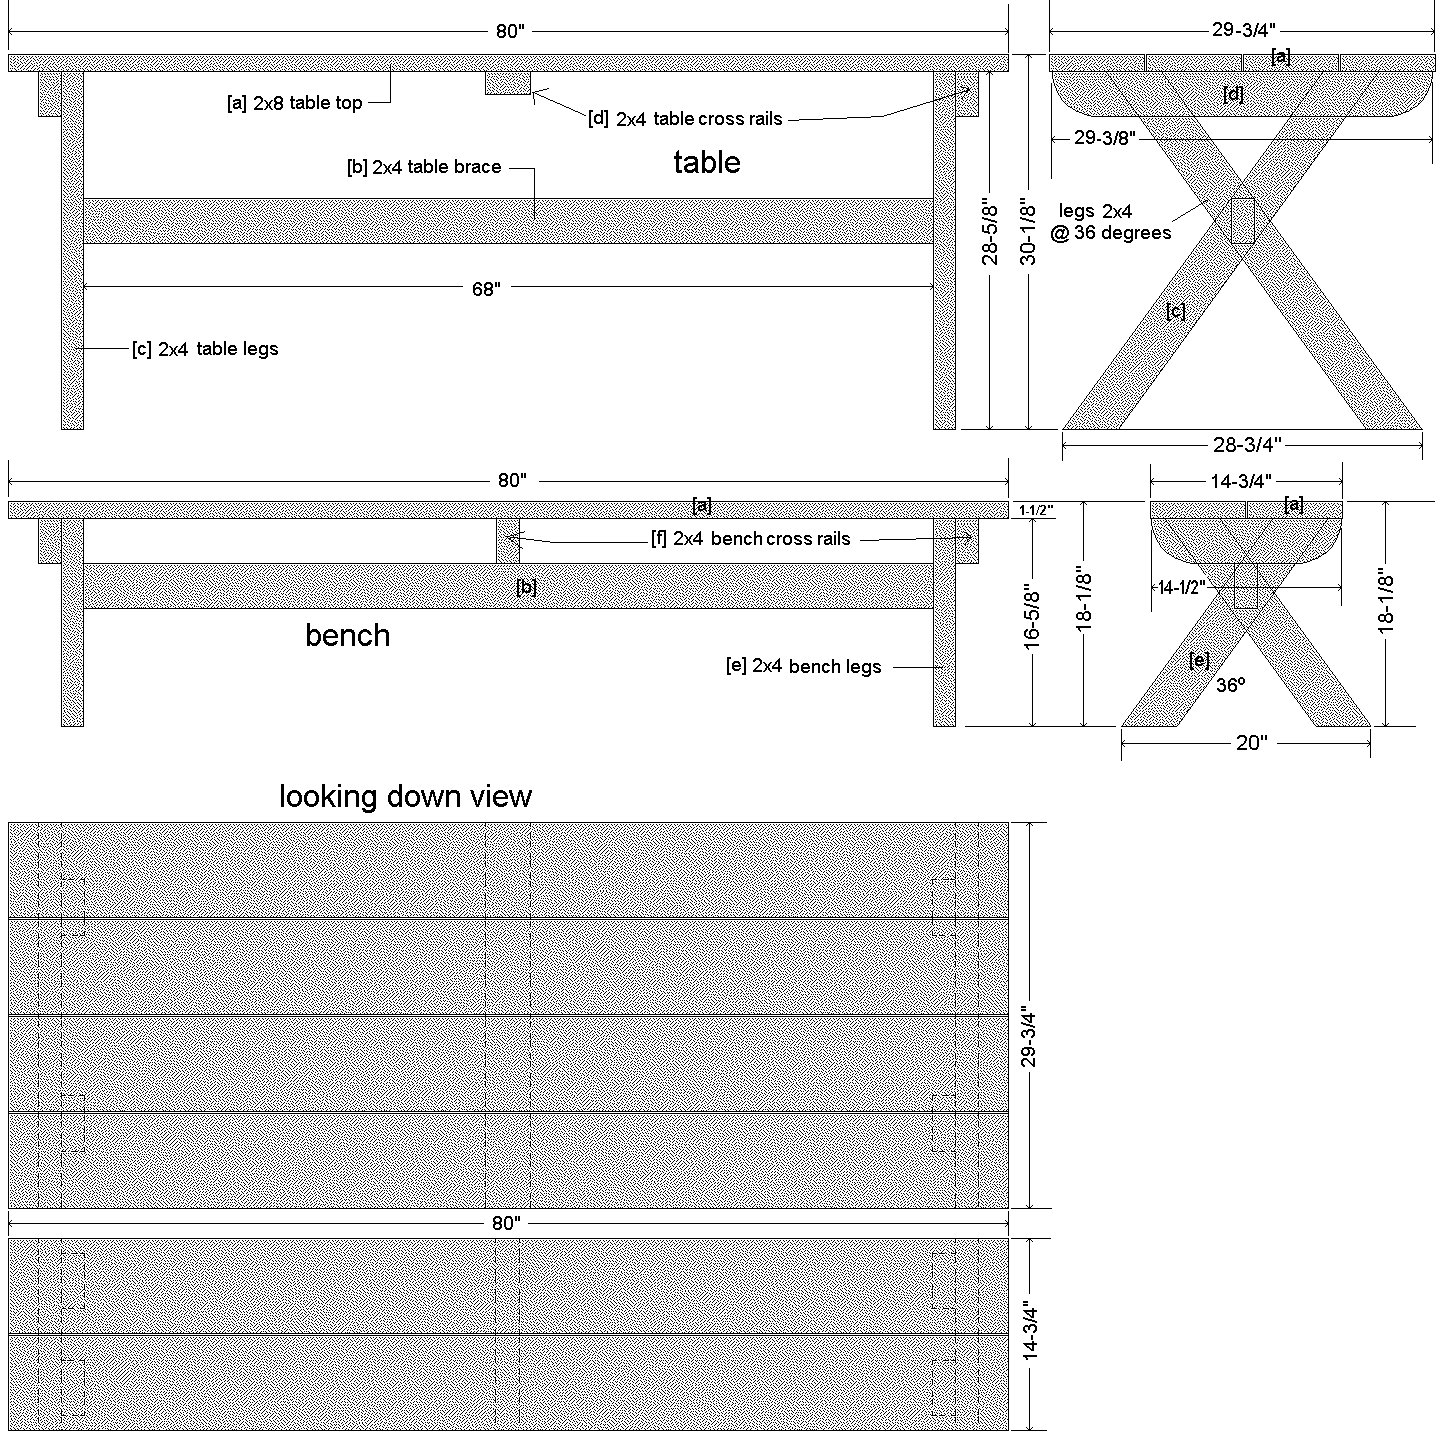
- [a] table top and bench top boards
- [b] table brace and seat brace
- [c] table legs
- [d] table rails
- [e] bench legs
- [f] bench rails
The plans
Ft and inch version
Metric version
Wood sizes | Shopping list | Cutting list
Wood and wood sizes
Ft and inch version
There are two wood sizes used in this project. They are 2×8 and 2×4 treated lumber. Dimensions are given in inches.
Take note, the dimensions given above are the nominal (called) sizes.
The actual sizes are 1-1/2″ x 7-1/4″ and 1-1/2″ x 3-1/2″ respectively. I.e. – 2×8 is really 1-1/2″ x 7-1/4″, and 2×4 is really 1-1/2″ x 3-1/2″.
The table top boards and the bench top boards are 2×8, and all else is 2×4.
At the time of writing, both the Home Depot and Lowes (USA) stocked the above sizes in lengths of 8ft and 16ft.
Metric version
- Out of two pieces of 190mm x 35mm x 6m – cut pieces [a] 6 @ 2m
- Out of one piece of 90mm x 45mm x 5.4m – cut pieces [c] 4 @ 960mm and pieces [f] 3 @ 380mm
- Out of one piece of 90mm x 45mm x 5.4m – cut pieces [d] 3 @ 760mm and pieces [e] 4 @ 575mm
- Out of one piece of 90mm x 45mm x 5.4m – cut pieces [b] 2 @ 1700mm
Materials – shopping list
Ft and inch version
Wood
- 2×8, six lengths @ 8ft.
- 2×4, six lengths @ 8ft.
Note: You will be able to cut all the pieces from the lengths above. There will be a bit of wastage with the 2×8 as the required table and bench lengths are 80″ and the stock (in store) lengths are 96″ (8ft.)
Other stuff
- 3-1/2″ exterior type wood screws, you will around 60
- 5/16″ x 5″ Galvanized Hex Lag Screws, You will need 8 screws and 8 washers
Metric version
- 190mm x 35mm You will need 2 @ 6m
- 90mm x 45mm You will need 3 @ 5.4m
- 14g x 85mm galvanised bugle head screws you will need around 60
- 8mm x 130mm galvanized hex coach screws and washers You will need 8 screws and 8 washers
Cutting list
Ft and inch version
2×8
- [a] table top and bench top – 6 @ 80″
2×4
- [b] table brace and seat brace – 2 @ 68″
- [c] table legs – 4 @ 38″
- [d] table rails – 3 @ 29-3/8″
- [e] bench legs – 4 @ 23-1/8″
- [f] bench rails – 3 @ 14-1/2″
Metric version
190mm x 35mm
- [a] table top and bench top – 6 @ 2m
90mm x 45mm
- [b] table brace and seat brace – 2 @ 1700mm
- [c] table legs – 4 @ 960mm
- [d] table rails – 3 @ 760mm
- [e] bench legs – 4 @ 575mm
- [f] bench rails – 3 @ 380mm
Instructions | The legs
How to make it
Note: These plans and material listings are for a stand alone table and one bench. If you require more than one bench (chances are, you will probably want two), then allow for the extra materials.
The legs: Preparing and marking the joint
Ft and inch version
- Out of 2×4 stock, cut the legs for the table and bench – 4 @ 38″ and 4 @ 23-1/8″.
- Make a cut each end 36 degrees off square.
The length along the sides (not the overall length) should be 35-3/8″ for the table legs and 20-1/2″ for the bench.

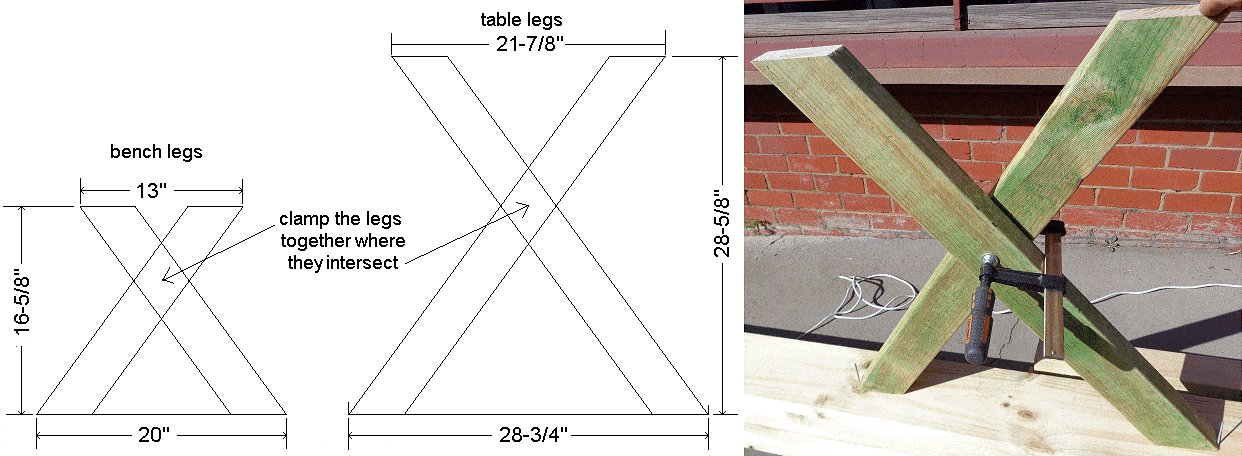
- Cross each pair of table legs (in an upright position) so the bottom ends are sitting flush on a flat surface and apart 28-3/4″ overall, then clamp each pair together in the middle where they intersect. The overall height should be 28-5/8″. Refer to the drawing below.
- Cross each pair of bench legs (in an upright position) so the bottom ends are sitting flush on a flat surface and apart 20″ overall, then clamp each pair together in the middle where they intersect. The overall height should be 16-5/8″. Refer to the drawing below.
Metric version
- Out of 90mm x 45mm stock, cut the legs for the table and bench – 4 @ 960mm and 4 @ 575mm.
- Make a cut each end 36 degrees off square.
The length along the sides (not the overall length) should be 885mm for the table legs and 510mm for the bench.

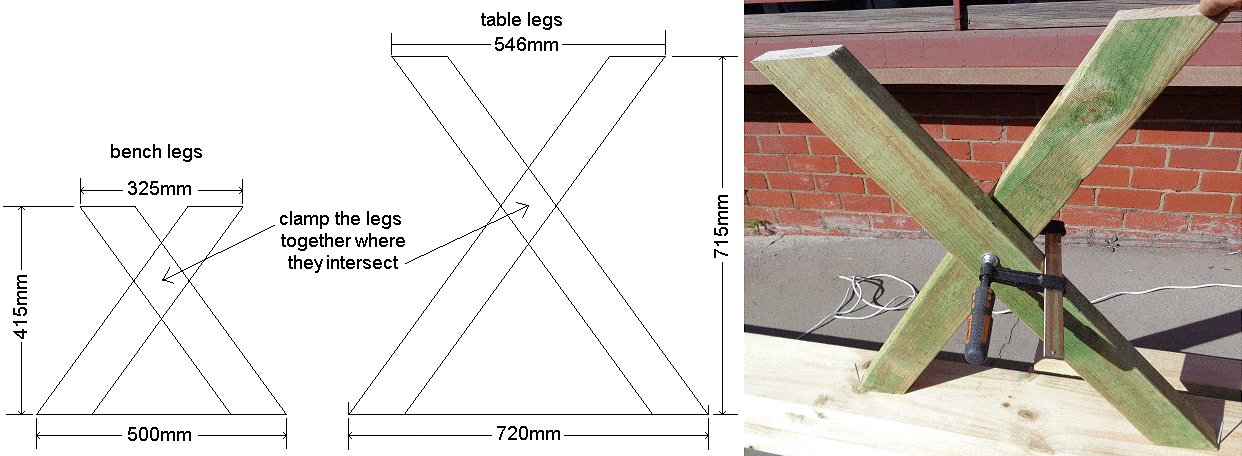
- Cross each pair of table legs (in an upright position) so the bottom ends are sitting flush on a flat surface and apart 720mm overall, then clamp each pair together in the middle where they intersect. The overall height should be 715mm. Refer to the drawing below.
- Cross each pair of bench legs (in an upright position) so the bottom ends are sitting flush on a flat surface and apart 500mm overall, then clamp each pair together in the middle where they intersect. The overall height should be 415mm. Refer to the drawing below.
Ft and inch version
- Then mark where the legs meet (the intersection), on each side. That will mark the area that needs to be checked out.
Metric version
Marking the leg X joints
Once marked, undo the clamps and lay the pieces out.
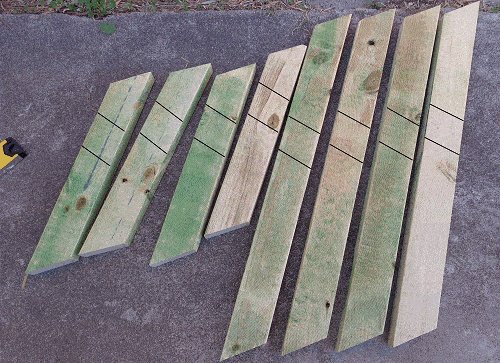
- Verify that the marks on all the pieces are consistent and match the marks on the drawings below.
Ft and inch version

Metric version

Joining the legs
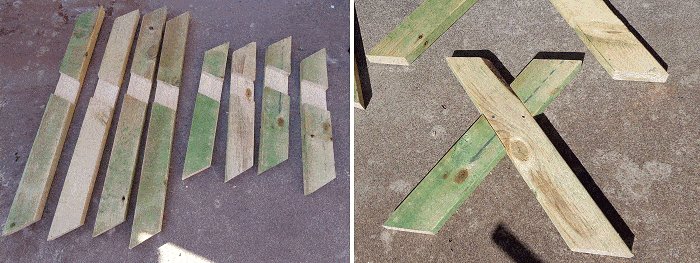
The joint that joins each pair of legs is called a cross-halved joint.
- You will need to cut out the area where the legs intersect (the cut-out area) to a depth halfway into each piece of wood.
- The cut-out area is already marked (see the previous section) on each leg.
- Set the blade of your saw (drop-saw, chop-saw, circular saw, or what ever) to a depth half of the thickness of the wood.
- Make multiple cuts across the cut-out area with the saw, and then clean out the area with a chisel.

- Glue and join each pair of legs together and screw to hold, but do not position any screws where the bolts are to go. See page 10 for bolthole positions
Adding the end rails to the legs
Cut and fix the rails to the legs
- Cut the rails and round the ends.
Note: The intermediate table rails are fixed on their flat (as opposed to being on edge like the rest of them) so take notice when rounding the ends.
- Glue and screw rails to the top of each pair of legs, making sure that the tops are flush and the overhang each side of the legs is equal. Refer to the picture below.

Drill bolt holes through the crosses
Ft and inch version
- Mark and drill two 5/16″ bolt holes through the center of each crossing. Position the holes 1-1/2″ apart horizontally. Refer to the drawing below.
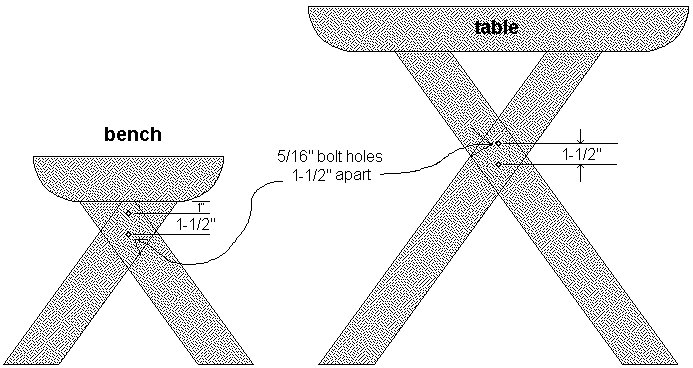
- For the bench, position the top hole 1″ below the bottom of the rail.
- For the table, position the holes central at each crossing, both horizontally and vertically.
Metric version
- Mark and drill two 8mm bolt holes through the center of each crossing. Position the holes 40mm apart horizontally. Refer to the drawing below.
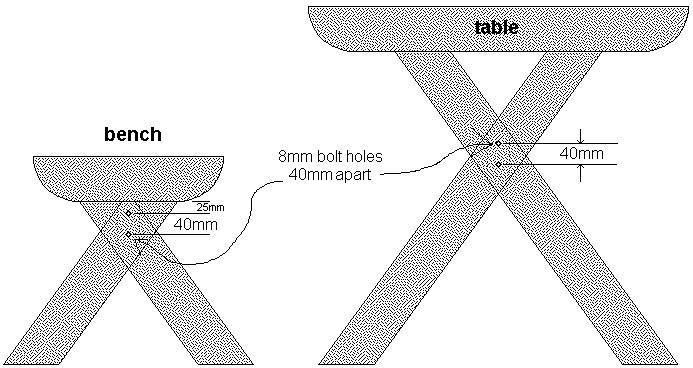
- For the bench, position the top hole 25mm below the bottom of the cross-rail.
- For the table, position the holes central at each crossing, both horizontally and vertically.
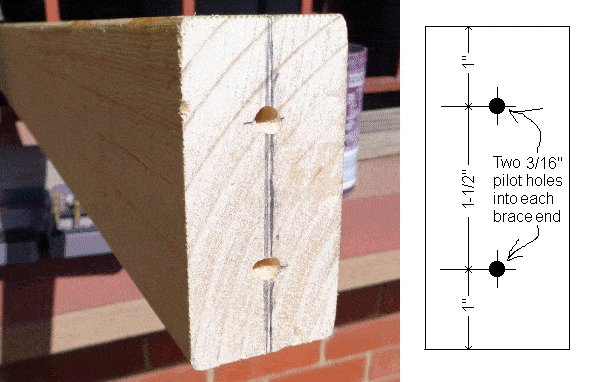
Drilling holes into the ends of the braces
Drill holes into the brace ends
Ft and inch version
- Drill two 3/16 pilot holes into the ends of each brace [b].
- Position the holes 1-1/2″ apart horizontally and make them equal distance top and bottom and from side to side. Refer to the picture below.
Metric version
- Drill two 5mm pilot holes into the ends of each brace [b].
- Position the holes 40mm apart horizontally and make them equal distance top and bottom and from side to side. Refer to the picture below.

Fixing the brace members in place
Fix the X legs to the braces
Ft and inch version
- Align the bolt holes in the crosses with the pilot holes in the braces [b], insert 5/16″ x 5″ galvanized hex lag screws with washers into each hole and tighten them up.
- That will pull everything in nice and tight and (if the cuts are square) should automatically make the legs 90° to the braces.
- While tightening the 3bolts, ensure that the two table rails are on the same plane, and that the two bench rails are also on the same plane as one another. You may have to twist the frame slightly to achieve this.
Metric version
- Align the bolt holes in the crosses with the pilot holes in the braces [b], insert 8mm x 130mm galvanized hex coach screws with washers into each hole and tighten them up.
That will pull everything in nice and tight and (if the cuts are square) should automatically make the legs 90° to the braces. - While tightening the bolts, ensure that the two table rails are on the same plane, and that the two bench rails are also on the same plane. You may have to twist the frame slightly to achieve that.
Just the tabletop and bench top boards to go
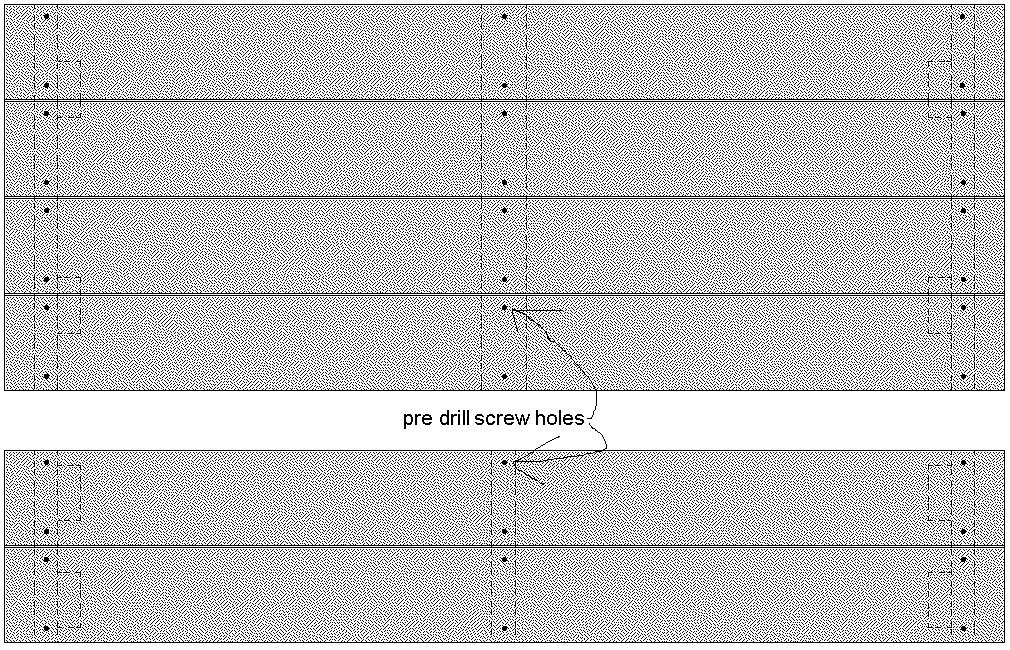
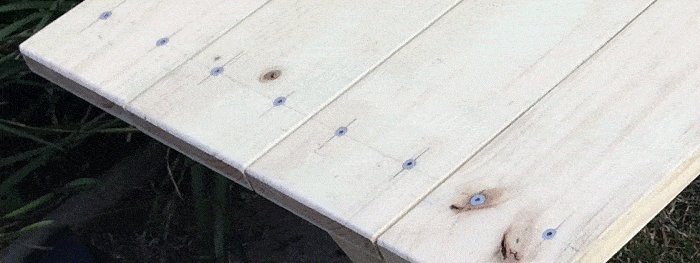
- Lay the tabletop and bench top boards on their respective frames ensuring all overhangs are equal and there is a slight gap (1/4″) between all boards to allow for water run off.
- Mark for screw placement, in line with the rails and about 25mm in from the sides of the boards. Refer to the drawing below.
- Take the boards off and drill the screw holes – the same size as the screw shanks.
- Then lay the boards back in place, drill pilot holes into the rails (slightly smaller than the screw size) where the screws are to go, add the screws and tighten.
Done!


What degree are the picnic tables usual legs? The cross pieces. On a regular table as well. “X”
Hi all,
I’ve bought the premium plans for the X legged table and found them really useful – thanks Les!
I wasn’t able to get the exact wood sizes in the UK and so have got 100x47mm instead of the 90×45 for the rails, brace etc and 200x47mm for the table and bench top.
I was wondering though if anyone could help with the X measurements given the different size wood.. I’m assuming that given the wood is thicker, the measurements for the cut down legs at 36 degrees (normally 885 for table leg and 512 for bench leg) and the measurements between end and cut out x section will differ (normally 518/93/274 for table and 332/93/87 for bench)..
Before I start cutting I wanted to run this by anyone that might know to see if they’re able to help with what the measurements would be/suggestions..
Thanks
Callum