Contents
If you’ve got the floor space, it’s a fun idea to design and put together your bar hideaway. You’ve probably seen many people’s bar projects online and thought, you know what? I want to do that!
The question is: how and where do you start?
In today’s guide, we’re going to take you through some bar ideas and ways you can design your home bar.
We’ll look at some bar ideas for basement bars, garage bars, and bars that can go anywhere you like!
So, pour yourself a cold one, and let’s take a look!
Why Build A Bar?
Building your bar is a fantastic project to start. The actual building process can be a social event, catharsis for your mind, and promotes some exercise value and creativity.
Because building a bar is all about your own personal preference, your design ideas will shine through and add a bit of “you” to your project.
It’s also a great way to save money, and nowadays, that’s much more important than it ever was.
You can invite your friends to use your new bar and maybe introduce some bar things like a dartboard or pool table – great ways to socialize and give your mental health a real boost!
What Do I Need Before I Start?
Before you start, you’ll need to assess your space and know where your bar will go.
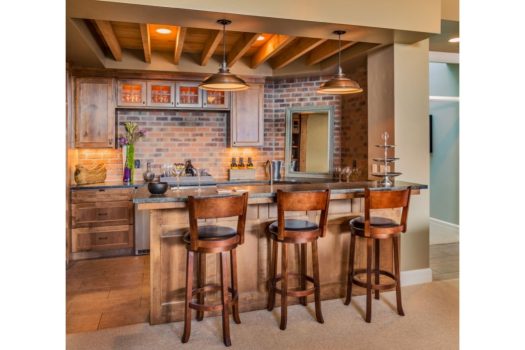
It’s advised that you choose somewhere with plenty of excess space and away from the central area of the home. The best places are in the basement or the garage.
Not only does this psychologically give you the idea that it is a separate place, but it also means anybody else in the home is not subjected to loud noises (during the building and the fun it will provide!).
Once you’ve decided on your area for the bar, clear it out of any junk that might be there. You will need to do this again, but it’s always best to start with a clean surface.
Now, design your own blueprints for the bar. What will the overall floor plan be? What is going to go where? What will the color scheme be? These ideas will shape the overall aesthetic of the bar and give you a reason to stick around!
If it looks good, it will make you feel good, and you’ll keep going back!
After you’ve decided on what will go where and what the color scheme and materials will be – you’ve now got to think about the bar itself.
Before you go right to building, ensure you have the correct tools. You will need a saw, a screwdriver, a hammer, some nails, a sander (if possible) and paint.
In terms of the material of the bar, you’ll need to have the following things:
- Bar rail molding
- Panel molding
- Foot rail
- Stiles
- Plywood
- Oak trim
- Framing board
You should plan your building process too. A good rule of thumb is to have a day of preparation and then two days of finishing up.
The final day should be inclusive of the absolute finishing touches like painting, floor cleaning and wall set-ups like posters, paint, boards etc.
Step One: Lay Out The Sides
You’ll first need to cut the bar’s panels for the front and the sides. Imagine a horse hitching-post shape.
You will have the longer panel lengthways and then five 1×4 framing boards going vertically. Nail these into place either with a nail gun or a hammer and use 1-inch nails.
Step Two: Sheathing
Start by laying the lauan face flat and cut it to the size required. Add some adhesive and connect this panel across the face of the bar.
Preferably, you’ll be using staples – just ensure when you’re placing the lauan that you’re not nailing through.
Step Three: Stiles
Prepare your stiles and place them in the corners using a block. You’ll want to cut the stiles using a miter saw if possible. When it comes to the front stiles, you’ll want to put them into the front panel along with the rails.
Step Four: Cleats And Walls
After you’ve marked up where the cleats and walls will be going, you’ll want to put some glue onto the walls and set them upright – this is where you’ll be clamping the two pieces together.
Ensure you’ve centered your screws and carefully drill 3-inch screws in one after the other.
Step Five: Shelves
You’ll now have an upright bar with a shell. You’ll probably want to install some shelves. Simply cut them to size and place them into the cleats with nails.
Step Six: Bar Top And Molding
The corner molds and bar top need to be placed in to give it that real bar look. When preparing the bar top, you’ll need to install plywood cut-to-size first and then install an oak top, ensuring it’s flush to the plywood.
The molds need to be prepared at a 45-degree angle and will fit where the plywood is exposed after the bar top has been placed. Don’t worry – you’ll see where this will be after the bar top is in!
Step Seven: Foot Rail And Finishing Touches
If you choose to have one, you need to affix a bracket into the bottom part of the bar and screw in the foot rail to the bracket.
After this, sand down and polish your oak top and get rid of any wooden areas that might be poking out or a danger of splinters.
Now you have your bar, place it into your chosen area and continue with the room design. Once you’ve placed up decorations, games etc. – do a thorough clean of the area and then place your bar stools, bar tables and drinks in.
You’re ready to go!
Summary
Building a bar can be fun but sometimes difficult. There are many ways to cut corners, but if you want a stable bar – you’ll want to follow the instructions above.
Good luck out there!


