Contents
Ramps can be handy. They help people who are less mobile, such as wheelchair users, to access places more easily. They can also be used to hone skateboarding and BMX skills.
If you want to build your own ramp, wood is one of the best materials because it is solid and durable.
Moreover, if you have access to woodworking tools and have experience with this skill, it should not be that difficult for you to construct a wooden ramp. All you need to do is follow these straightforward instructions.
How To Build A Wooden Ramp
Instructions
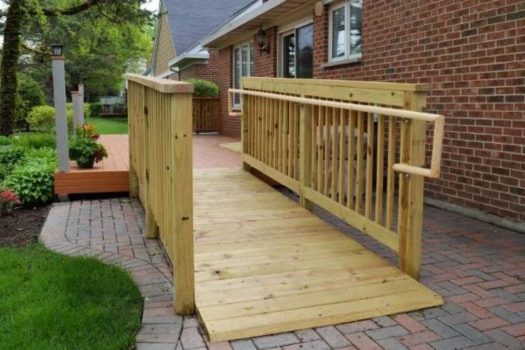
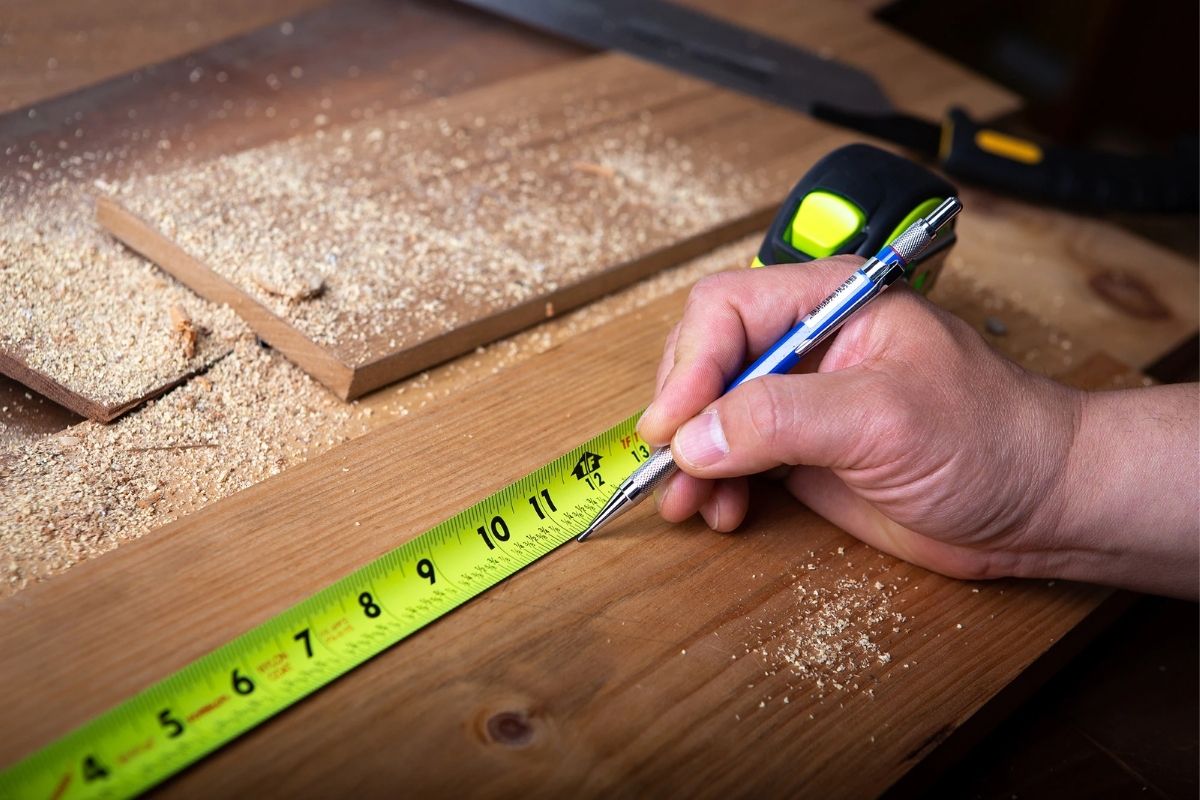
- Design your ramp: though you may not think it, there are many different ways to construct a ramp. Consequently, you will need to think about the design of your ramp. Do you want a half-pipe ramp? Or would you rather just a simple angled ramp? When planning it, take into account the preferred measurements. Think about how high it will need to be. To do this, we advise using a measuring tape.
- Put on safety equipment: woodworking can be a dangerous hobby if you are not careful. Consequently, we advise that you don safety gear, such as goggles.
- Begin cutting the side pieces: once you have worked out how big these pieces need to be and at what angle they should be directed, start cutting these shapes into the wood. You will need two side pieces (if you want a double half-pipe, you will require four pieces). These pieces will need to be identical, so you might want to cut one and use the other as a template.
- Add grooves: to allow for a sturdier ramp, add grooves to the top of the side pieces. You might also want to have a groove on the 90-degree angle of these triangular pieces.
- Make support pieces: using the side pieces as templates, cut two identical support pieces out of wood. These will be placed a few inches apart from either side pieces, thus giving them increased support and stability.
- Construct support beams: these beams will be placed in the grooves, being placed horizontally across the two side pieces and support pieces. You will need roughly three support beams to be placed on top of the triangular pieces. Plus, you will require a support beam that will be placed at a 90-degree angle on these triangles. The support beams should be long and thin pieces of wood. They should be the same length as the entire ramp.
- Screw the support beams: you should place the beams in the grooves, thus giving the ramp fantastic firmness.
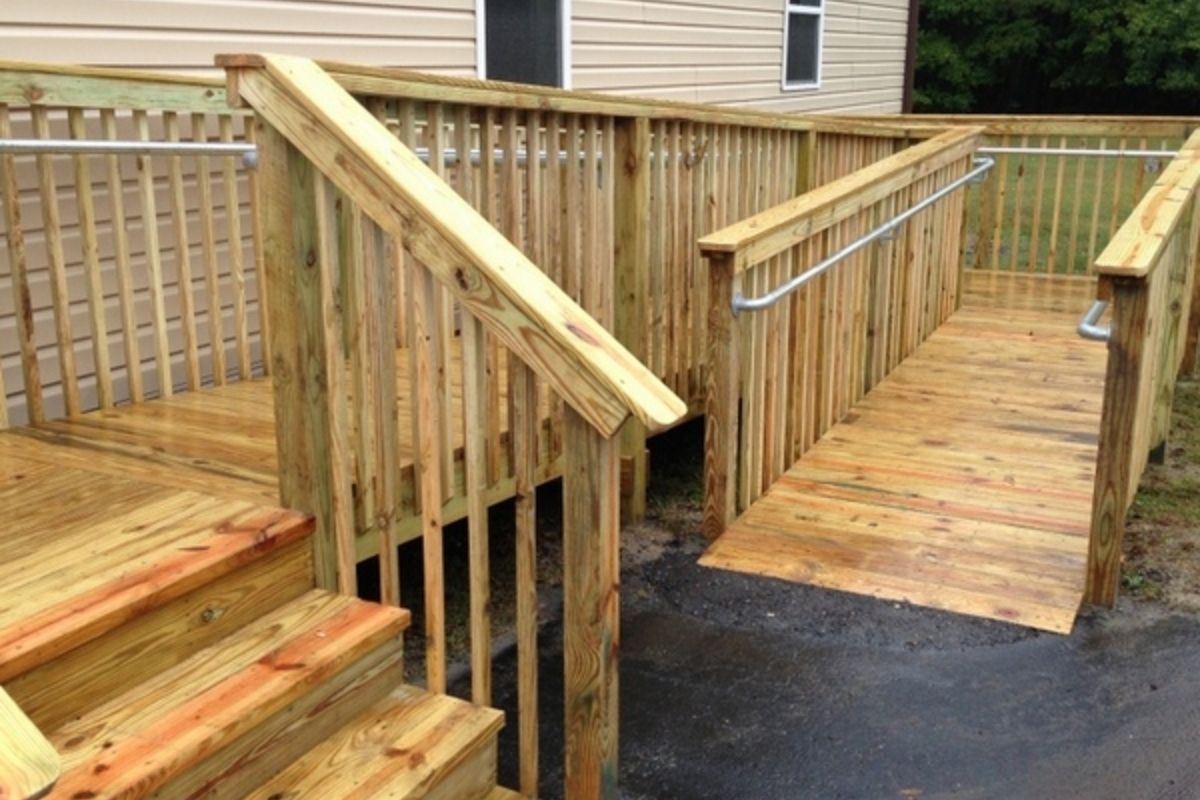
- Build the top and bottom pieces of the ramp: now that you have the support structure, you need to cut a piece of wood that can be glued to the top of these pieces. This is the piece of wood that you will ride on. Moreover, you must place a large rectangular slab of wood underneath the support structure.
- Attach the top and bottom pieces: you should screw these pieces onto the support beams and pieces.
- Smooth the ramp: using grit sandpaper, rub the ramp so that it has been smoothed. This smoothing process will remove imperfections in the wood.
- Give the ramp a finish: it is recommended that you give the wood a weatherproof finish, therefore allowing it to withstand harsh weather conditions. You might also wish to cover the ramp in a smoother material, which enables the ramp to be easier to mount.
Equipment
To complete this set of instructions, a few key pieces of equipment are required. Among these items are:
- A measuring tape: this DIY essential can be used to give you accurate measurements.
- Safety equipment: Safety equipment can keep you safe when woodworking. For example, you can use safety goggles because wood splinters can irritate your eyes. You might also want to use gloves to protect your hands.
- A sufficient amount of wood: you will need plenty of wood to construct a ramp. There are lots of different varieties of woods that can be used for this activity. For example, plywood is strong and relatively inexpensive. Be sure to shop around to find the ideal wood for the project.
- A saw: You can use either a standard handsaw or an electric one to cut wood. Among the saws that can be utilized are jigsaws, circular saws, and hacksaws.
- Screws and a screwdriver: these items are wielded to secure the support frame of the wooden ramp.
- Grit sandpaper: sandpaper is an essential tool for woodworkers. It is employed to smooth wooden surfaces. You can find it online or in hardware stores.
- A weatherproof wood finish (optional): to give the wood additional protection, it is advised that you use a wood finish.
- A smooth material (optional): it is suggested that you cover the ramp with a smooth material if you wish to use it for skateboarding or BMX skills.
Frequently Asked Questions
What Angle Should a Ramp Be?
The angle of your ramp will depend on its purpose. If you are constructing a ramp that will allow people to access a building, the preferred angle is 4.8 degrees.
Meanwhile, an angle between 15 and 30 degrees will be preferable if you are using the ramp for skateboarding.
Why Should Wood be Coated with a Finish?
Finishing is used on wood because it helps give the material an additional layer of protection. These finishes are mainly used to defend the wood from moisture.
This is essential if you place your ramp outside, as rain would otherwise damage the wood.
Final Thoughts
Wooden ramps can be used for a wide variety of purposes. While this project may be too complex for beginner woodworkers, those with some experience can quickly build a wooden ramp with these instructions.
It is important to remember that wooden ramps can have a few different designs, so you need to think carefully about what design is best for you.


we need to have a ramp frame starting at 16 1/2″ high (actual deck is 17 1/2″ so the top boards can be an inch and level off with the deck)
We need to extend 18′ to get to the clearance and to give a better angle for the patient to roll down. A shorter ramp creates considerable anxiety and fear with the degree of severity of the disability. It is necessary to be 4′ wide.
We are not sure where to get long enough boards so we can blend into the ground area of the yard. we thought of running the ramp to a landing of 4″ high and then additional ramps off the landing to make up the full length but that is a lot more work then I am up to. That way I could use 16′ 2×6″ and still be less steep than what code recommends. The disabled person has great difficulty with vertigo, blood pressure and swaying of the body in the chair or in a vehicle. The 6′ ramp on our handicap van is too steep for her and sometimes is too steep for her to go up it.
but, we have a courtyard and back yard which she could access better if she could get down on the west side of the front deck. we only have room for a straight shot down but at the bottom, can veer to the left or right to be on the trails. I would love to hear your ideas and suggestions. Your ramp styles are right up our alley. Too bad there isn’t a prefab kit to just put together… thanks for your input.