Contents
There are many reasons why somebody might want to use wood stain, from updating an old piece of furniture to bringing life to a hardwood floor.
The difference between wood stain and paint is that wood stain allows for the grain of the wood to seep through, giving it a more natural and authentic finish. It also adds an element of protection to the wood, helping to prolong its life, which is especially important when it comes to something like flooring or outdoor decking.
If you are looking to change the color of wood, and want to have the timber show its natural beauty, then you should consider investigating wood stain further.
While it might look like something only professionals can do, you can easily stain wood in the comfort of your own home. So, whether it is a chair, the kitchen floor, or a new wooden ceiling, follow these steps, and you will have the knowledge and expertise to do it yourself.
Before You Start
If you plan to stain some wood, pick a time when you know you can do at least one layer without needing to stop. This is because if you only do a section at a time and then stop to run some errands, you will have different drying times and get confused.
Choosing The Wood Stain
Even if you have a specific color in mind, it is always worth giving a few different stains a try on a small area. If you do not, the color you initially liked may not turn out exactly as you had hoped, and if you use the stain on a large surface, you will need to start from scratch again.
Unlike paint, where you can use a primer over the color, wood stain will need to be sanded back to its raw form again and then primed, ready for more wood stain.
Save the hassle and test on small areas to find the best color suitable for the piece of wood you are staining.
Prepare The Wood
Even though you might want to get started right ahead and stain the wood – do not do this! You need to prepare the wood so it is ready to take the strain at its best.
If it is furniture you are updating, it may have old wood stain or varnish on it. Sanding the surface will remove it and give you a plain canvas to work with.
If you need to sand the wood, do it now. You cannot do this after applying your the stain; otherwise, you will remove it all. Once the sanding is complete, make sure any wood residue has been obliterated.
If you do not plan to sand the wood because it does not need it, or because you have already done it, make sure there is no dirt or debris stuck to the material. You will want it to be as clean as possible, so it makes staining the wood so much easier.
How To Sand Wood
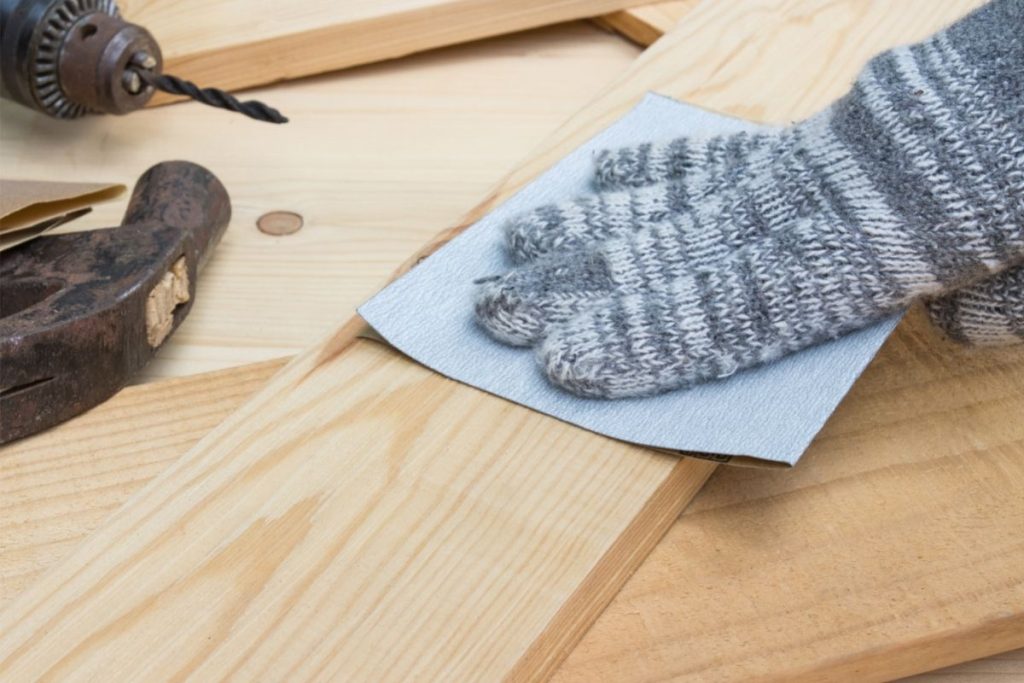
Using 120-grit sandpaper, rub it gently in the direction of the wood grain. During the process, remember to wipe the wood with a clean cloth. This can be damp or dry. Just remember that the wood needs to be fully dry before staining.
The sanding process will help to smooth out any dents or scratches. If there are some deep indents, use a wood filler before sanding. You can find this at your local hardware store.
Once this process has been done, make sure all the debris has been removed so you can move on to staining the wood.
Condition The wood
If you are using pinewood or some type of softwood, then it is worth using a pre-stain conditioner. It is a crucial step if this is the type of wood you are using because it will help to avoid wood stain settling patchy and looking terrible.
You will only need to apply a thin layer on the entire piece of wood and then wait for around 15 minutes before using a clean lint-free cloth to wipe off the excess.
You will need to use small strokes that go in the same direction as the wood grain for best results. Before you move on to the next step, let the conditioner fully dry.
If you want the best results, stain the wood on the same day. The recommended window frame is within two hours, but this may vary, so always read the label on the can.
Before Applying, Stir Well
You will need to make sure that the wood stain is fully mixed before you can even think about applying it. Sometimes the pigments in the stain settle at the bottom due to the can being left in transit and on the shop floor for a number of days.
All you need is a long stick or a brush which you can use to stir the stain so the color is correct when you use it. Make a habit of doing this every time you use wood stain.
Apply The Stain
Transfer some of the stain to a tray, as this will be much easier than just using a big can. Also, if you leave the lid off the can for too long, it will start to cause the stain to lose some of its quality, as well as dry it out due to being exposed to the air.
So, always remember to pour as much as you need into a tray, rather than too much. If you are unsure, always use much less than you think to avoid wasting any product.
It is actually fairly easy to apply the stain. Using a brush or a lint free cloth, dip it into the stain and apply it to the wood using a thin coat.
The trick is to use a brush first using small and light movements and then again with a second layer (once the first is dry) with a cloth.
Wipe the Excess
After applying the first layer, wait a few minutes before wiping the excess off. If you have done a test, you will have calculated how long to leave it for to reach the desired result.
The longer you leave it on, the darker the color will be, so make sure you are aware of this if you hope to achieve a lighter color. If you wipe it off too early and it is far too light, do not worry because you can add a second coat to make it darker.
If you plan to add an extra coat, always wait for it to become completely dry before doing so to avoid removing the stain underneath.
Finishing Touches
Once 4 hours have passed, and you can feel that the wood stain is completely dry, you can finally finish it off with a top coat.
Using a varnish or a sealant will give the wood stain extra protection, and it may even give it a glossy shine – unless you decide to choose a matte finish.
Apply the top coat the same way you would apply the wood stain, starting with the center and working your way out to the edges of the wood.
Always use a brush rather than a cloth to apply a top coat due to its thicker texture. You may struggle to apply it with something like a cloth, so make it easier for yourself by using a brush.
Once it is dry, the job is complete!
Final Words
Learning to use wood stain is an easier task than you probably initially thought. It is a great way to update old wooden furniture, as well as to make new projects look well finished.
While it might be tempting to work on bigger wooden items, always start with something small so that you can build up confidence.


I'm a carpenter by day and an amateur woodworker by night. I don't believe in limitations, and I love to help others. I'm here to answer your questions and make your life simpler. I craft and create with all-natural, reclaimed, and repurposed materials.