Contents
Introduction
Standard version (ft and inch)
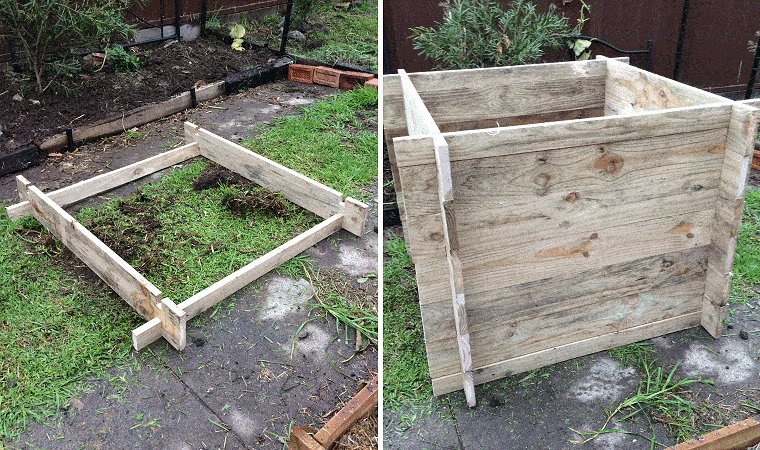
This is a multipurpose garden bed box.
You can make 1 high garden box, 2 medium height, or 3 lower boxes. Switch and change to suit – all with the same interlocking boards.
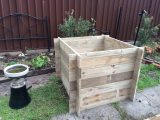
This raised garden box is very versatile and practical.
It is easy to assemble, disassemble, and change height, as the pieces slot into one another (interlock) and there is no need for any fasteners.
Overall the footprint (area) is 4ft x 4ft.
The height can be raised or lowered at will just by adding or subtracting the wall boards.
The height adjustable factor can be very useful for growing such vegetables as potatoes which can benefit from adding height in stages as the plants grow.
Metric version
A versatile garden box with many uses and easy to move around – you can make it any height you like.
It would make an ideal potato box where the height of the box can be expanded as the potatoes grow – of course, that is only one of it’s capable uses.
This particular box is 1200 mm square but you can make one any size you like and as high or low as you like.
For this project I used 25mm x 150mm boards (actual size). You can also use a thicker and/or wider board – just make sure you use a wood that will not rot given its use.
Use either a natural decay resistant wood or a treated wood. ACQ treated wood is considered acceptable.
Some treated woods may release harmful chemicals into the soil and into the plants. Your wood supplier should be able to advise you on the best type of wood to use.
If you have any concerns you can always put plastic sheet between the boards and the soil.
Wood size and type
What size wood
I used 1×6 (actual size) boards for this project.
Wider or thicker wood can be used by following the same construction principles.
What type of wood
Use a wood that is decay resistant – i.e. suitable for outside and it’s intended application.
Some natural woods do the trick, but for the most part treated woods seem to be cheaper and more readily available.
Some treated woods have toxic chemicals in them that may get into the soil and possibly the plant life.
Some treated woods can be acceptable. Your local supplier should be able to advise on the right type of wood to use, and if you have any concerns about the treatment you can always place plastic sheet (e.g. polythene) between the boards and the soil.
Construction overview
The making basically involves cutting slots into the edge of the boards at each end. The slots in one board fit into the slots in another board and that holds them together. The more boards added, the higher she goes. Easy stuff and very practical.
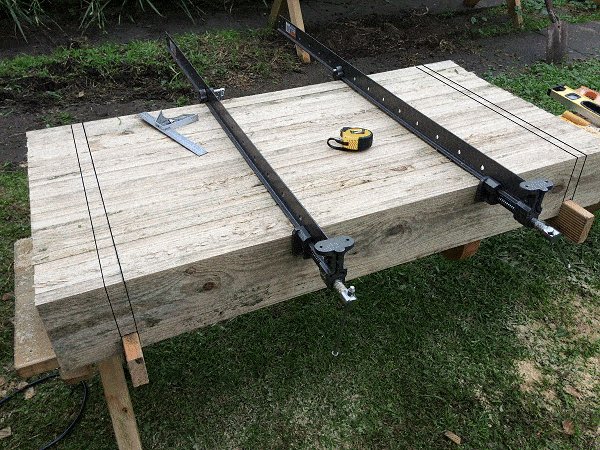
Step 1. Cut the boards and mark the trenches

Standard version (ft and inch)
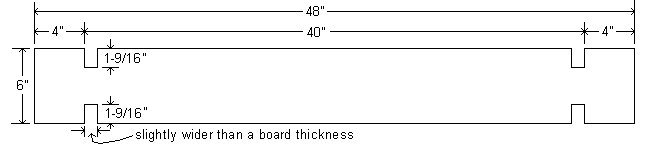
- From 1×6 boards, cut 24 @ 4ft long.
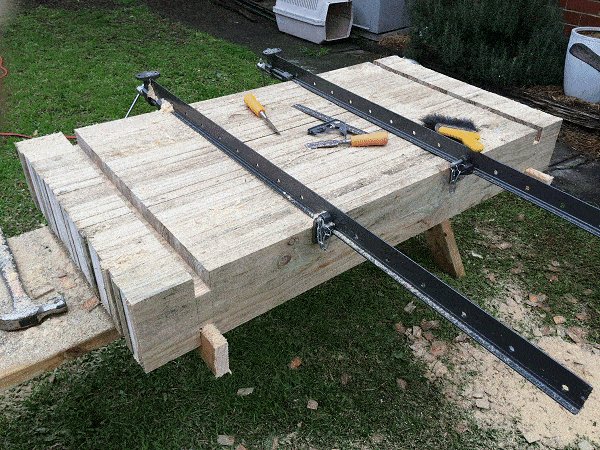
- Clamp them together with the ends flush, and mark a line across the boards at each end, positioned as follows:
- Make the lines approximately 4″ in from each end.
- Ensure the lines are exactly 40″ apart.
- Mark another couple of lines across the boards, one at each end, in 1-1/16″ from the first lines.
- The area between the two lines at each end is the slot cut-out area. The width of the cut-out area should be slightly wider than the width of a board, i.e., a board (in this case) is 1″ thick. Therefore make the cut-out area 1-1/16″.
Metric version
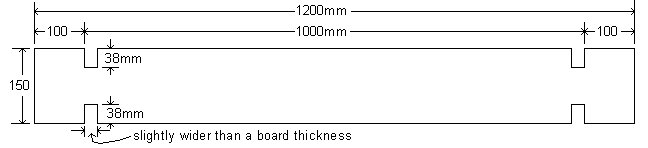
- Using 150mm x 25mm boards (actual size) cut 24 pieces @ 1200mm long.
- Stack them altogether with the ends flush and clamp them from the underside so the top of the boards are clear and free to work on.
- Draw two lines square across the top of the clamped boards, 100mm in from each end.
- The lines should be exactly 1000mm apart.
- Draw another two lines 26mm (or slightly larger that the thickness of a board) in from the first two lines. The area between the lines is the cut-out area.
Step 2. Set the depth of the power saw blade
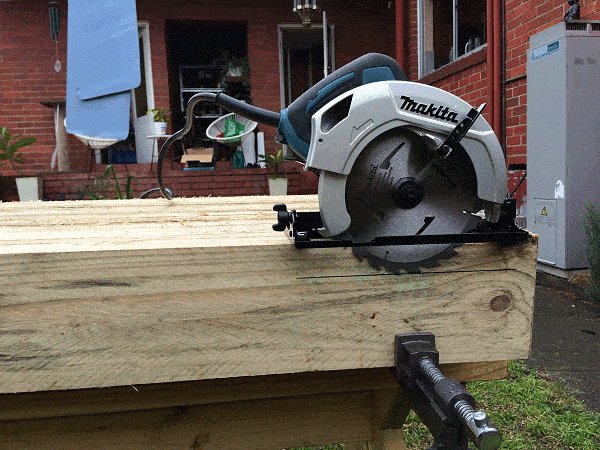
Standard version (ft and inch)
- Set your power saw blade to a depth just slightly more than 1/4 of the width of a board.
For example, if the board is 6″ wide (as in this case), set the blade depth to 1-9/16 which is just a little over 1/4 of the boards width.
Metric version
- Set the depth of your power saw blade to a little more than 1/4 of the width of a board.
- In this case the boards are 150mm wide, so the blade depth should be set to 38mm which is slightly more than 1/4 of the boards width.
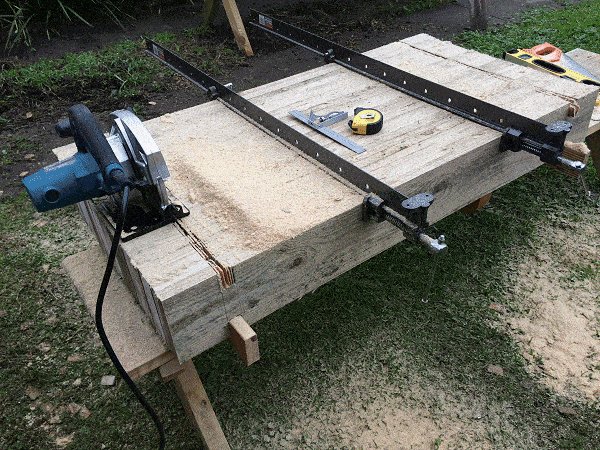
Step 3. Make cuts along the cut-out area
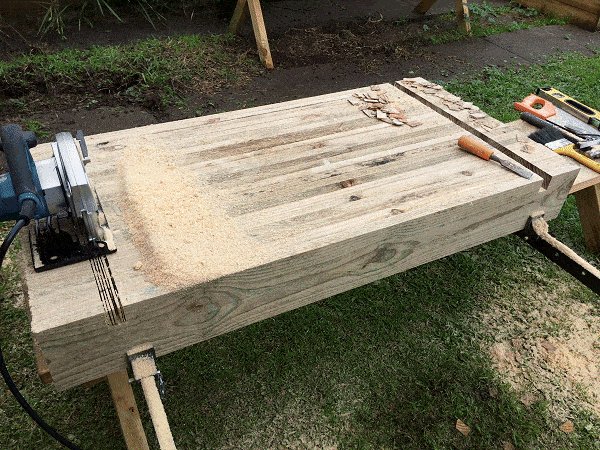
- Make multiple cuts along the cut-out area with the power saw. Ensure the blade is set to the right depth – see the previous step.
Step 4. Clean out the grooves

- Clean out the trenches with a sharp chisel.
Step 5. Prepare and mark the opposite side
Standard version (ft and inch)
- Unclamp the boards.
Get two runners the same thickness as a board and longer than 2ft. Make the eight over 2″.
Turn the boards over and have the trenches sit over the runners i.e., the two runners will be in the tenches. - Clamp the boards together, and when positioning the clamps ensure there will be enough free area to work the power saw when making multiple cuts across the cut-out area (yet to be marked).
- On the sides, mark square lines up from the trench below and from there mark the cut-out area across the top.
Metric version
- Turn it all over so the boards are sitting on a couple of runners (the same thickness as a board) fitted into the grooves.
- This will keep all the boards in line while you take off the clamps from the underside and re clamp on the top side.
- Be sure to position the clamps away from the cut-out area to allow working space.
- Square up (with a pencil and square) from the grooves each side, and from those (squared up lines) mark the cut-out area across the edge of the boards.
Step 6. Cut the opposing trench
- Cut the trench the same way as in step 3.
Step 7. Clean out the opposing trench
- Clean out the trench with a sharp chisel.
Step 8. Make some half-height boards
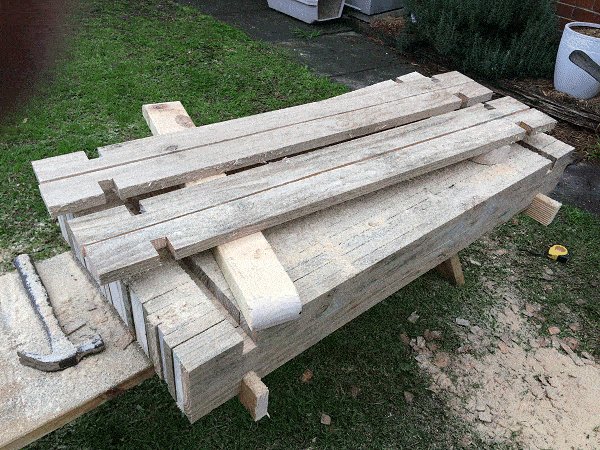
- Unclamp the boards.
- Rip (cut lengthwise) 2 boards down the middle, making four half-height boards.
- They are needed to make the bottom row flush and the top row flush.
Step 9. Lay the bottom row of boards
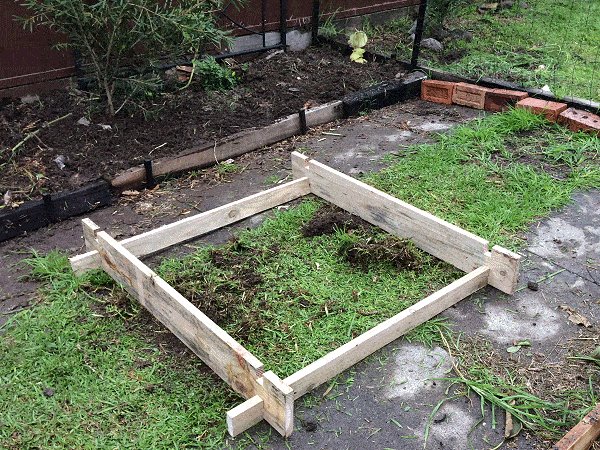
- Lay two half-height boards on the ground parallel, spaced apart 1m overall. Place two other boards at right angles on top, slot into slot.
Step 10. Stack ’em up

- Continue adding boards until they are all fitted or you have reached the height you desire.
- Finish off with two half-height boards to make the top even.


