Contents
Introduction
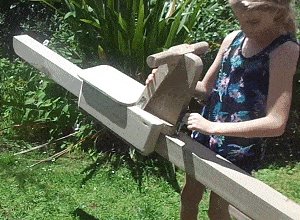
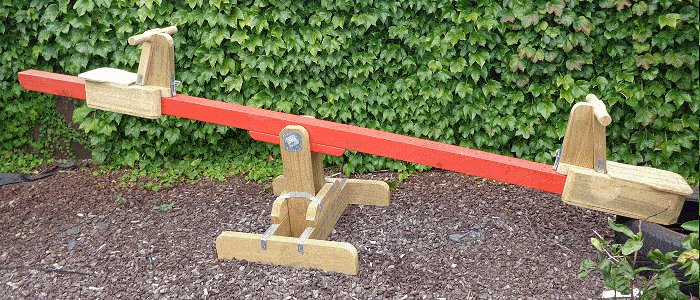
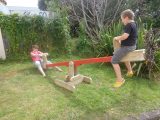
This seesaw has adjustable seats that are able to slide along the seesaw beam making it possible to balance a couple of riders of different weights.
The seats can be moved and locked in place at points along the beam simply with a standard pad bolt.
This allows even a parent to have a balanced ride with their child.
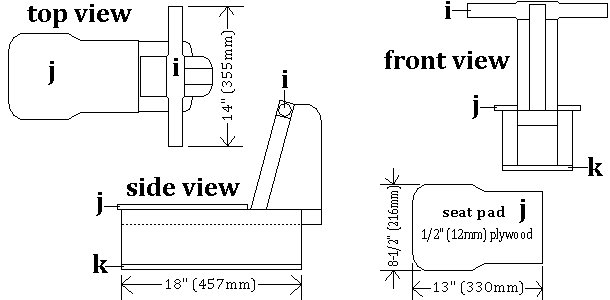
Dimension plans
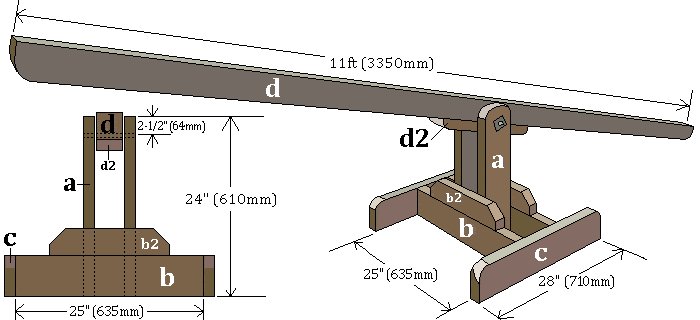
The beam and stand
The seats
The pieces – cutting list

| Wood cutting list | ||||
| ID | Stock size | Length | Qty | Tasks |
| a | 2×6 (150mm x 50mm) | 24″ (610mm) | 2 | round the top cnrs |
| b | 2×6 (150mm x 50mm) | 25″ (635mm) | 2 | |
| b2 | 2×4 (100mm x 50mm) | 16″ (407mm) | 2 | round the top cnrs |
| c | 2×6 (150mm x 50mm) | 28″ (710mm) | 2 | |
| d | 4×4 (100mm x 100mm) | 11ft (3350mm) | 1 | round the bottom cnrs |
| d2 | 2×4 (100mm x 50mm) | 20″ (508mm) | 1 | round the bottom ends |
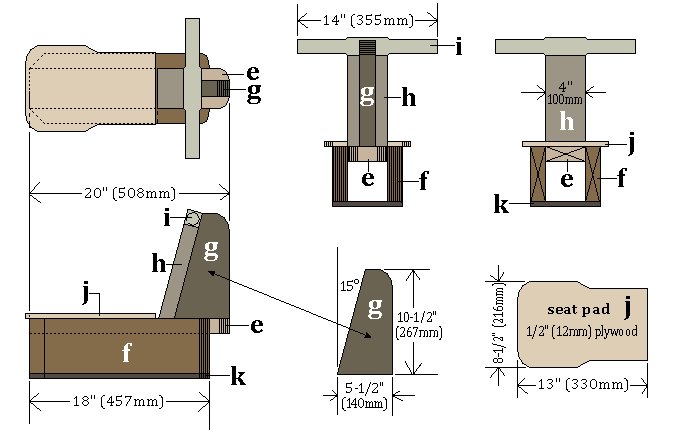
| e | 2×6 (150mm x 50mm) | 20″ (508mm) | 2 | rip to req’d width |
| f | 2×6 (150mm x 50mm) | 18″ (457mm) | 4 | angle and round the ends |
| g | 2×6 (150mm x 50mm) | 10-1/2″ (267mm) | 2 | cut to plan |
| h | 2×6 (150mm x 50mm) | 10″ 254mm | 2 | rip to req’d width |
| i | 2×2 (50mm x 50mm) | 14″ (355mm) | 2 | round the handles |
| j | 1/2″ (12mm) plywood | 13″ (330mm) | 2 | cut to plan |
| k | 1/2″ (12mm) plywood | 18″ (457mm) | 2 | cut to plan |
You will need
Wood
- 4×4 (100mm x 100mm): 1 @ 11ft (3350mm)
- 2×6 (150mm x 50mm): 27ft (8m) in total, allows for a little bit of wastage.
- 2×4 (100mm x 50mm): 4½ft (1.4m) in total, allows for a little bit of wastage.
- 2×2 (50mm x 50mm): 28″ (710mm) in total.
- 1/2″ (12mm) plywood: 1 piece 18″x36″ (460mm x 920mm) allows for a little bit of wastage.
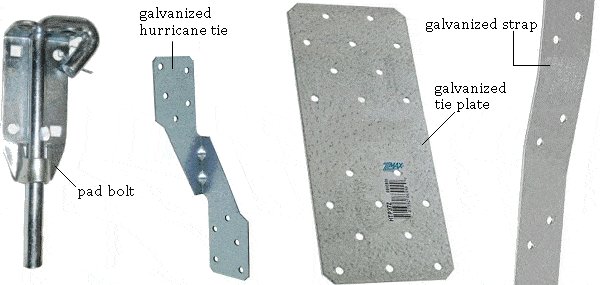
Other stuff
- 1 only 1/2″ (12mm) galvanized bolt 9″ (225mm) long with nut and four washers,
- 2 only pad bolts,
- 3-1/2″ (90mm) wood screws,
- good exterior wood glue,
- 1 only piece of galvanized or copper tube (pipe) 8″ (200mm) long with an inside diameter of 12 mm (1/2″) (optional),
- 2 only 3×7 (75mm x 175mm) galvanized tie plates and suitable nails (optional),
- 3ft (900mm) of galvanized strap and suitable nails (optional),
- 4 only galvanized hurricane ties 4″ (100mm) long, and suitable nails (optional).
Note: The optional items mentioned above and shown in the pictures below depend on how strong you want the seesaw to be.
Wood & wood size explanations
The measurements throughout this project are given in both standard (inches) and metric (millimetres).
The standard measurements (inches) are given first followed by their metric equivalents in brackets.
Use a treated dressed (surfaced, dimensional) wood. Dressed wood will actually be less than the sizes (width, thickness) given in this documentation.
Make any necessary allowances – easy peasy.
How strong to be!

My grandkids tend to be a bit rough-and-tumble when it comes to using the play structures I make for them.
To compensate, I pretty much tie everything together with galvanized metal strap or similar fastenings to ensure minimal give or pull. I like to make sure the things I make are going to be around for a while and are able to take any punishment likely to be dished out to them.
Such fastenings are optional for this project. Good glue and screws alone should suffice in a gentle world, but,… by using the extra fastenings, for little extra cost you can have a much stronger unit. it’s entirely up to you.
Safety notes
Make and use at your own risk.
Many a mishap has occurred on a seesaw so all due care should be taken.
Kids should be supervised by a responsible person (assuming you can find one).
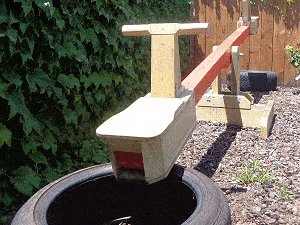
A tire under each end of the seesaw can take away a bit of the jar when one kid jumps off quickly without warning (usually on purpose) while the other’s up in the air.
Baring all that, there’s a lot of fun to be had.
Instructions – The stand
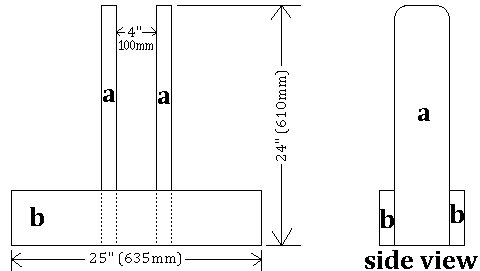
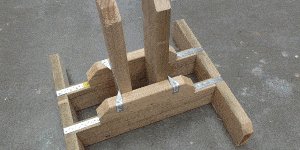
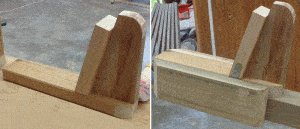
Step 1. Attach base pieces [b] to upright pieces [a]
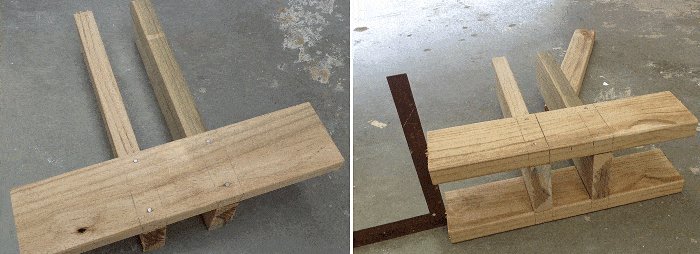
- Pieces [b], 2×6 (150mm x 50mm): Cut 2 pieces @ 25″ (635mm) long.
- Pieces [a], 2×6 (150mm x 50mm): Cut 2 pieces @ 24″ (610mm)long. Round the top cnrs.
- Attach base pieces [b] to the upright pieces [a] with glue and screws. Pre drill the screw holes.
- Refer to the pictures above and the dimension plans below.
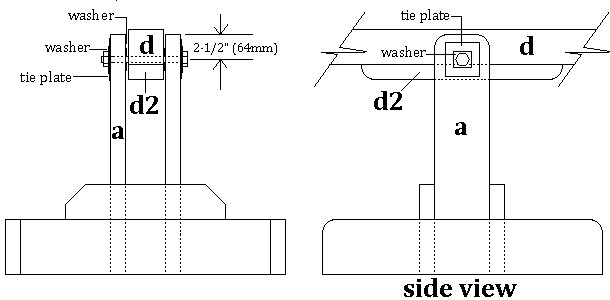
Note: Ensure the gap between the two uprights [a] is wide enough to take the beam [d], a couple of washers, and still have a little bit of play. If the beam is 3-12″ (90mm) wide, and the gap is 4″ (100mm), that will be fine.
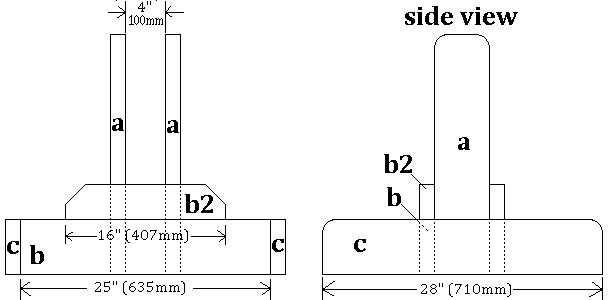
Step 2. Add base pieces [c] and [b2]
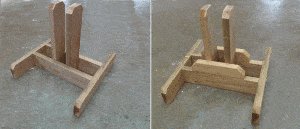
- Pieces [c], 2×6 (150mm x 50mm): Cut 2 pieces @ 28″ (710mm) long. Round the top cnrs.
- Pieces [b2], 2×4 (100mm x 50mm): Cut 2 pieces @ 16″ (407mm) long. Round or angle the top cnrs.
- Fix base pieces [c] to pieces [b] and fix pieces [b2] to the upright pieces [a] with glue and screws. Pre drill the screw holes.
- Refer to the pictures above and the dimension plans below.
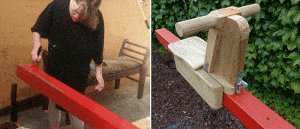
Step 3. Tie it all together (optional)
- For extra strength tie the stand together with galvanized metal strap and ties.
- This is optional. Refer to the paragraph ‘How strong to be!’ on page 8 for an explanation. Also refer to page 7 for types of ties, and refer to the pictures below for placement.
Instructions – The beam
Step 4. Prepare the beam

- Drill a hole in the center of the beam [d] close to the bottom. Note that the beam is upside-down in the photos.
- Make the hole size big enough to take a piece of pipe or tube that has an inside diameter of 1/2″ (12mm). Obviously the overall, outside pipe diameter will be bigger than the inside diameter.
- Stick the pipe or tube into the hole and cut it flush at each end.
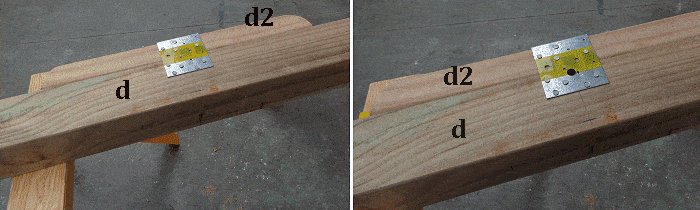
- Glue and screw piece [d2] to the beam [d] as shown in the pictures.
- Cover the hole (one side only) with a piece of 3×3 (75mm x 75mm) galvanized tie plate.
- Drill a 1/2″ (12mm) hole through the tie plate, where the pipe is. You will have to drill from the other side, through the pipe and then the plate.
- Cover the other end of the hole with a similar piece of galvanized tie plate and repeat the drilling procedure.
Step 5. Attach the beam to the Stand
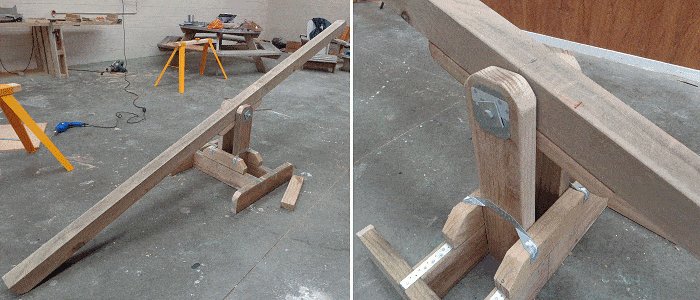
- Drill a 1/2″ (12mm) hole through the uprights [a], 2-1/2″ (64mm) down from the top.
Cover the holes with a galvanized tie plate each side and drill through them. - Align the holes in the beam [d] with the holes in the uprights [a] and commence to thread the bolt.
- Apply washers in the following order as the bolt is being inserted:
- Washer
- Upright [a]
- Washer
- Beam [d]
- Washer
- Upright [a]
- Washer
- Nut
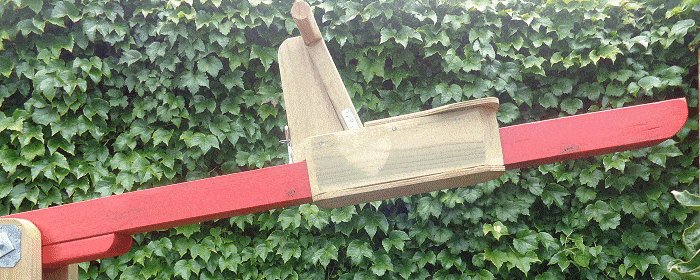
Instructions – the seats
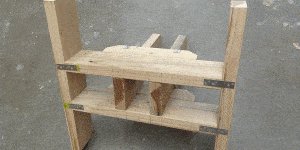
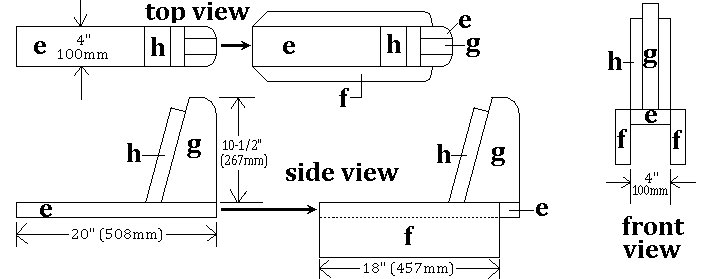
Step 6. Make the seat frames
- Cut all the pieces for the seat frames according to the plans and drawings on this page and on the ‘cutting list’ page. Round, angle, and shape where needed.
When cutting piece [e], ensure it is slightly wider than the beam [d] – very important. - Fix pieces [g] and [h] to piece [e] with glue and screws and apply galvanized strap for extra strength. Make sure the front of piece [g] is flush with the front of piece [e].
- Fix pieces [f] to the sides as per plan and then try it out on the beam [d] to ensure it can slide easily and that pieces [f] run below the bottom of the beam [d].
Step 7. Add the seat handles & pads
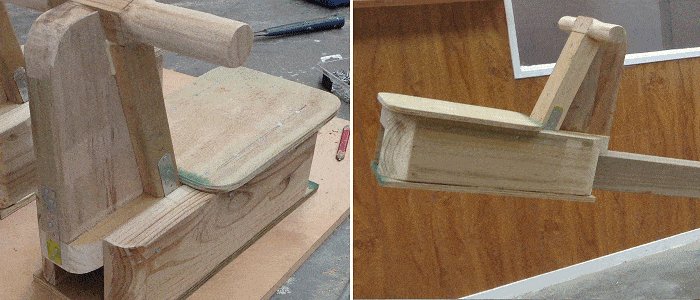
- Cut and shape the top and bottom pads out of 1/2″ (12mm) plywood according to the plans and fix them in place with glue and screws.
- Shape the handles as per plan and fix them in place with glue and screws.
- Slip the seats onto the beam to try them out.
Step 8. A bit of paint if you like, and the pad bolt
- If you want to apply any paint, now is the time to do it.
- Finally, fit a pad bolt to the front of both seats, drill holes every 6″ (150mm) along the seesaw beam to accommodate the pad bolt when it is in lock position, and that’s about it.
Done!


