Contents
Table saw blades tend to get blunt after a few uses, but it does not mean that it is time to get rid of them. Put in some effort and sharpen the table saw blade, and it will be as good as new.
Sharpening has 3 goals:
- make the blade last longer
- maintains the quality of the cut
- improve the performance of the motor.
Material such as delicate wood can even experience burns if cut through a blunt blade.
Identifying A Dull Table Saw Blade
When you need to put more effort into cutting through materials than usual, it means that you need to sharpen the blade.
It is essential to sharpen it as soon as it starts showing signs of dullness. Failing to do so in time can cause irreparable damage to the blade, which means you would have to replace it for good.
Some common symptoms that will tell you it’s when it’s time to sharpen the blade:
- Resistance occurs when cutting through material.
- The blade produces a shrill and sharp noise when it touches the surface of the material.
- The edges of the cut material are not smooth. They may have splinters or chips that are visible upon close inspection.
- The load on the motor increases.
How To Sharpen A Table Saw Blade
Here is a comprehensive guide that can help you sharpen the table saw blade within no time.
What you will need
You will need a diamond saw blade that you will mount on your table saw. You are going to use this blade to sharpen the saw blade. I you don’t have one, you can get one of these:


Safety Precautions
Before doing anything else, you must switch off and unplug the table saw.
The next step is to get safety gear to avoid injury or harm:
- Safety goggles prevent small particles from entering the eye area.
- A pair of gloves prevent cuts and bruises.
- A pair of earplugs, or safety earmuffs to ease the noise during the sharpening process.
- A dust mask respirator, to protect the inhalation of small metal particles.
Remove The Blade
Trying to sharpen the blade while it is still placed in the saw is the biggest mistake one can make. If the blade is inside the saw, there is no way to secure it or restrict its movement. Despite the fact that the blade is dull, it still can cause harm and serious injuries.
To release the blade from the saw, look for the blade release switch. If your saw does not have one, it means you need to loosen the arbor nut with a wrench to release it.
Secure The Diamond Blade
Now that you have moved the blade, you need to replace it by the diamond blade that you will use to sharpen it.
If there is a blade switch, use it to insert and hold the diamond blade in place. Otherwise, use the nut to tighten the diamond blade in place. In case you use the nut, make sure that it is neither too tight nor too loose. A tight nut can bend the blade whereas a loose one is unable to secure it in place.
Align The Teeth
To make sure you have sharpened every tooth of the blade, I recommend you mark the tooth you start working on. You can use any marker or tape.
If all the teeth of your blade are pointing towards the same direction, then you can sharpen it in one pass. But if they point towards both directions, then you need to perform one pass for each direction.
Filling The Teeth
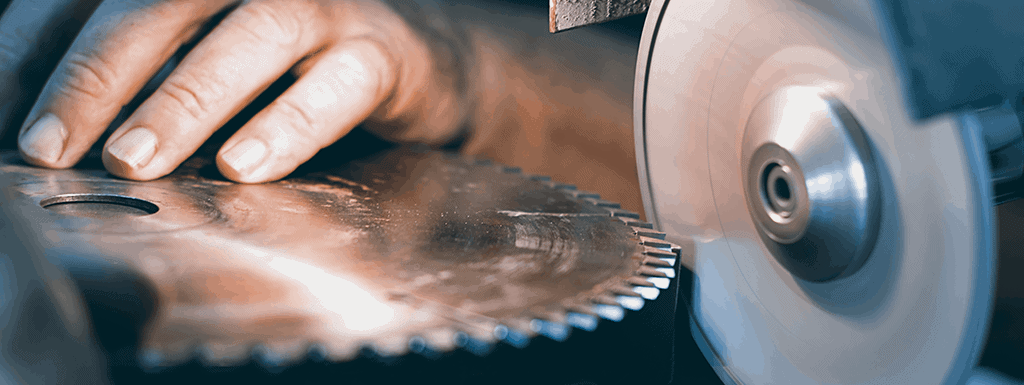
Now, plug the saw in, and switch it on. The diamond blade will start rotating. Bring the marked teeth of the saw blade close to the diamond blade and touch it against the diamond blade.
When doing so, ensure that the inner edge of the blade is in contact with the diamond blade. This is the part of the blade that has carbide layering responsible for the bluntness of the blade.
Now move on to the next tooth and repeat the process until you have done them all.
Here is a nice video that shows this process:
Removing The Diamond Blade
When all the teeth of the saw blade are sharp enough, and their edges are clean, remove the diamond blade from the saw.
Once the blade is out of the saw, make sure that you clean it before putting it away. This removes the small metal particles and gets rid of the carbide dust on the blade so that it does not tarnish or rust.
Install The Saw Blade
Now put the saw blade back, and it is time to check if the blade has been sharpened properly. After installing the saw blade, plug the saw in and turn it ON.
Cut through any material. It should cut through without much effort or resistance. Moreover, the edges of the cut must be smooth and regular. This means that the blade has been sharpened properly.
Maintenance Of A Table Saw Blade
There are different types of table saw blades that are readily available in the market. You can distinguish them based on their shape and the level of their grind. But whatever blade you choose, if it is not maintained and cared for, you will not be able to extend its lifestyle, and it would need replacement.
Make sure that the blade is cleaned and sharpened properly. Also, keep an eye on the edges of the blades to ensure that no sign of rusting or carbide layering is present inside the edges and crevices. These small things may seem insignificant, but, they impact the usability and quality of the blade a lot.


Vou tentar usar este método de a fiação.
I can now sharpen my saw on my own. Thanks a lot! Keep it coming!
Great thank you so much, I’ve always struggled with effectively sharpening my blade.
DO NOT DO THIS! This person is a total moron. As I will quickly outline.
1. This is extremely dangerous. Diamond blades at high speed can grind a digit off in a couple of seconds. Further, if the blade skips even once, it can shoot at you hard enough to impale that saw blade halfway through your stomach like a bad horror movie.
2. Using the wrong type of diamond material. This blade is meant for cutting concrete or tile. It will leave your blade super rough and it will need sharpening again VERY soon.
3. This doesn’t properly account for the kerf of the blade, and each tooth is being cut at the wrong angle. He is destroying his blade little by little.
4. The fast speed of the diamond blade is removing material very fast. Rather than just sharpening, he is grinding off a lot of good material.
5. No respirator. Carbide dust can destroy your lungs.
DO NOT FOLLOW THIS TUTORIAL OF STUPIDITY!!!
It would be better to build a jig which sits in the rails of your table saw with a pivot point in the proper location so the angle of your grind is the same every time.