Contents
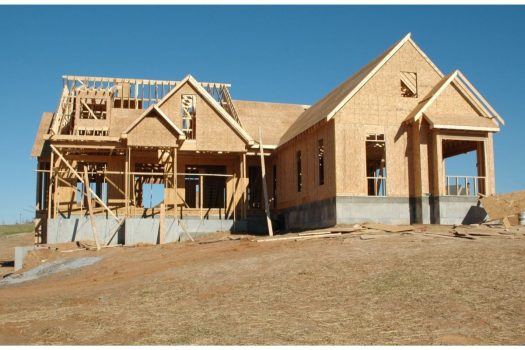
Constructing a partition wall or a stud wall that splits an indoor space without serious structural remodeling is an excellent introduction to a simple building. This job employs the same principles and parts utilized in the building of any framework residence.
Even though most of the work won’t be visible after the construction, if you take shortcuts, it will be evident and bring difficulty, so always ensure you complete the job properly.
Starting the framing process with excellent products and materials is wise, along with employing proven techniques. Tasks such as achieving smooth wall surfaces, countertops that fit entirely, and doors that turn without sticking are crucial for a successful job. Now let’s see how to build a wall frame.
Gather Your tools
First, you should gather all the tools you will need to frame your wall. Typically, you will need the following:
- Tape measure
- Sledgehammer
- Level
- Plumb bob
- Chalk line
- Circular saw
- Hammer
Identify the members
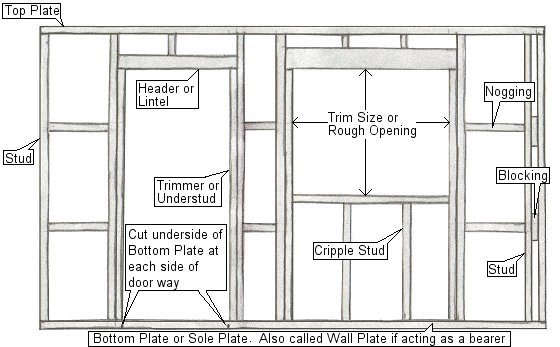
Wall Framing, except headers, is usually of 100×50 (2×4) stock for perimeter or bearing walls. Internal non-load bearing walls can be of 75×50 (3×2) stock.
- Partly cut the underside of the Bottom Plate at each side of the doorway before standing the wall frame up. This is to enable the Bottom Plate in the doorway to be cut out (from the top side) when the Wall Frame has been squared, straightened, and fixed in place.
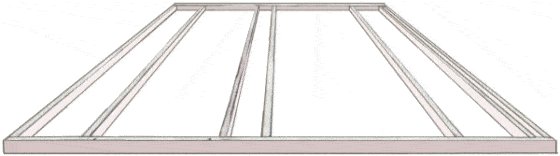
Mark the Top and Bottom Plates for Studs
- First, cut all the Wall Plates in place, top and bottom, and place them on the floor or surface where they are intended to go to ensure they all fit according to plan.
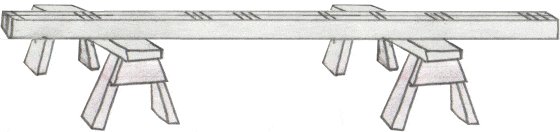
- Take the top and bottom Wall Plates of one wall, temporary nail, or clamp them together and place them on a couple of saw stools for marking Stud and Trimmer Stud positions.
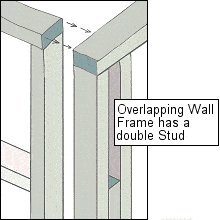
- The overlapping Wall Frame has a double Stud at the overlapping end separated by blocking pieces that are usually the same thickness as the Studs.
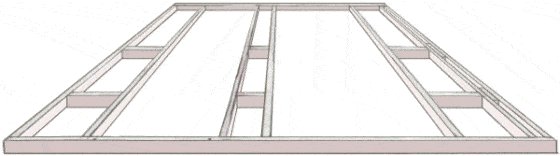
Place and fix the Studs
- Lay and fix the Studs in place between the Top and Bottom Plates. If the Studs are not straight, lay with the bow upwards.
- The length of the Stud should be the required ceiling height less the thickness of the Top and Bottom Plates as well as the thickness of the ceiling lining as well as a bit to play with, say 10mm (3/8”).
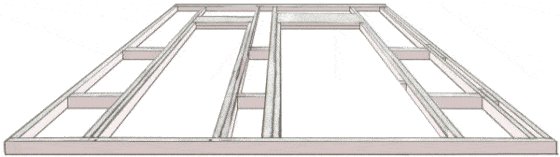
Place and fix the Noggings
- Fix the Noggings and Blocking in place between the Studs. At least one row of Noggings can help minimize twisting and warping.
Place and fix the Trimmer Studs and Headers
- Lay and fix the Trimmer Studs and Headers in place. The Header is usually two 50 (2”) thick pieces of lumber nailed together to form one 100 (4”) thick piece. The width of the Header depends on the required span.
- The width and height of the Trim size (Rough opening) should be slightly larger than the actual window or door finished frame size, by at least 10mm (3/8”).
Place and Fix the Cripple Studs
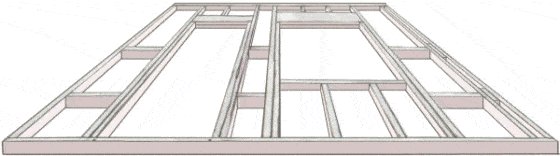
- Just the Cripple Studs to go, which are the short Studs between the Header / Lintel and a Top Plate or between the sill and Bottom Plate.
- The Wall Frame is now ready to be squared and lifted into place. The Wall Frame is square when the Wall Plates are straight, and the distance between the opposing diagonals is equal.
Put Up The Wall
Once the parts have been nailed together, you can attempt to put the wall into position and check that it aligns. This is a two-person job, and you should get assistance to elevate the wall to the correct position.
If the fit is limited, find a hammer or large tool and hammer the side of the sole plate into the right place. If the wall runs vertically to ceiling connections, drill another nail through the leading plate into each joist.
If the wall runs directly below a joist, nail right into it, with the leading plate in between the joists.
Check And Secure The Wall
Before drilling, you must check that all the edges are precisely vertical. Adjust the level and use the hammer to set the wall in place if modifications are needed. After that, please use the level to recheck it is perfectly straight.
If you discover any part of the wall that isn’t snug, slide slim wood shims under the single plate at the stud areas to close the void on top.
Secure the single plate by drilling one nail into each joist on the floor. If the wall is aligned with a joist, drill another nail through the plates on each stud bay and into the floor.
Drill in 16d studs into the ends every 13-14 inches of the abutting wall. Cut the sole plate out of the door when the wall is held securely in place using a handsaw. Ensure it is flush with the jack studs and avoid sawing the subfloor.
Blocking
Blocking is a technique that adds extra strength to partition walls and helps studs remain straight. This is especially important for any walls that are larger than 8 feet (2.44 m) tall.
Herringbone blocking is so-called as a result of its distinct zigzag pattern. This type of blocking was often used in older houses where king studs often ran over several stories and were used to anchor old-fashioned sinks.
To achieve this, install the blocking once the wall is in position. You can then make parallel cuts into 2×4 scraps and ensure that the ends can fit together against the stud faces.
The next step is to nail through the stud faces straight into the blocking. The pieces then rotate 180 degrees from the first until they all line up. This continues until all the bays are fully up.
Final Thoughts
Now you know how to build a wall! To make things easier for yourself, we recommend taking all your measurements and gathering all your tools together in one place. After that, it’s a simple case of following the steps above, and you’ll be able to create a partition/frame wall successfully.


