Contents
So… You would like to replace your existing window with a ranch slider or with a set of french doors. This article contains eazy to follow, step-by-step instructions to help you along the way, along with estimated time involved.
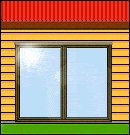
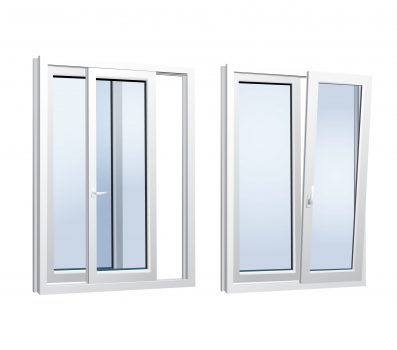
This section shows how to take out an existing window and replace it with an aluminum ranch slider. A 2400mm (8ft) wide aluminum ranch slider has been chosen for this tutorial in order to be more precise with detail, but the same principals apply should you wish to install timber French doors or any other type of door. To simplify the job, the width of the door should be the same width as the window it is replacing.
Getting to know the structure around the window
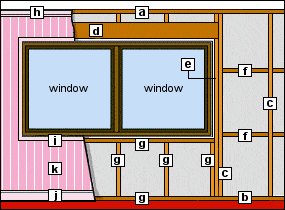
a – Top plate: Usually 100×50 (2×4)
b – Bottom plate: Usually 100×50 (2×4)
c – Studs: Usually 100×50 (2×4)
d – Beam or Lintel: Size is determined by length. Usually 100mm (4″) wide and 25mm (1″) thickness per 300mm (12″) of length. For example, a beam 2400mm (8ft) long would need to be 200×100 (4×8).
e – Understud: Supports the beam. Usually 100×50 (2×4)
f – Noggings (blockings): Usually 100×50 (2×4)
g – Frame underneath the window. Usually 100×50 (2×4). This is to be removed.
h – Scotia or cornice: Decorative moulding round the top of the wall.
i – Architrave: Moulding round the window.
j – Skirting: Moulding round the bottom of internal wall.
k – Wall lining: Usually plaster board.
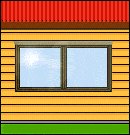
Measuring up for the ranch slider
- A new ranch slider may take between one and four weeks to make so plan for it to be on site before the existing window is removed.
- Most ranch slider or french door manufacturers will come out to the site and give a free measure and quote service. This is the best option, however, if you want to measure up yourself, this is how to go about it.
- To measure for the new ranch slider, first take the architraves off the existing window (the internal mouldings around the window jambs) so the timber frame around the window can be seen.
- Measure from the floor to the underside of the lintel. This is the rough trim height.
- Measure from side frame (understud) to side frame (understud). This is the rough trim width.
- Deduct 10mm (3/8″) off each of the above measurements to get the ‘box’ size, or the exact size of the overall height and width of the ranch slider jamb liners (also called reveals).
- For example: If the trim height (from floor to lintel) is 2010mm (80 3/8″) and the trim width (from frame to frame) is 2410mm (96 3/8″), then the box size, or exact overall size of the ranch slider jamb liners will be 2000mm (80″) high and 2400mm (96″) wide.
- The ranch slider manufactures will also want to know the overall width of the wall to establish jamb liner width. For example, weather board 25mm (1″) + framing 90mm (3 1/2″) + internal lining 10mm (3/8″) = overall wall thickness 125mm (4 7/8″)
Removing the window
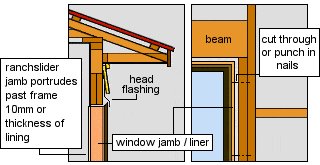
- EXTERIOR: Take off any scribers or timber facings that might be fixed to or against the window and the weather boards. Do not remove the flashing at the head of the window as can be re-used for the ranch slider. (see drawing below)
- INTERIOR: Take down any curtains, curtain rails and take off the surrounding architraves.
- Take off the wall lining below the window (usually plasterboard).
- The nails fixing the window to the frame should now be visible between the window jamb liner and the surrounding frame. Pry the window jamb away from the frame with a lever where needed until the nails become accessible. Cut through the nails using a hacksaw blade or an old handsaw. Alternatively, punch the nails through the jamb liner with a narrow nail set.
- When all nails have been cut or punched, commence removing the window by first pushing out at the bottom and then lowering it to enable the top of the window to slip below the exterior head flashing.
Trim and prepare the wall for the ranch slider
- Remove the weather boards below the window frame by cutting them vertically at each end of the opening with a circular saw and prising the boards off with a lever.
- Remove all framing below the window frame. The bottom plate will have to be cut at each end of the opening with a handsaw.
Fixing the ranch slider in place
- Take the sliding door section out the ranch slider before installing so as to make the ranch slider lighter and more maneuverable. This is easily done by simply lifting the door upwards until the wheels at the bottom clear the tracks and then by lifting the door out.
- Lean the ranch slider against the opening. (It will not fall through as the aluminum flange on the outside of the ranch slider is bigger than the opening).
- Slide the ranch slider up so the top is against the weather boards and able to slot under the head flashing. Push the bottom of the ranch slider in. The aluminum flange around the ranch slider should now be hard against the weather boards, and if the measurements are right, the jamb liners (internal part of the ranch slider) should be protruding inside and past the framework by the thickness of the wall lining. (usually 10mm, the standard thickness of plasterboard). See diagram above.
- Proceed to fix the ranch slider in place. Make the bottom jamb (on the floor) level and straight and protruding inside, past the frame by 10mm (3/8″) (the thickness of the internal lining). Use packers if needed and nail to floor but do not nail all the way in at this stage.
- Nail the sides in the same way as the bottom, checking the sides are plumb and straight and protruding inside, past the frame by 10mm (3/8″).
- Put the sliding door back into the ranch slider.
- Check to see that the door slides even and square, make any necessary adjustments and finish nailing off.
Finishing lines
- When the ranch slider is in place and working well, Fix the architraves inside and scribers against the aluminum flange, outside.
Other jobs that may need doing
(1) Nail hole filling and painting
(2) In some cases, there might be a power point under the existing window. This will need to be removed or re-positioned before the ranch slider installation.
(3) In some cases, there might be part of a wall brace under the existing window. This will need to be re-positioned before the ranch slider installation.
Materials and time
Time: approx. two days.
| Item | Description |
| Finishing lines | architrave and scriber |
| Misc | nails etc |
| Aluminum ranch slider | Std 2400w x 2000h |
Note 1: In this example, a standard aluminum ranch slider is used. The same principle can be applied to timber joinery or any other type of door.
Note 2:In this example, a weather board wall is used. The same principle can be applied to any other type of wall such as brick or block. Different cutting gear will be required but all masonry cutting gear can be hired from most hire centers in most areas.


