Contents
Ready to start working on a new project? Want to try your hand at making a drawer?
Don’t be discouraged by all the intricate and complex joinery on the web. Making your own DIY drawer is quick and straightforward, and you’ll only need a few tools to get started.
So, dig out your equipment, get a cup of coffee to hand, and let us take you through the easiest way to build a durable, quick DIY drawer. No mess, no fuss.
What You’ll Need
Here’s everything you’ll need to start building your drawer:
Tools
- Table or circular saw
- Miter or circular saw
- Router (optional)
- Hammer or brad nailer
- Pocket hole jig
Materials
- Wood glue
- Brad or finish nails (¾”)
- Pocket hole screws (1-¼”)
- Plywood (¼”)
- Plywood or Solid Wood (¾”)
- Drawer sliders
Figure Out The Height

First up, you’ll need to decide how high your drawers will be. For example, if you’re building them for an existing table or dresser, measure the opening for the drawer and take off between 1 to 1-½” for the most accurate measurement.
Now that you’ve got an exact measurement cut your plywood strips to suit the size.
Cut Sides to Size
Now, you’ll need to trim the sides of the drawer to the correct size. To ensure you’re cutting to the right size, measure the drawer sliders you’re using for your project. For example, if using 15” sliders, cut your sides to that exact measurement. Then, you can trim your sides with a miter saw.
Measure and Cut Fronts and Backs
You’ll now need to measure the width of your drawers and cut the fronts and backs to size.
Remember: the fronts and backs of your drawers sit by the sides, and you’ll need to factor these into your measurements too. Measuring and cutting to size here can be tricky. If you’re using a miter saw, we recommend using your stop block and positioning it to the full width of the drawer.
Now, use two rough pieces of plywood to space out the block. These will be the same thickness as your drawers. Once you’ve done this, you’ll need to align your front and back drawer parts with the spacers and cut them to the correct length.
Quick Tip
If you don’t want to use a stop block, place the spacers at the end of your board and factor them in when you’re marking your cut line. You’ll get an accurate width if you include them and cut them here. Then you’ll need to measure the complete width of your drawer.
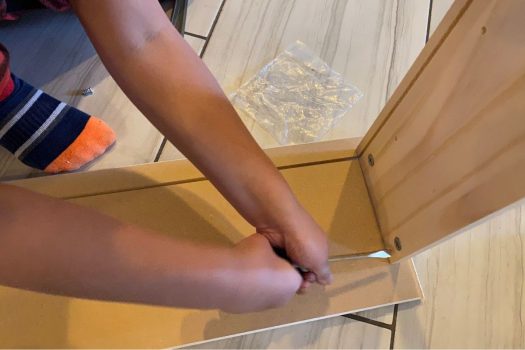
Drill and Assemble
Now, you’ll need to drill your pocket holes and begin assembling your DIY drawer box. This step is necessary to join the front and back of your drawer together. You’ll need your pocket hole jig for this bit.
Now, use your hole jig to drill three small holes into the outer ends of your drawers. Once this is done, clamp the sides but position the drawers so the pocket holes sit outwards. Finally, secure the pieces with your pocket hole screws.
Install Drawer Bottoms
It’s almost time to install your drawer bottoms! First off, you’ll need to do some measuring and cutting. Thankfully, this is the easiest step of them all.
Start by measuring the depth and width of your drawer. This should match the measurements you made earlier. Now, cut one of your ¼” to your measurements and apply a small amount of flue to the bottom edge of your drawer box. You’ll only need a small amount to hold it in place, so don’t go too crazy.
Once you’ve applied the glue, nail the bottom to your drawers with your ¾” brad nails. If you don’t want to use brad nails, you can use finish nails instead and fix them in with a hammer. Make sure to position your nails around ½” from the outer edge.
Quick Tip
If you don’t like the appearance of the plywood on your drawer, you can use a sander to even out the edges. This will reduce the visibility of the plywood from above.
Drawer Knobs, Pulls, and Handles
You’ll also need to think about what drawer knobs, pulls, or handles you want on your drawer. These features can vary dramatically in price, and you’ll need to pick something that complements existing drawers (if you’ve made a drawer for a current unit).
If this proves too difficult, you can always replace the handles, knobs, or pulls on your drawers, so they match. If you want to do this, ensure the screws are easily accessible from the inside of the drawers.
All knobs, handles, and pulls are easy to install and will require minimal equipment. In most cases, you’ll just need a screwdriver and a screw. Just make sure you’re happy that your choice complements the aesthetic of your room, and you’re good to go!
The Bottom Line
Whether you’re experienced or not, we hope we’ve shown you that making your own DIY drawer is super simple. All you need is the right tools and the patience to make plenty of measurements!
So, whether you’re replacing a broken drawer (and want to save the expense of buying a new one), or you’re simply trying your hand at a new project, grab your plywood and saws and get to work. You’ll be finished in no time!


