Contents
When bearded dragons are fully grown, they can measure up to two feet long. This large size makes it tricky to find a commercial cage to house your beardie comfortably.
However, you can always build your own! Building a bearded dragon cage will not cost you a lot of money, and it will still be a good-looking and sizable wooden cage for your beardie.
All you need to get started is an old wooden box or a container and then attach a few other things to it.
In this article, we are going to look at the steps you need to take to build a bearded dragon cage out of wood.
We will also go through some tips and tricks on how to make your pet’s enclosure mimic their natural habitat, so they stay happy and healthy throughout the day. Let’s jump in.
Ideal Size For Bearded Dragon Cage
You will need a cage that is big enough to allow your beardie to exercise, and it needs to be longer than it is wide. The dimensions should measure 48 x 34 x 24 inches for an adult bearded dragon to be able to move around freely.
You will also be able to have a thermal gradient with this size to vary the temperature as your beardie needs.
How To Build The Cage

You will need:
- A wooden container or box
- Insulation board
- Mesh
- Table saw
- Sandpaper
- Acrylic sheets
- Drill
- Hard Glue
- Grout
- Hinges/ screws
- Non-toxic paint and spray foam (both optional)
- Cleaning The Box
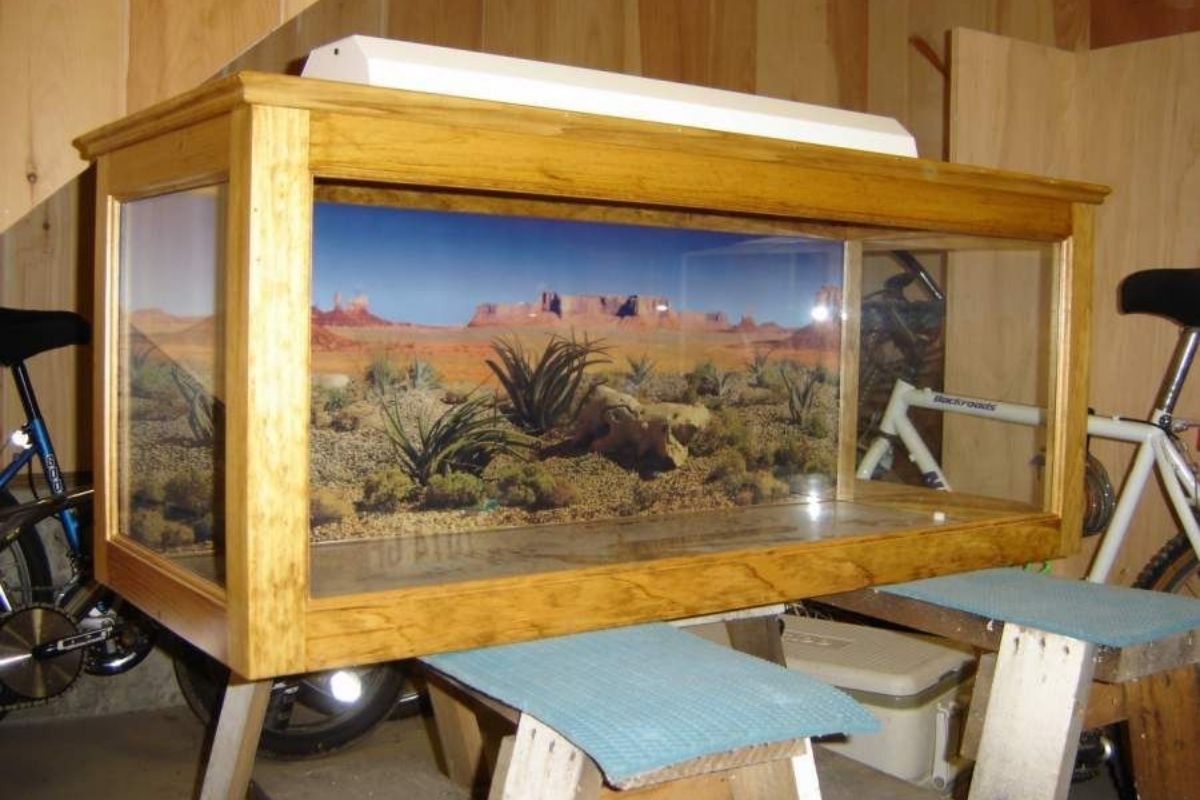
You will first need to prepare the wooden container, whether this is an old cabinet, an old dresser, or whatever other wooden box you have chosen.
All you will need is an old screwdriver and a hammer or tool that can remove the inside pieces before sanding down any rougher or sharp edges with sandpaper. You should ensure it is smooth and there is nothing left that could hurt your bearded dragon.
- Plan The Interior and Cut the Insulation Boards
You will now need to decide whether you want to use the container or box opening for the top or the front of the enclosure. You can picture the cage’s interior and perhaps sketch it out to give you a clearer idea.
Once you have this in mind, you need to cut and install the insulation board in three steps.
- Measure the boards for insulation
- Use a table saw to cut the boards
- Use hard glue to apply to the board and install them at the base or side of the enclosure.
- Apply spray foam, and this should give the cage a rugged look. Spray foam makes the cage more compact and improves its longevity.
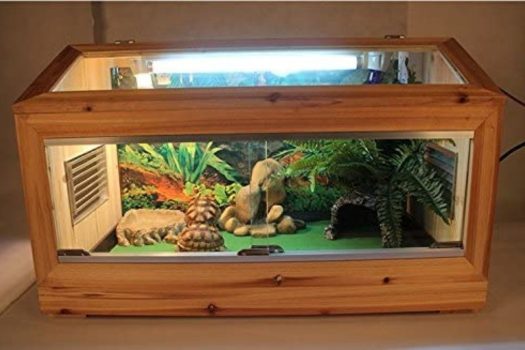
3. Layering The Cage With Tile Grout and Paint
The next step is to add a few layers to grout the bottom and the interior sides. This gives the insulation a natural look, but you can use non-toxic paint on top of this.
You will need to apply a layer of grout before waiting for it to set. You can then add another layer but ensure you follow the manufacturer’s instructions. Follow this by applying two layers of paint. Before going any further, allow the case to dry.
4. Installing The Top
You now need to install and secure the top of this cage. You will have two options here, either using the top for access or as a way of regulating temperature. Using it to regulate temperature is great if you prefer access at the front, and you will just need to install mesh.
However, if you decide to use the top for access instead, you will need to create a hole big enough for your beardie to easily get in and out of the cage. You will need to add a latch to secure the top access and stop your pet from escaping and attach the hinges to your acrylic sheet. Use screws to install it on the top.
You can apply non-toxic paint to the cage’s exterior and although you can choose whichever paint you want, try to stay with browns and greens to mimic the natural colors in the wild.
7. Finishing
Finally, it is time to decorate. You can add all the decorations you want and let your creativity shine through! However, remember we are mimicking their natural environment, so you must keep your beardie’s needs in mind!
How To Make Your Beardie Comfortable
- Add two bowls: one for food and the other for water. Shallow dishes work best.
- Add a heat lamp for an external heat source to help regulate your beardie’s body temperature and provide lighting.
- UVB lights in the form of a basking lamp should be installed to maintain the beardie’s calcium levels.
- Remember to add a thermometer in the basking spot and in the colder area to monitor the temperature.
- Add a thermostat to eliminate constant temperature checks, which will regulate the cage’s temperature.
- For furnishing, you can add logs, low branches, rocks, hammocks, and hiding spots. This will encourage your beardier to stay active and mimic the natural habitat.
- If you do not want a bare floor, add substrates such as a reptile carpet or newspapers but do not add gravel, sand, or loose substrate in case of impaction.
Final Thoughts
We hope you have enjoyed this article on building a bearded dragon cage out of wood and realize it’s easier than you think.
Remember, once you have your basic model of the right dimensions, follow the tips and tricks to make your beardie comfortable and mimic the natural environment, which should keep your pet happy for a very long time!


