Contents
Introduction
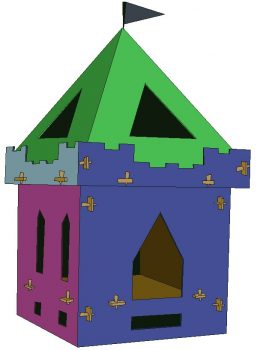
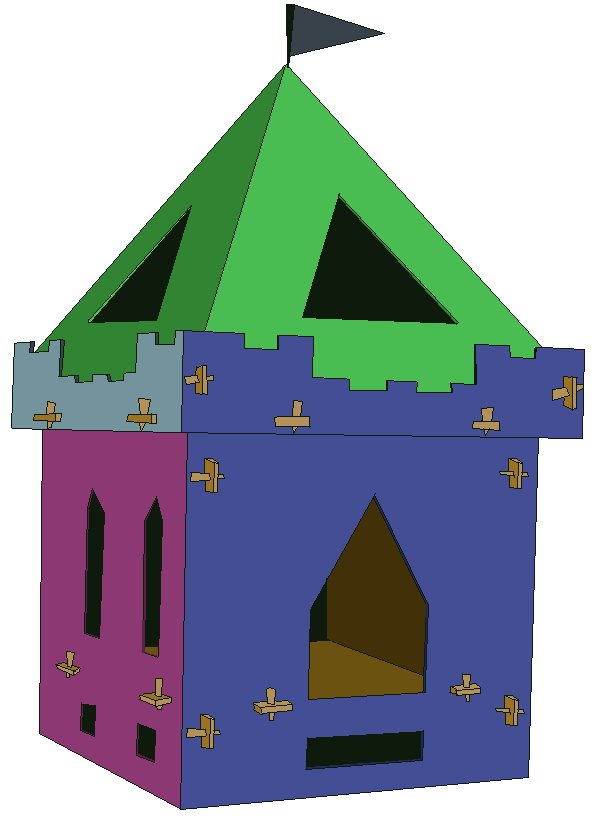
This Kid’s castle playhouse is designed to be easily assembled and disassembled, allowing it to be put up at will then taken down and stored in a narrow space when the kids have finished playing in it at the day’s end.
This Kid’s castle playhouse is securely held together using a ‘lug and plug system’.
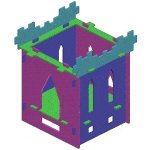
The whole structure is made up of interlocking panels where rectangular projecting tongues (lugs) on some panels fit through corresponding slots (lug holes) in other panels.
Pegs (plugs) are then inserted into holes in the projecting tongues (lugs) wedging and locking the panels firmly together.
There is no need for any nails, screws or glue.
18mm (3/4″) thick plywood and 18mm (3/4″) diameter wood dowel are the only materials required to make the castle.
The whole project can be cut from four and a half sheets of 1200mm x 2400mm (4’X8′) plywood and a 3000mm (10ft) length of 18mm (3/4″) diameter wood dowel.
Construction is simply a matter of cutting all the pieces to plan and just fitting them together. The whole assembly process only takes about 10 minutes.
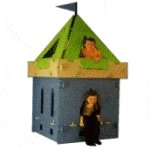
The castle when fully assembled with roof stands 2300mm (92″) high, however the roof is optional and without the roof the overall height is 1400mm (56″). The castle covers an area of 1200mm (48″) square.
The designer
Karel (plum house designs) originally designed and built this Kid’s Castle Playhouse some years ago for his niece and nephew.
“The idea was to be able to assemble the castle when my niece and nephew visited and then disassemble it again for storage when they left. Hence the ‘plug and lug’ system. The pieces stacked against a wall in the garage take up very little space – 1200mm x 1200mm x 300mm (4’x4’x1′).”
Karel designs and sells very affordable unconventional house plans. His website is www.plumdesign.ca/
We give thanks to plum house designs for allowing us to use their design, plans and images in the BuildEazy website.
In this article there are two versions of the plans – imperial (ft and ins) and metric (millimeters). They are clearly defined.
Tools and materials – Instructions
Overview

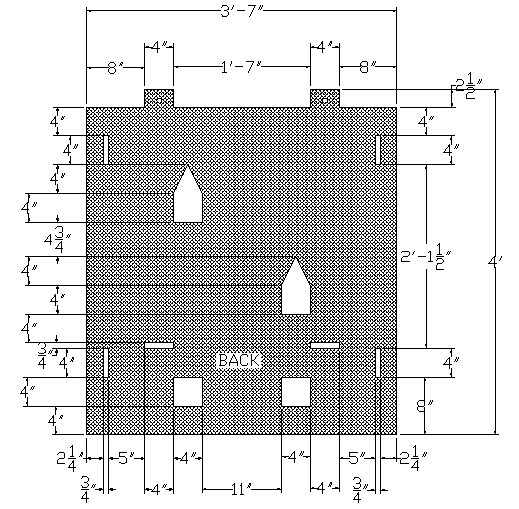
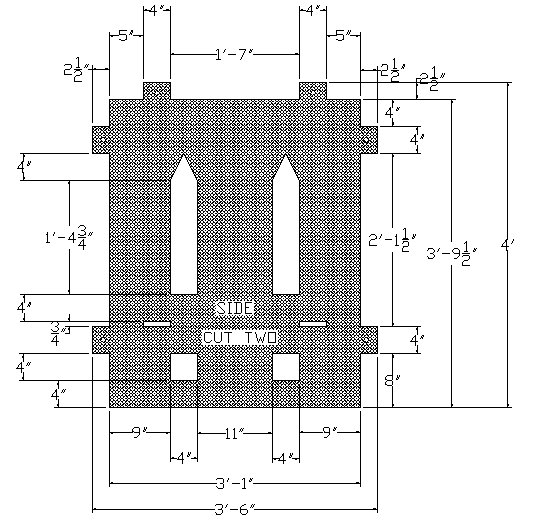
The making of this kid’s castle playhouse is really just a matter of cutting all the floor, wall, eave, parapet and roof panels to the sizes and shapes that are given in the plans and then just fitting them together.
Tools and materials
- The minimum tools required to do this project are pencil, measuring tape, hand saw, circular power saw, jig saw, electric drill with drill bit slightly larger than the jig saw blade, and a belt sander.
- You will need four and a half 1200mm x 2400mm (4’X8′) sheets of 18mm (3/4″) thick plywood and a 3000mm (10ft) length of 18mm (3/4″) diameter wood dowel.
Instructions
- Read through this article before commencing to get an understanding of the project.
- Mark out the profiles (shapes) of all the panels on the plywood sheets according to the plans.

- Cut out the panels – some will have jutting-out pieces (lugs) and some will have slots (lug holes). The perimeter of the panels can be cut using a circular saw and handsaw and the slots (lug holes) can be cut with a jigsaw. A hole will first need to be drilled in one or more corners of each slot (lug hole) to allow for the jigsaw blade.
- Drill the holes in the lugs (the jutting-out pieces on the panels) and cut and taper the dowel to make the plugs. Refer to the Lug and plug detail page for Lug hole placement, measurements and plug cutting tips.
Tip: Experiment with the plug and lug system before proceeding – cut inside penciled layout lines for lugs and outside penciled lines for lug holes to ensure lugs fit comfortably thru lug holes.
- Once all the panels have been cut, the holes drilled and the plugs tapered and cut to length, it is just a matter of fitting everything together.
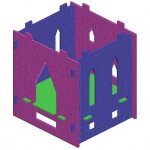
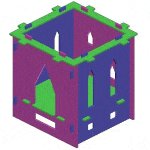
The images in this page show the order of assembly. - Some of the panels have jutting-out pieces called ‘lugs’ and some of the panels have slots called ‘lug holes’.
- The lugs have ‘plug’ holes.
- The lugs go into the slots and are held firmly in place once the plugs (tapered dowel pegs) have been inserted in the ‘plug’ holes.
- The castle playhouse should only take about 10 minutes to assemble and 8 minutes to disassemble.
- Castles are festive, so a bit of bright paint should not go amiss. For kid’s parties, fill the castle with balloons of various shapes and sizes, sit back and watch the fun!
Variations:
- The castle without the roof is still fully functional and is an option that requires less plywood and less work.
- Door and window openings can be different shapes limited only by your imagination.
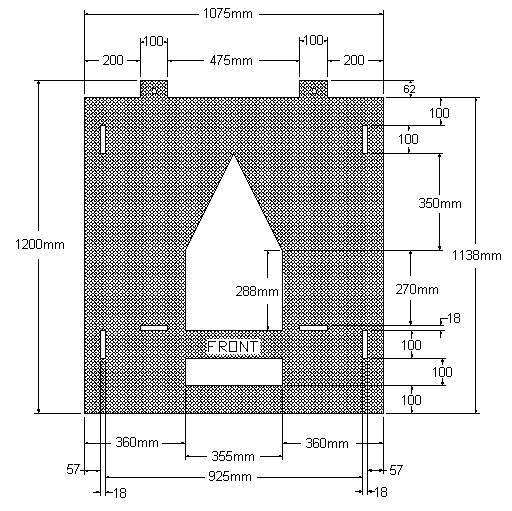
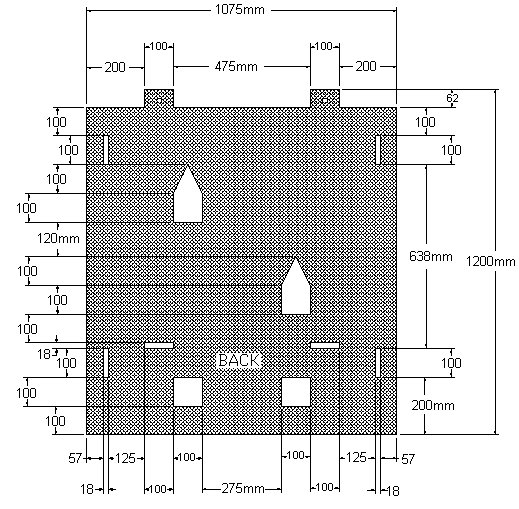
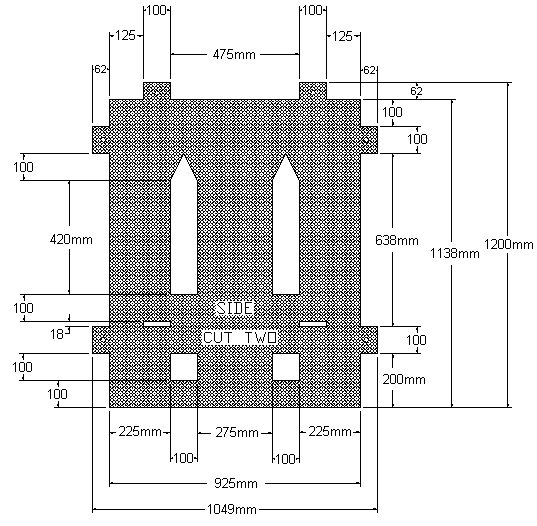
Castle wall plans – ft and inches

Castle wall plans – metric
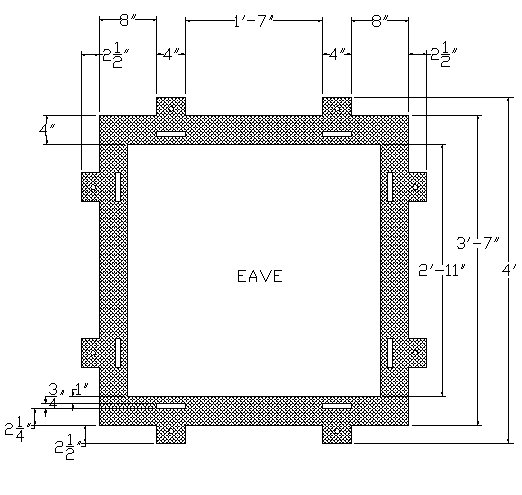
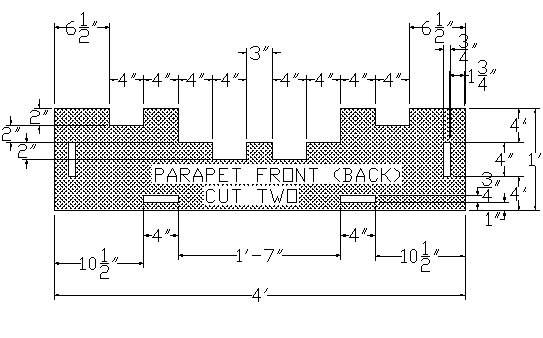
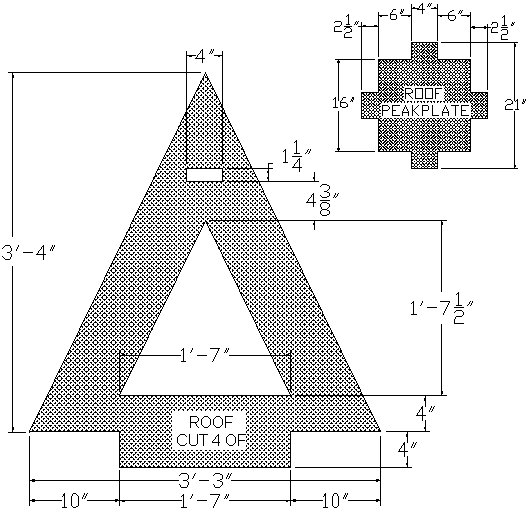
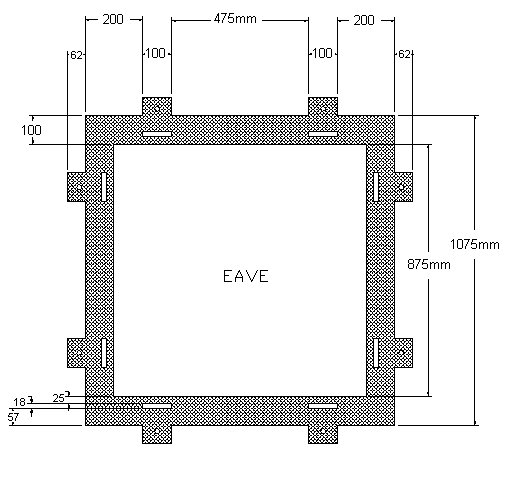
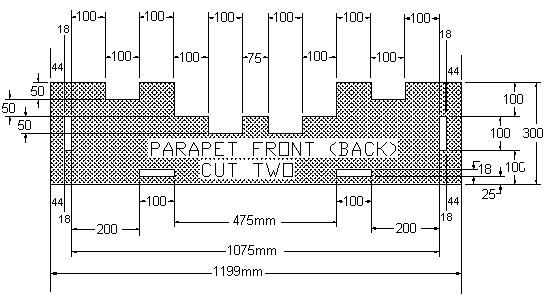
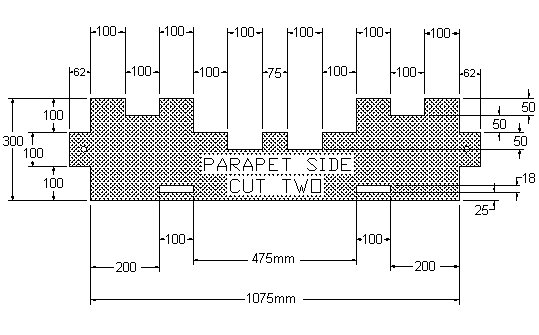
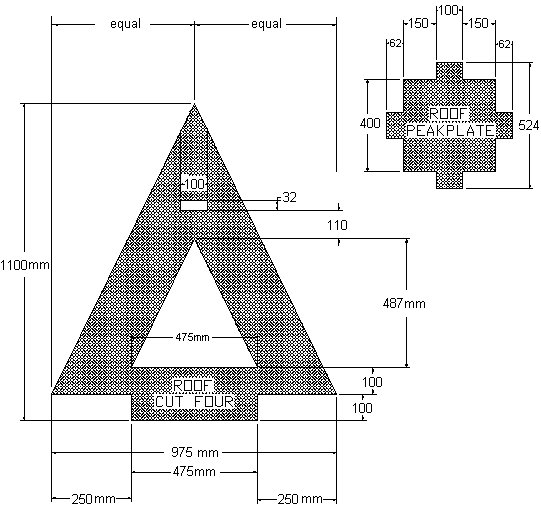
Floor, eaves, parapet, roof plans – ft and inches
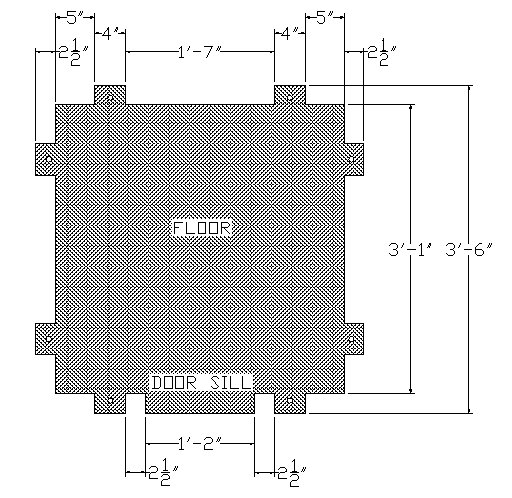

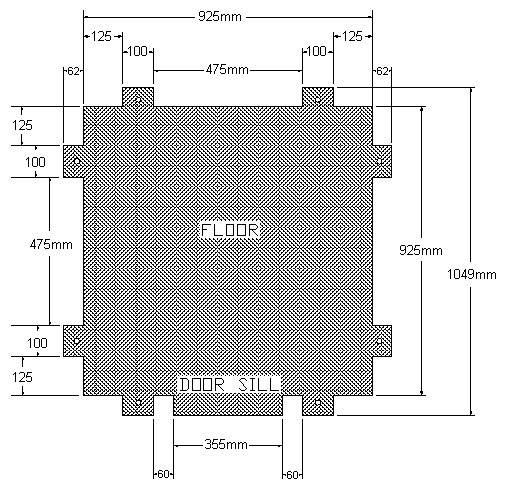
Floor, eaves, parapet, roof plans – metric
Lug and plug system detail
Below are the plans for making a lug template including the plug hole placement. There is also a detail plan of the plugs giving necessary dimensions followed by a ‘tip’ on how to taper the plugs.
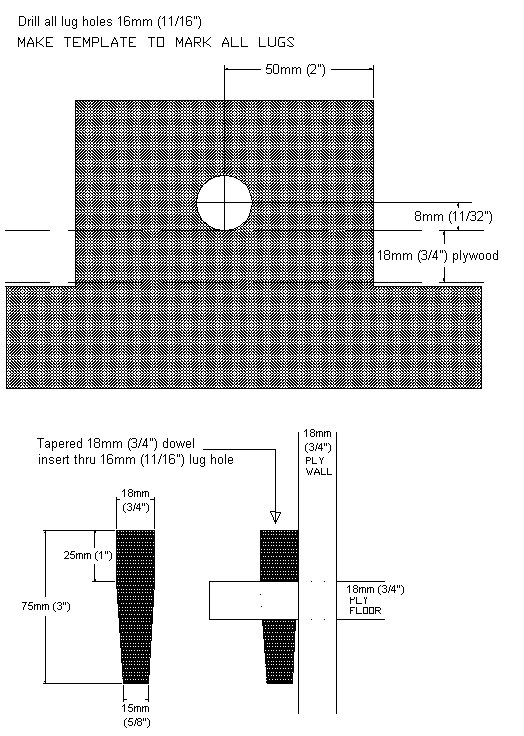
Tip: Making the plugs
- Make the plugs out of 18mm (3/4″) diameter wood dowel. 36 plugs are required altogether although a few extra for future plug loss would be advisable. Forty 75mm (3″) plugs can be made from a 3000mm (10ft) length of dowel.
- Taper the plugs by holding a full length of dowel in a turning motion against a belt sander. Once the end of the dowel is tapered to the dimensions as shown in the above plan, then cut 75mm (3″) off the end of the dowel length. The first plug is made. Repeat the sanding and cutting action until all the plugs are made.


I want more plans I love them.