Base board and foam
A dabble into upholstery
How to upholster the seat:
Modern upholstering is done (in some cases) a bit differently to the more traditional methods of the past.
This padded drop-in seat consists of a solid seat board with a layer of foam and a layer of batting which are then enveloped by a fabric (such as calico) which is fixed to the underside of the seat board holding everything in place.
The seat is then covered again, by a finishing fabric of choice.
Step 1. Cut the seat board and the foam
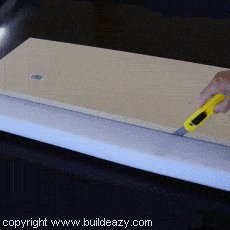
- The seat board can be cut from MDF, plywood or any other similar type of 20mm (3/4″) thick sheet board.
Cut the seat board to fit neatly between the rails of the hall bench, making allowances for the thickness of the padding materials. - In this case, the bench seat opening is 325mm (13″) wide by 1138mm (45 1/2″)long.
- The seat board will need to be cut slightly smaller than the opening to allow for the thickness of the padding which will cover the edges of the seat board.
- In this case we allow 3mm (1/8″) all the way around for the padding material, therefore we cut the seat board 319mm (12 3/4″) wide x 1132mm (45 1/4″) long.
- Depending on the thickness of padding materials that you use, further allowances may be needed.
- Cut a piece of foam the same size as the seat board.
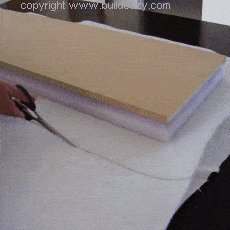
Step 2. Trim the edges of the foam
- Cut an angle around the perimeter of the foam pad.
- Start the cut slightly more than half way down the thickness of the foam and angle it in about 45 degrees.
- When the cut is complete, flip the foam pad over.
- The cut is to be on the underside, not the top.
Step 3. Glue the foam to the seat board
- Glue the foam pad to the seat board.
- Spray glue (or apply contact adhesive) onto both surfaces, the seat board and the underside of the foam pad.
- When the glue is ‘tacky’ to touch, press the two surfaces together. Press firmly all over.
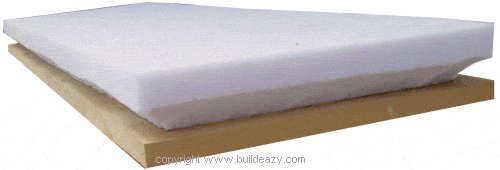
The layers
Step 4. Cut the layers
- Cut the batting and the calico so that they are 120mm (4 3/4″) bigger that the seat board all the way around.
- We used a polyester batting about 6mm (1/4″) thick.
This batting can be compressed to almost nothing around the sides of the seat board when pulled taut with the calico, so therefore it does not add much bulk to the sides.
The batting is quite strong, i.e. hard to pull apart. - Batting can often be obtained from upholstery stores, craft stores, fabric stores or curtain stores.
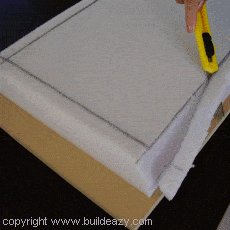
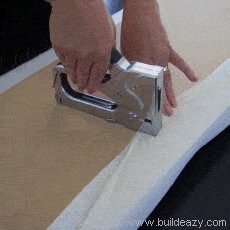
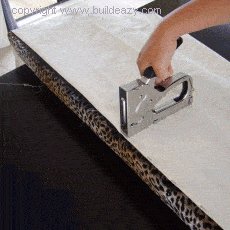
Step 5. Staple along the sides and ends
- Place the calico on a work table.
- Place the batting on top of the calico and then place the foam and seat board (upside down) centrally on top of the batting.
- Begin at the middle of one of the long sides.
Stretch the calico and batting over the edge and staple to the underside of the seat board. - Next do the same to the opposing side and then to the two end sides.
- Continue by stapling along one edge at a time, working from the middle towards the ends but do not staple any of the corners at this stage. Do one side, then the other side and then the two ends, trying to stretch the calico and batting with an even pressure all the way around.
- Turn the seat over and have a look at your work. If you see any areas that appear to be pulled in too tightly, then simply pop out the staple there, adjust and re-staple. Likewise, if you see any areas that appear to be too loose then do the same.
Step 6. Cut excess off corners then fold and staple
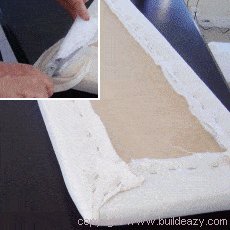
- Before finishing the corners, first cut away any excess batting and calico that may cause bulk.
Fold the corners over and fix with staples, - It is important not to accumulate too much mass at the corners, otherwise the drop-in seat might not drop-in as neatly as intended.
The materials list can be seen here and the tools list can be seen here.
Cover fabric
Step 7. Ready for the cover fabric
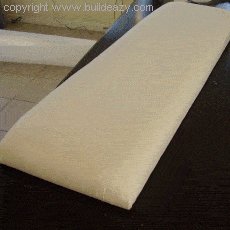
- This is how the seat should look with the calico stapled in place.
- The seat is now ready for the cover fabric.
- This can be cut and put on in the same manner as the calico, but take special care with the folds at the corners since this is the final cover and the fabric that will be seen.
- Line the seat underside
- Line the underside of the seat.
- This is just a matter of stapling a piece of calico with folded edges to the underside of the seat, basically to make the whole underside look tidy.
Almost done!
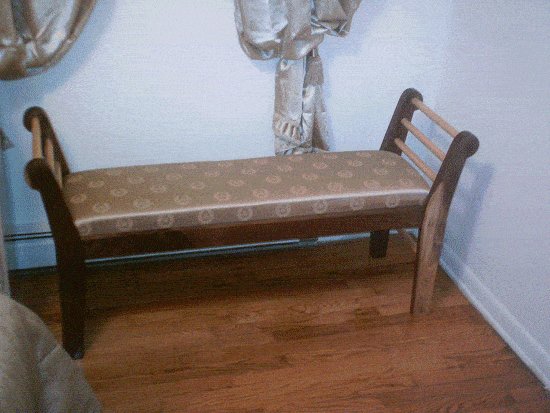
- The seat should just drop into its rightful place in the bench.
- Now just add 5 or 6 screws up through the seat support strips into the underside of the seat board and it’s all finished.
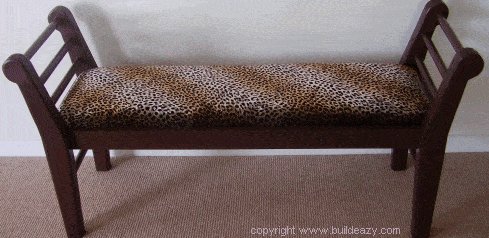


Thank you for the plans for the bed end bench. I have finished two benches. Here are pictures of both.
Steve Meriweather