Contents
Introduction and Plan
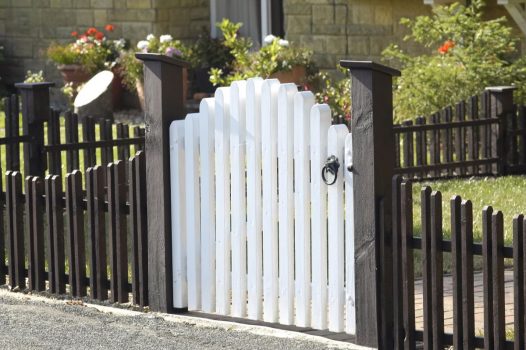
Child-proof maybe a bit too strong of a term to use for this gate as there will always be some kid who will figure out how to scarper over the top of it, so maybe child-resistant might be a more accurate description.
Anyway, the purpose of this project is to make a standard 900mm (36′) high picket gate a little bit harder for small kids to open and let themselves (as well as their dogs) into any area they may not be allowed into unsupervised.
The project basically involves incorporating an extended stile (upright member) into the gate frame, high enough to attach a gate latch which is out of reach of the kids.
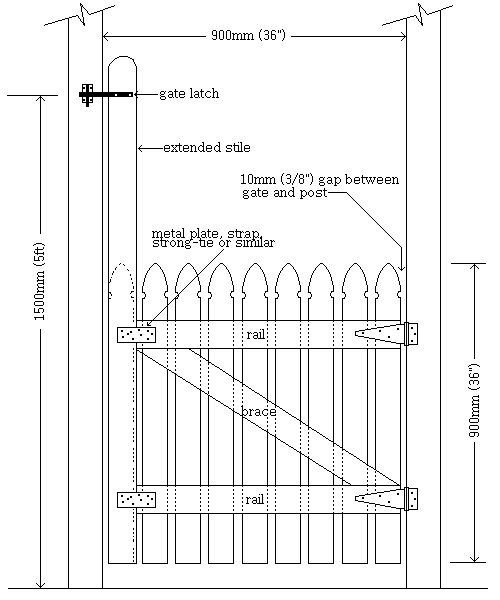
Below is a plan drawing with instructions on the next page.
Instructions
Although this particular gate is only 900mm (36″) high, the posts each side of the gate need to be at least 1500mm (5ft) high in order to accommodate the gate latch, which should be at least 1400mm (56″) above ground.
You could use even higher posts if they are incorporated into a walk-through structure such as an arbor.
Opening between posts.
- Try to make the opening between the two posts at least 900mm (36″) to allow for garden implements such as wheel barrows to pass through.
Gate width.
- Make the width of the gate 20mm (3/4″) less than the opening between the posts. That’s 10mm (3/8″) clearance each side.
Wood.
- Use any standard size exterior pickets for the fence boards. Sizes usually range between 70mm to 100mm (2 1/2″ to 4″) wide and are usually 20mm (3/4″) thick.
- Use 90mm x 45mm (1 1/2″ x 3 1/2″) stock for the rails and brace. A lesser size will also do.
Note: The metric (mm) sizes given in this project do not convert exactly to their corresponding ft and inch equivalents.
This project gives the dimensions in both metric (millimeters) and imperial (inches).
The abbreviation for millimeters is mm and the abbreviation for inches is “.
The metric (mm) measurements are given first, followed by the imperial (inch) measurements in brackets.
Example: 100mm x 50mm (2″ x 4″).
However, the metric (mm) sizes do not convert exactly to the equivalent imperial (inch) sizes because the measurements are rounded to their respective commonly called sizes.
Example: A piece of 2″ x 4″ wood in North America is the equivalent of a piece of 100mm x 50mm wood in Australasia.
2″ x 4″ is not exactly the same size as 100mm x 50mm.
In fact, if 2″ x 4″ was converted into millimeters exactly it would be 101.6mm x 50.8 mm, and nobody really wants to be calling those sorts of sizes..
Also note that in North America the narrower side of the wood is called first (2 x 4), where as in Australasia the wider side is called first (100 x 50).
When the same piece of wood is made smooth (surfaced, dressed, planed), there is an even bigger discrepancy. 1 1/2″ x 3 1/2″ in North America compared to 90mm x 45mm in Australasia.
A project built using metric measurements will be approximately 1.6% smaller than the same project built using imperial (ft and in) measurements.
In this project the imperial measurements are suited to North America. The metric measurements are more suited to Australasia.
Make the gate frame
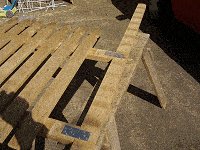
- Lay out the extended stile and the two rails on a pair of sawhorses or a similar type of work platform.
- Lay the rails at right angles to the stile. See the plan drawing on the previous page for placement.
- Nail (toenail) the rails to the stile and then further strengthen with metal plates, straps or strong-ties nailed to the rails and stile over each join, both top and bottom. Four plates in all.
- Ensure that the frame is square and start nailing or screwing the pickets to the rails.
Fix the pickets to the rails
- Work out the spacings between the pickets before you commence nailing.
- Ensure that the first and last pickets are flush with the ends of the frame and that the intermediate spaces between the pickets are equal.
- Fix with two nails or screws at each meeting.
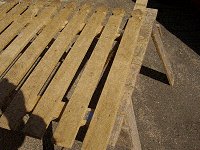
Add the brace and hinges
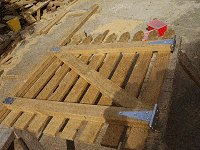
- Check again that the frame is square.
- Mark, cut and fix the diagonal brace.
- You can then screw one side of each hinge to the two rails, as shown in the picture.
Fix the gate in place.
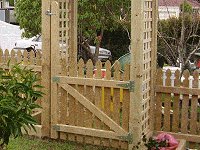
- Position the gate between the posts.
- Sit the gate on packers so that the gate is about 75mm (3″) off the ground and then temporarily pack the sides between the gate and posts to hold it in position.
- There should be a gap of about 10mm (3/8″) each side.
- Screw the hinges to the posts and add the gate latch.
All done! Eazy with a ‘Z’


