
The glass in the entry door was cracked and the frame pretty worse for wear, so it was really time for a new door.
The old door was a common size so it was no problem finding a replacement.
This is how the door was replaced:
Removing the old door
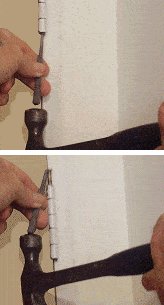
- The door was taken out by simply removing the pins from the hinges.
- This was done by driving the pin out using a nail set and a hammer. With the door in the closed position, once the hinge pins were out the door was easily removed.
Note: With some hinges the pins cannot be removed.
In these cases the hinges will have to be unscrewed from the jamb (the surrounding frame that houses the door) and/or the door.
Marking the new door
Laying the old door on work stools
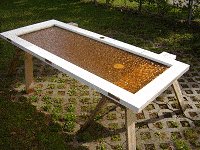
- The old door was stripped of all its hardware (hinges and lockset) and placed on a pair of work stools.
Note: The replacement door should be the same size or slightly bigger than the old door. A slightly bigger door can be cut down or shaved to suit.
If the replacement door has to be cut down or shaved to replicate the shape of the old door, make sure that there is enough solid wood to allow for cutting/shaving without weakening the structure of the door.
Laying the new on top of the old

- The new door was slightly bigger than the old door. It was placed on top of the old door so the exact shape of the old door could be marked onto the new one.
- The new door was taken off, shaved to the same shape as the old door, placed back on top the old door and clamped firmly in place.
Marking for the hinges
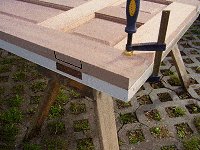
- The edges of the new door were flush with the edges of the old door.
- Using a square and a ruler, the hinge positions on the old door were copied to the new door.
Marking for the latch
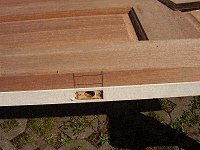
- Using a square and a ruler, the latch position on the old door was copied to the new door.
Chiseling out for the hinges
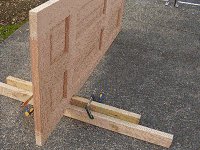
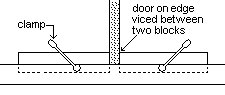
Holding the door steady
- The new door was turned on edge and held steady between two blocks of wood which were clamped to another piece of wood.
Scoring the outline of the hinges with a chisel
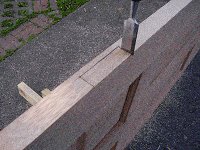
- An indent was made around the hinge outline mark with a sharp chisel.
- The depth of the indent was the same as the thickness of the hinge.
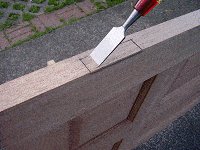
Chiseling out the hinge area
- The hinge area was chiseled out with a sharp chisel.
- The depth of the area chiseled out was the same as the thickness of the hinge.
- Once the hinge areas were chiseled out, one side of each of the hinges was screwed in place. The other side of the hinges were still in the jamb; they never had to be taken off.
Fitting the lockset
The installation kit
Note 1: New locksets (lockable door handles and latch) usually come with installation instructions as well as a paper or card template for marking the handle holes.
Note 2: Inexpensive lock installation kits, containing the necessary drill bits and hole saw, can be purchased from some hardware stores.
Fitting the lockset
- The positions of the holes were marked using the template which came with the lockset.
- The hole was drilled through the sides of the door with a hole saw and then the smaller hole was drilled into the edge of the door with a drill bit.
- The latch was inserted into the edge hole and the latch area was marked.
- The latch was taken out and the latch area was chiseled out.
- The latch was then installed, followed by the lock cylinder and handle.
Hanging the door
- The door was then lifted in place and the hinge pins tapped back into the hinges.
- The door fitted and worked perfectly… but then so it should have, since the old door was a good fit, the new door was the same size as the old door and all the hardware was in exactly the same place.
- Still the painting to do yet, but that’s another story!


Do you have instructions for replacing a door, but the entire casing with a new door and casing?