
Contents
Making a folding stick chair by Les Kenny

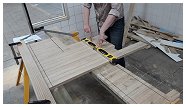
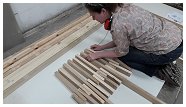
This particular stick chair was designed for and built by Robyn, a novice woodworker and only her second ever woodworking project. You can see more of Robyn making the chair here. It is a fun project.
Pictorial table of contents
Click on a thumbnail image below to jump straight to that step, or scroll down through the steps.

Introduction
The folding stick chair is made out of 1″x2″ (50mm x 25mm) lumber thus differing from all the others I have made. Because the sticks are narrower than other versions it has an extra three pieces to build up the width of the chair. 1″x2″ (50mm x 25mm) lumber is a very common stock so it should be easy to source. This is an easy-peasy fun project to do – so let’s cut to the chase and jump straight into it with these easy to follow step-by-step pictorial laden instructions.
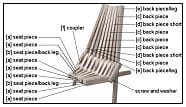
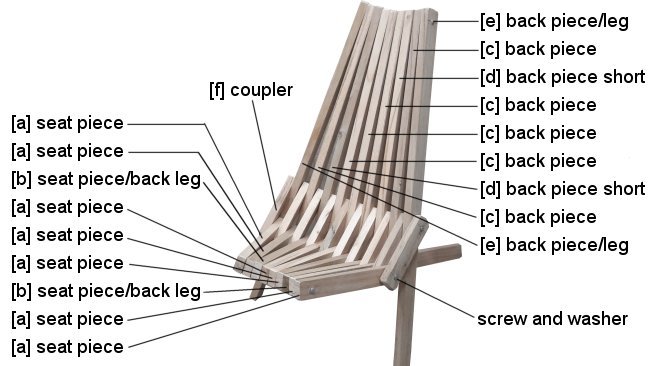
Part identification
You will need
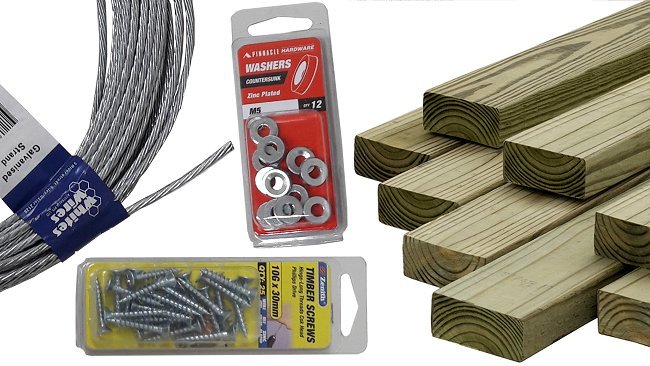
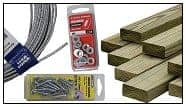
In all you will need the following materials:
- Lumber – You will need 60ft (18 metres) of 1″x 2″ (50mm x 25mm) treated lumber
- Wire – You will need 4 pieces of wire 32″ (800mm) long. Use approximately 9/64″ (3.5mm) to 5/32″ (4mm) diameter galvanized mild steel wire or galvanized strand wire (wire rope).
- Screws and washers – You will need 8 screws 10g x 1-1/4″ (30mm) long and washers to suit.
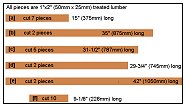
Cutting list

In all you will need to cut the following pieces to the given lengths:
[a] seat: 6 pieces @ 15″ (375mm) long
[b] seat/back leg: 2 pieces @ 35″ (875mm) long
[c] back piece long: 4 pieces @ 31-1/2″ (787mm) long
[d] back piece short: 2 pieces @ 29-3/4″ (745mm) long
[e] back piece/leg: 2 pieces @ 42″ (1050mm) long
[f] coupler: 9 pieces @ 9-1/8″ (228mm) long
Mark the holes
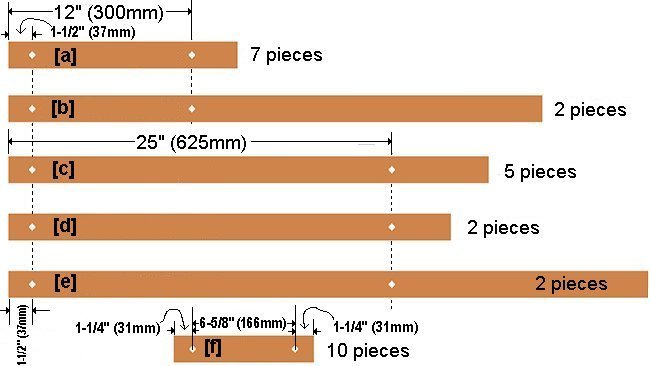
Mark the holes according to the following measurements:
- On pieces [a] and [b], along the center measure 1-1/2″ (37mm) and 12″ (300mm) from one end and mark for the holes.
- On pieces [c], [d] and [e], along the center measure 1-1/2″ (37mm) and 25″ (625mm) from one end and mark for the holes.
- On pieces [f], along the center measure 1-1/4″ (31mm) in from each end and mark for the holes.
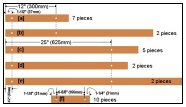
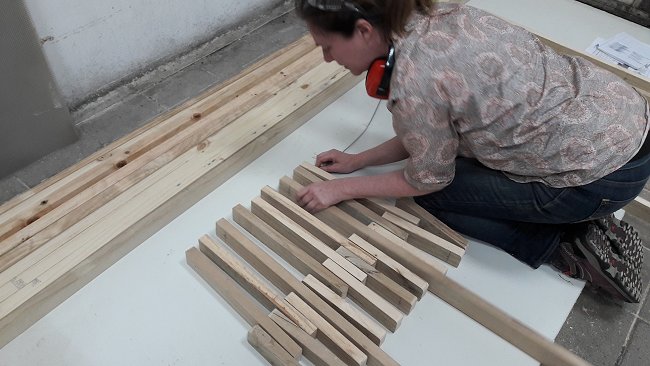
Marking made easy
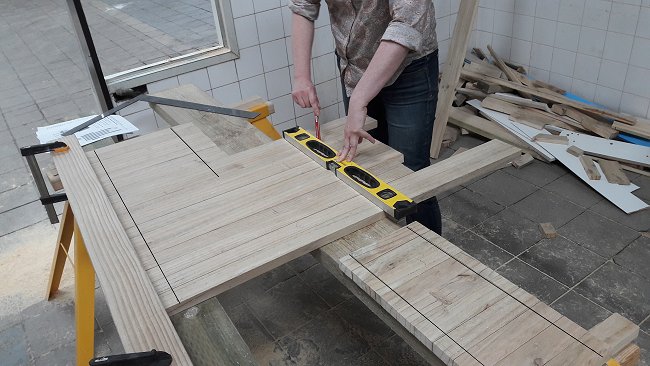
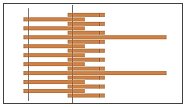
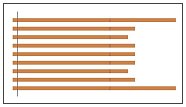
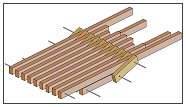
- Place all the pieces next to one another with one end against a straight edge, in this order: [a] [a] [a] [a] [a] [a] [a] [b] [b] [c] [c] [c] [c] [c] [d] [d] [e] [e], and separately do the same to the 10 [f] pieces.
- Draw a parallel line 1-1/2″ (37mm) from the straight edge across pieces [a], [b], [c], [d], and [e]. Refer to the picture above.
- Draw a parallel line 12″ (300mm) from the straight edge across pieces [a] and [b]. Refer to the picture above.
- Draw a parallel line 25″ (625mm) from the straight edge across pieces [c], [d] and [e]. Refer to the picture above.
- On pieces [f], measure in 1-1/4″ 31mm from each end and draw a line across.
- Mark the center of the lines on all the pieces, to determine where the holes are to be drilled.
Drill the holes
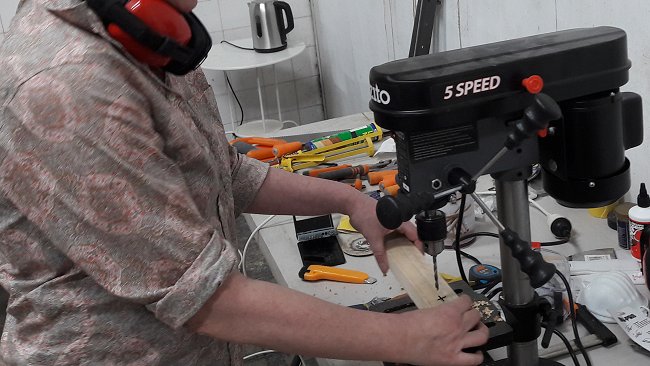
The size of the hole:
- Make the diameter of the hole about 5/64″ (2mm) larger that the diameter of the wire you use. You just want the hole big enough to allow the wire to be easily thread through the sticks.
- There are two wire options given in this article. See ‘Wire fastening options‘.
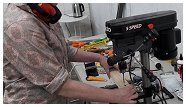
- It is advisable to use a drill press (as shown in the photo) to ensure all the holes are straight and true.
Align the seat pieces (section A) by drawing
Align the seat pieces (section A) 3d drawing
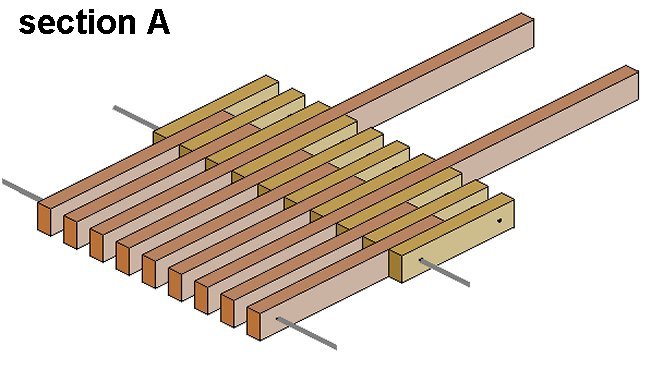
Align the seat pieces (section A) and thread the wire
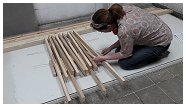
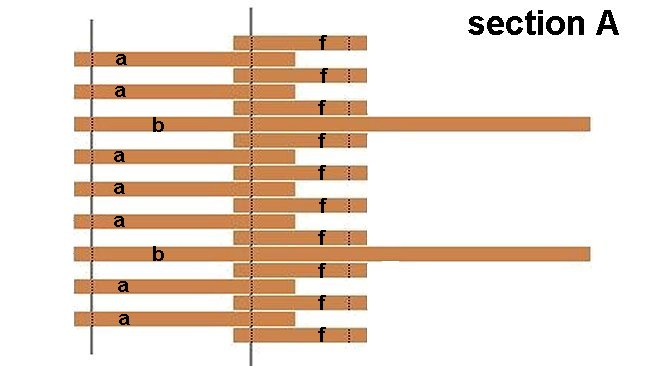
Align the seat pieces and thread the wire:
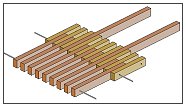
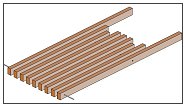
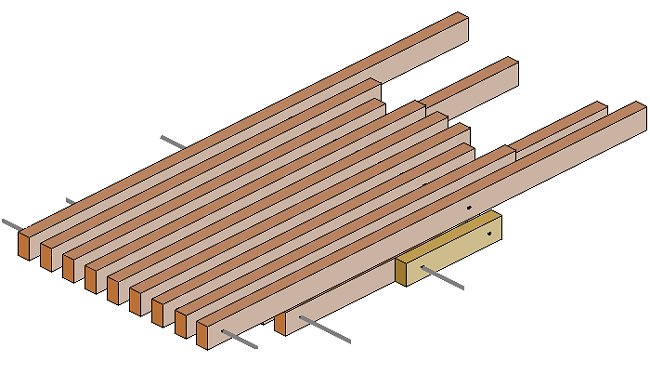
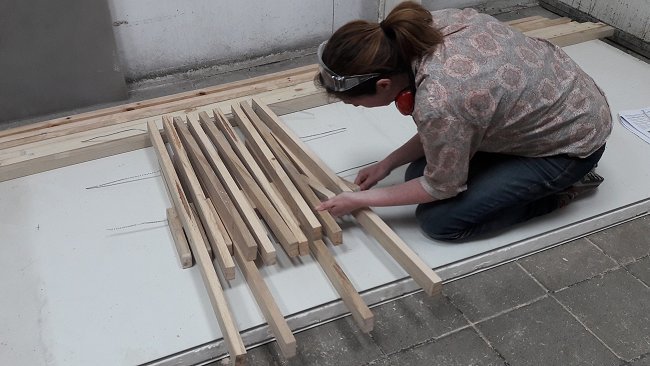
- Align the seat pieces as shown in the three previous drawings and picture.
- The drawings clearly show where to thread the wire – at this stage only two lines. Take note, do not thread a wire through the end of the coupler [f] holes just yet. This is section A.
Align the back pieces (section B) by drawing
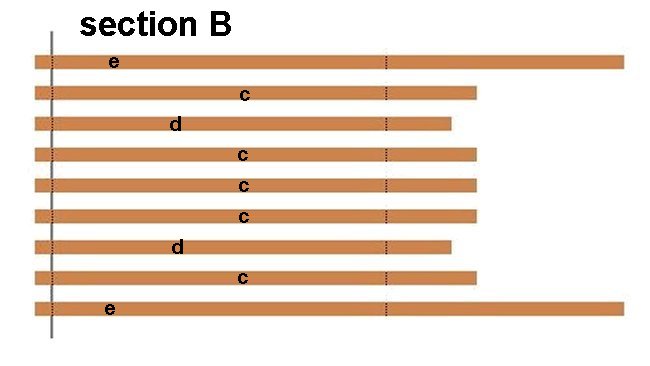
Align the back pieces (section B) 3d drawing
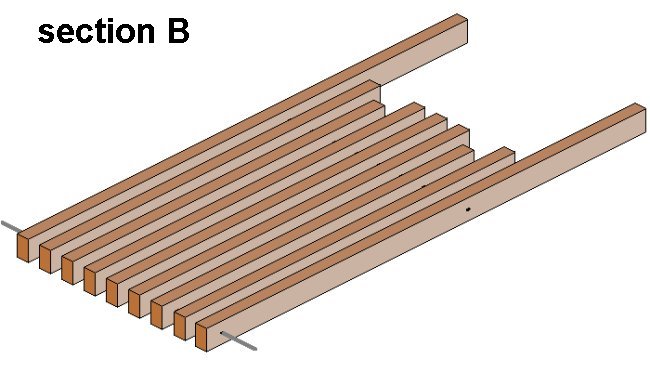
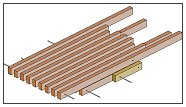
- Lay the back pieces in a row, spaced apart 1″ (25mm) in this order [e] [c] [d] [c] [c] [c] [d] [c] [e] with the top holes in line and thread the wire through the top holes. This is section B.
Sit section B on top of section A
- Sit section B on top of section A. Have pieces of section B sit directly on top of the pieces of section A.
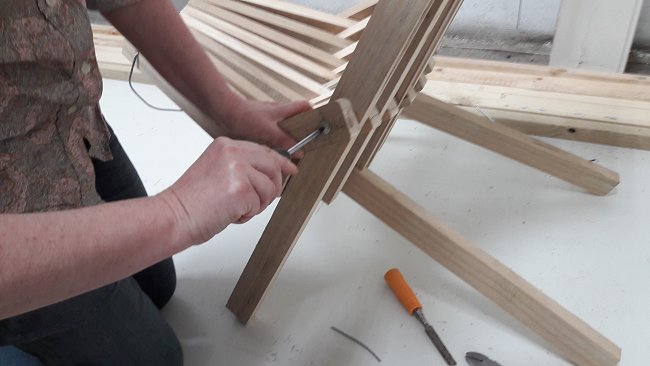
Join section B to section A

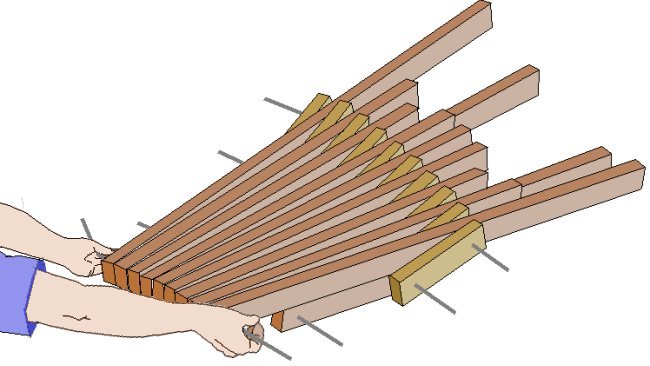
- Raise the free end of the couplers [f] until the free hole in each coupler is in line with the free holes in the section B pieces. Thead the wire as you go.
Section B being joined to section A
- And this is the previous drawing being excecuted – the seat and back sections being tied together.
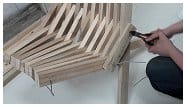
Push the top in and lift
- Give the top a bit of a squeeze in.
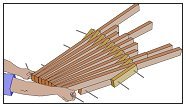
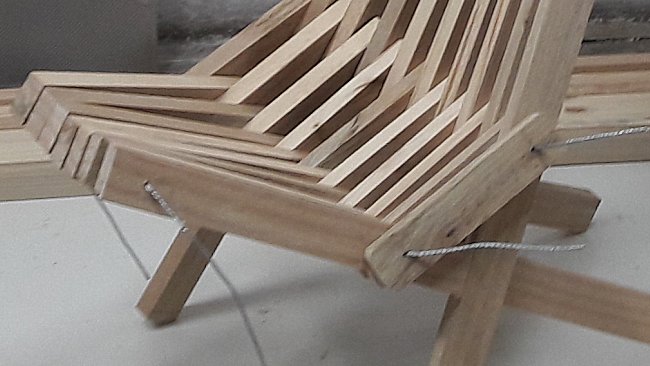
- This is the interesting part because you will now get to see the chair unfold.
- Simply grab the wire at each end of the chair top and commence lifting it up until the chair is upright and on its legs.
The chair unfolds

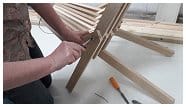
Squeeze the pieces in and fold the wire
- Squeeze the pieces in and bend the wire to keep the pieces from opening out.
Trim the wire
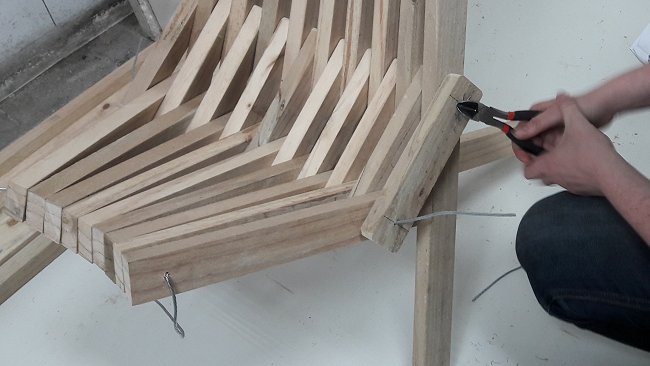
- Snip the ends of the wire about 3/8″ (10mm) or so away from the hole and hammer the excess into the stick. Ideally, you will want the washer to cover and hold the wire (protruding past the hole) tight against the stick.
Flare the wire
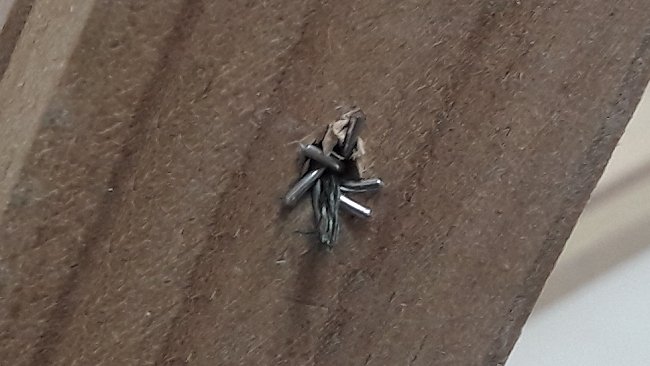
- If you use stranded wire (wire rope), bend the protruding strands around the hole hard against the stick.
- If you use mild steel wire, bend the protruding part and hammer it against the stick. The washer on the screw will cover and hold the wire (protruding past the hole) tight against the stick.
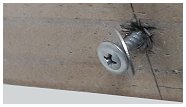
Wire flush ready for screw
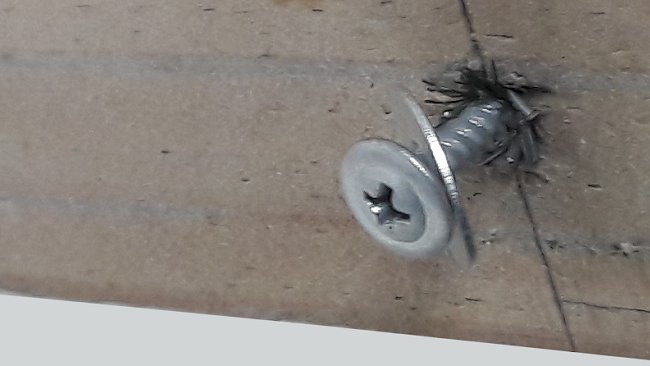
- With the protruding wire bent against the stick, you can insert the screw and washer. The screw will go somewhere between the wire and the side of the hole and the washer will hold the protruding wire hard against the stick.
Screw it home
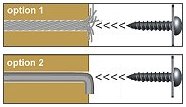
Wire fastening options
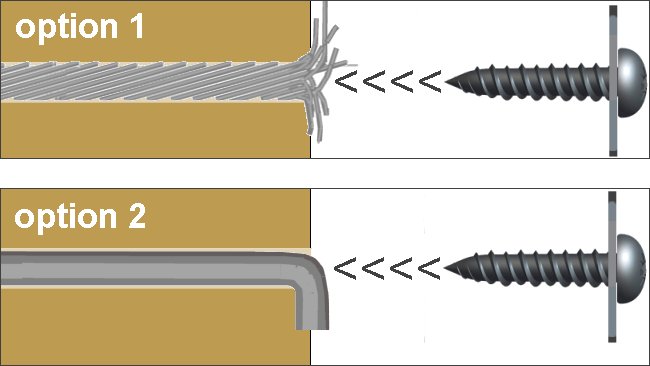
A choice of two types of wire depending on what you can source.
- Option 1 Approximately 9/64″ (3.5mm) to 5/32″ (4mm) diameter galvanized strand wire (wire rope).
- Flare the snipped protruding strands around the hole and hammer them hard against the stick.
- Insert the screw between the wire and the side of the hole. The washer will hold the bent over protruding wire hard against the stick.
- Option 2 Approximately 9/64″ (3.5mm) to 5/32″ (4mm) diameter galvanized mild steel wire.
- Bend the snipped protruding wire over and hammer it hard against the stick.
- Insert the screw between the wire and the side of the hole. The washer will hold the bent over protruding wire hard against the stick.
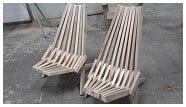
Done! Two versions
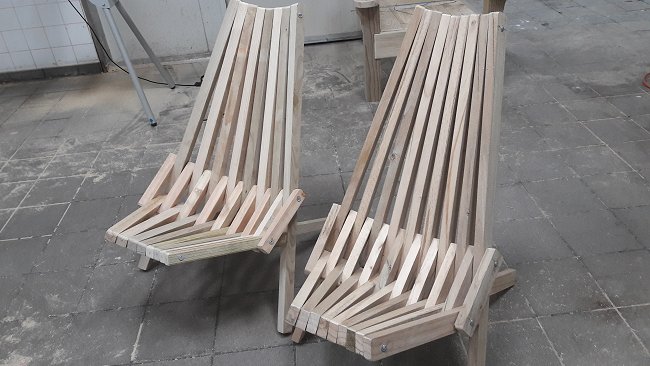
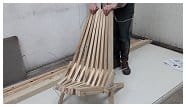
The picture shows two versions. The chair in front (this project) is of 1×2 (25mm x 50mm) wood.
The other chair is a different version with different size sticks and the plans can be seen here www.buildeazy.com/stickchair-1.html
Post your handiwork
If you build this stick chair we would love to see a photograph and your story. You can post your handiwork here
Photos of your handiwork
None yet – be the first


very nicely thought out and presented – easy to follow, especially for an old timer like me – thanks
Would it be possible to lengthen the legs to make the seat higher?
Thank you! Thank you soooo much for You have made a 1×2 version. I am so frustrated coz there’s no 2×2 cedar Wood and Las the places I called won’t rip it for me. So excited to make this. The instructions are so clear.