Contents
Introduction, digging the hole and the plan drawing
Introduction
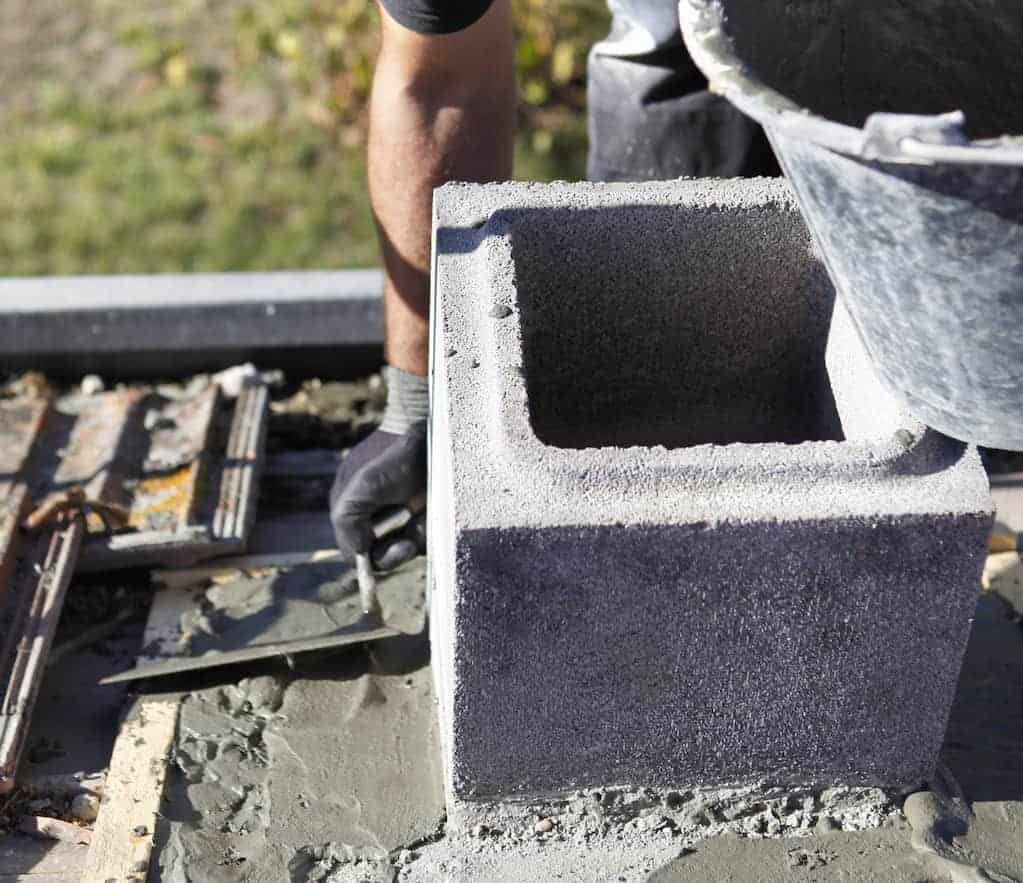
Not only does a concrete gate post look good and have a bit of a stately feel about it, but unlike its lumber counterpart it is not prone to twisting, bending, warping or bowing. In fact it is not going anywhere for a long while. Sure, there’s a bit more work involved than with a lumber post but the extra effort is well worth the bother.
This is how the concrete posts were made…
Digging the hole

- The post placings were determined, their positions were marked on the ground and the footing holes were dug.
- The holes were made 400mm (16″) square, which was slightly bigger than the size of posts, and dug to a depth of 1000mm (40″).
- There were no frost lines to worry about and the ground was very firm, so we concluded that digging to 1000mm (40″) was deep enough to support the posts.
Digging equipment

The digging arsenal consisted of:
- a very sharp spade for cutting through hedge roots;
- a medium-size shovel to remove the loose debris from the top of the hole;
- a long thin hooked shovel to remove the loose debris from the bottom of the hole, and
- a 1800mm (6ft) long heavy bar with a point on one end and a chisel point on the other end for breaking up the ground.
The tops of the holes were dug with a spade and shovel but once down to a depth of about 400mm (16″), the ground was broken in increments of about 3 or 4 inches deep at a time using the bar and the debris removed with the long thin shovel.
Plan Drawing
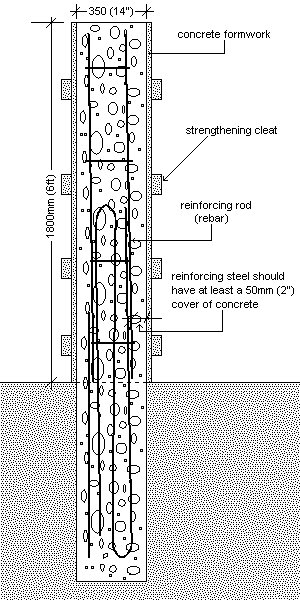
The footing
Preparing the reinforcing steel (rebar)
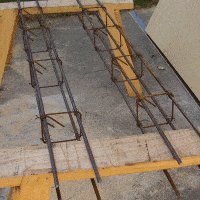
- A length of ribbed (deformed) #4 rebar, i.e. 12mm (1/2″) thick, was bent in an ‘S’ shape as shown in the picture below. The overall finished length of the bent rebar was about 1800mm (6ft).

Pouring the footing
- The hole was filled with concrete.
- About 900mm (3ft) or half of the length of the bent reinforcing steel was placed into the wet concrete in the hole with the other half sticking out. See picture.

Note: Make sure that all of the rebar is surrounded by concrete and that no reinforcing steel is touching any ground.
The reinforcing steel should have at least a 50mm (2″) cover of concrete as shown in the plan (Page 1).
Why should the reinforcing steel should have at least a 50mm (2″) cover of concrete?
To prevent the steel from rusting.
Reinforcing steel will eventually rust when exposed to air and moisture. The concrete cover prevents air and moisture getting to the steel.
If the reinforcing steel was to touch the ground, it would eventually begin to rust and the rust would spread along the steel into the concrete post.
Note: For information on how to mix concrete click here
Making the formwork and the steel cage
Formwork
- Formwork is the structure of boards which make up a form for holding wet concrete in shape until such time as the concrete hardens.
- A formwork box was made out of 18mm (3/4″) plywood. The inside measurement was 350mm (14″) square and the length was 1800mm (6ft).
- The plywood panels were screwed together with 50mm (2″) screws every 150mm (6″) along the edges and further held together with 75×50 (2×3) cleats surrounding the formwork box in four places.
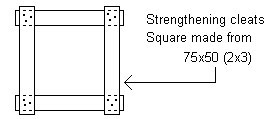
- The cleats were made into squares, nailed together and then slipped over the box.
Note: The form needs to be strong as wet concrete exerts a lot of pressure when poured, especially towards the bottom.
- This particular plywood, called ‘concrete form plywood’ had a black resin type non-stick film cover. If you are unable to obtain such a similar type board and prefer a smooth concrete finish, then just use standard board and use a release agent obtainable from some hardware stores or make you own release agent out of an even mixture of used car oil and diesel and apply with a paint brush or a rag.
Making the steel reinforcing cage
- A reinforcing cage was made for each post.
- The 150mm (6″) square cage was made out of four 1700mm (68″) lengths of ribbed (deformed) #4 rebar, i.e. 12mm (1/2″) thick, held together by four 6mm (1/4″) thick square stirrups and tie wire.
Preparing and pouring the concrete
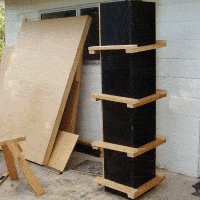
Bracing the form and placing the steel reinforcing cage
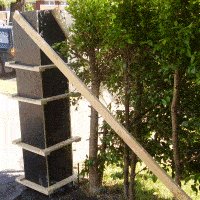
- The form was positioned upright in place and braced with two diagonal braces at right angles to one another.
- The braces were fixed to the top of the form with screws at one end and clamped to stakes hammered into the ground at the other end.
- The bottom of the form was also fixed to a couple of stakes to prevent the form from rising.
- When the form was fixed firmly in place and plumb (upright), then the reinforcing cage was placed inside. See plan (Page 1).
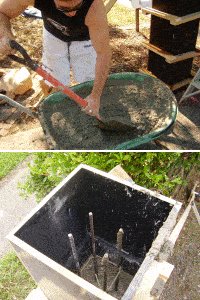
Mixing and pouring the concrete
- The concrete was mixed in a wheelbarrow and bucketed into the form.
Note: For information on how to mix concrete click here
Note: When concrete is dropped down a long chute, such as the form, the concrete can break down when hitting the bottom and make the mix very weak, therefore… after every wheelbarrow full of concrete has been bucketed into the form, it is important to ‘remix’ and settle the concrete. Poke the freshly poured concrete repeatedly with a piece of steel rod, i.e. push and pull a piece of rebar continuously in and out of the concrete.
This will settle the concrete, get rid of any air pockets and makes the concrete nice and smooth against the form.

The finished post
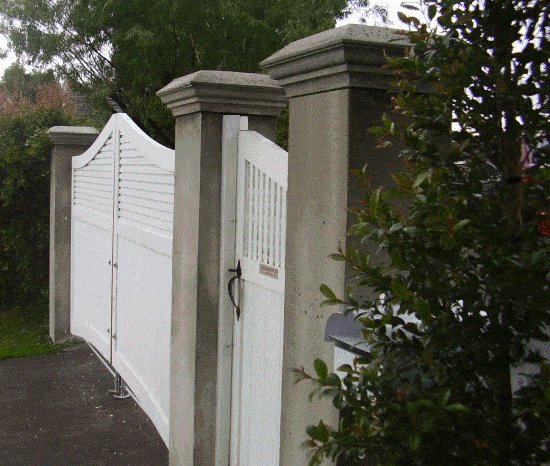
- After a week, the formwork was stripped off very carefully so as not to damage the concrete.
- The concrete finish had a few imperfections in it but it looked good. The slight imperfections aged the post, which was very much in keeping with the style and age of the house.
- We decided to retain that look.
- An alternative would have been to render (plaster) the post but we felt that would have made the post look too neat and prim.
- To see how to make caps for the concrete posts click here.


