Contents
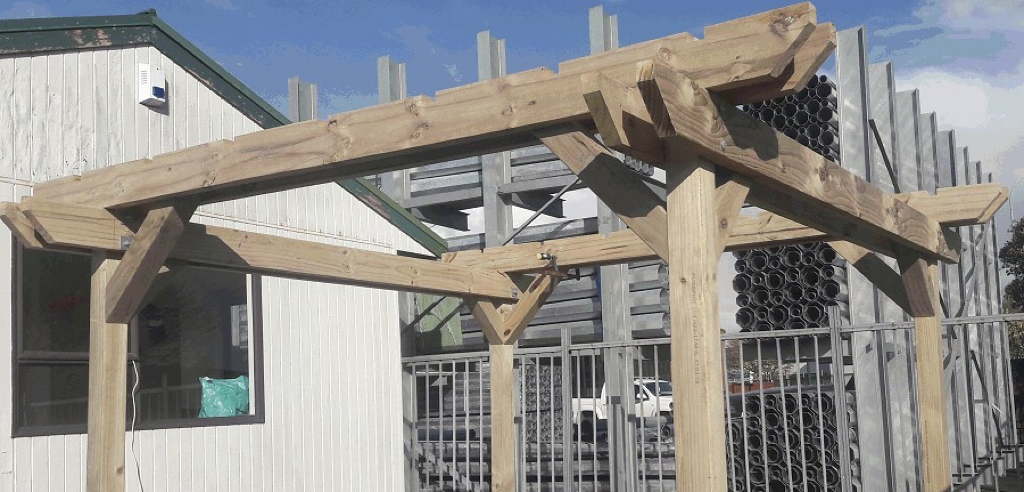
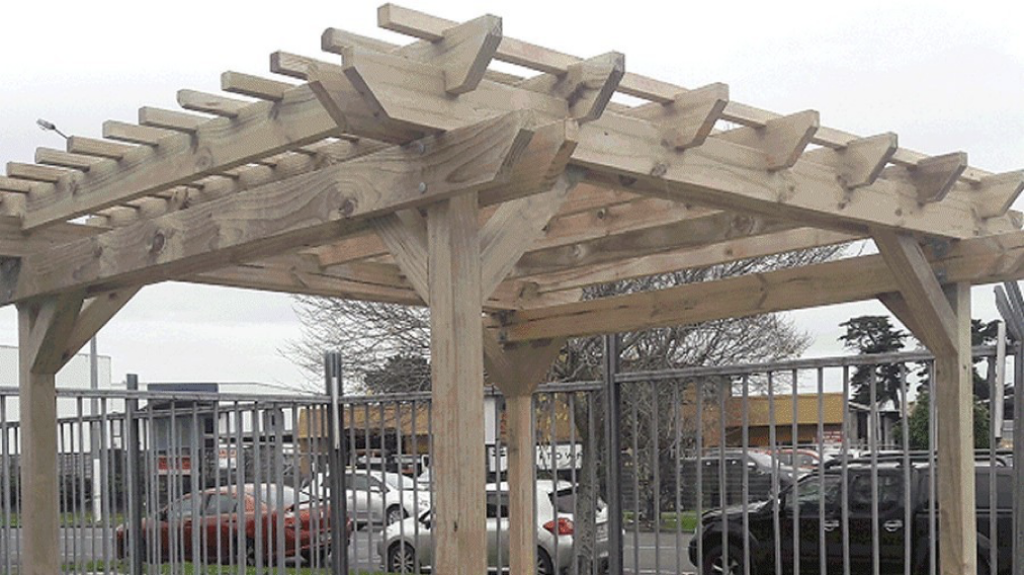
This 10×10 (3m x3m) pergola is a great looker. The beams and rafters are 2×6 (150mm x50mm) dressed in treated wood and the posts and braces are 4×4 (100mm x100mm).
The notches in the rafters fit into the notches in the top beams so they pretty much self-align, and likewise with the top battens.
You can also buy this plan:
- 🛑 No ads
- 🖨 Printable PDF
- 🎗Support the author

Build plans for a 10ft x 10ft (3m x 3m) Sturdy Pergola
Original price was: $5.00.$3.00Current price is: $3.00. -40%
|
The Plans – Front View
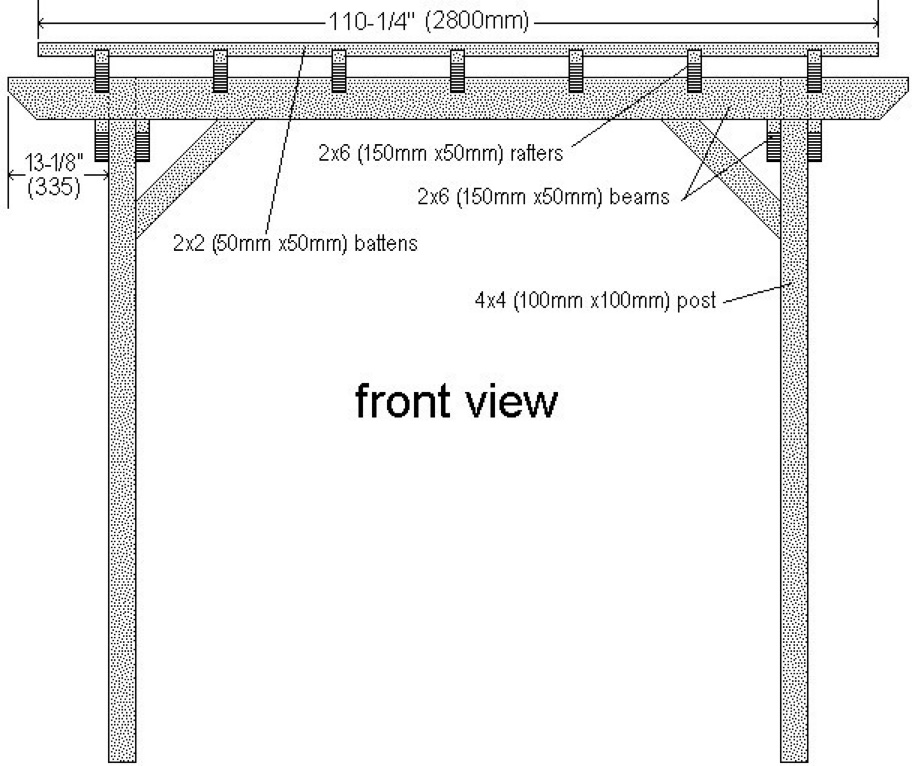
The standard inch measurements are given first followed by the metric equivalent in brackets ().
FOR EXAMPLE: 2×6 (150mm x 50mm) means a piece of wood 2 inches thick by 6 inches wide, and the metric equivalent – 150 millimetres wide by 50 millimetres thick.
AND: 13-1/8″ (335mm) means wood that is 13 and 1/8 inches long, with the metric equivalent being 335 millimetres long.
So the inches are given first followed by the metric equivalent in brackets.
The Plans – Side View
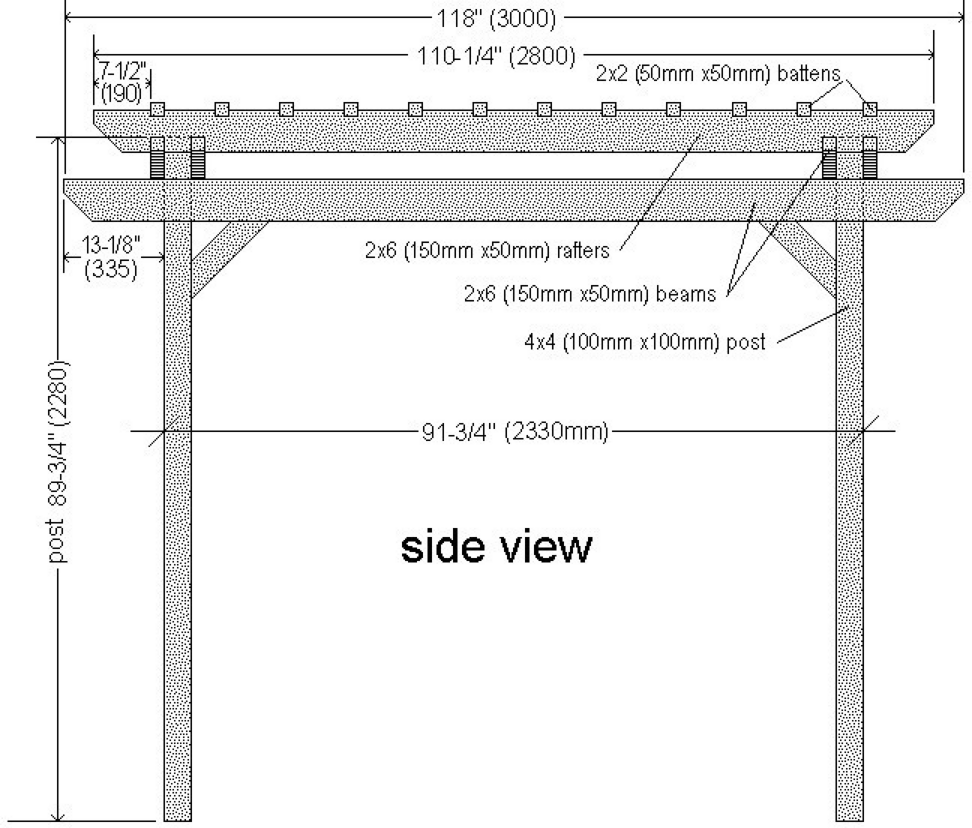
Therefore, the real (actual) size of the wood will be less.
FOR EXAMPLE: 4×4 (100mm x100mm) wood, nominal size, may really be 3-1/2 x 3-1/2 (90mm x 90mm) which is the actual size. That will also vary in different countries.
That’s just the way it is.
The Plans – Looking Down View

WOOD. treated pine or other suitable exterior wood.
- 4×4 (100mm x100mm) 4 @ 8ft (2400mm)
- 2×6 (150mm x50mm) 15 @ 10ft (3000mm)
- 2×2 (50mm x50mm) 12 @ 10ft (3000mm)
- 2-1/4 lb (1 kg) of 3-1//2″ (90mm) Flat head galvanised nails.
- 24 only 1/2″ (12mm) galvanised bolts 9″ (220mm) long with nuts and washers.
Cutting detail
Note: The list in the ‘Materials you will need’ above, lists standard lengths (or increments of) that can be purchased at some yards.
The list below is the exact lengths you will need to cut from that listed above.
- 4×4 (100mmx100mm) posts– 4 @ 89-3/4″ (2280mm)
- 2×6 (150mm x50mm) rafters/beams – 8 @ 118″ (3000mm), 7 @ 110-1/4″ (2800mm). Measure 1-3/4″ (45mm) down both ends of each piece and from there angle in 45 degrees.
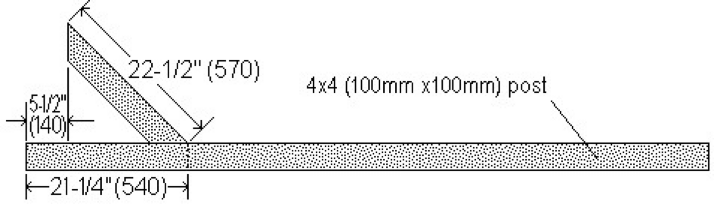
- 4×4 (100mm x100mm) braces – 4 @ 30″ (760mm), 4 @ 22-1/2″ (570mm), angle the ends in 45 degrees.
- 2×2 (50mmx50mm) battens – 12 @ 110-1/4″ (2800mm)
Instructions
Cut the pieces
Cut all the pieces according to the Cutting detail above. Refer to the plan drawings for visual guidance.
Then follow the step-by-step pictures and instructions that follow
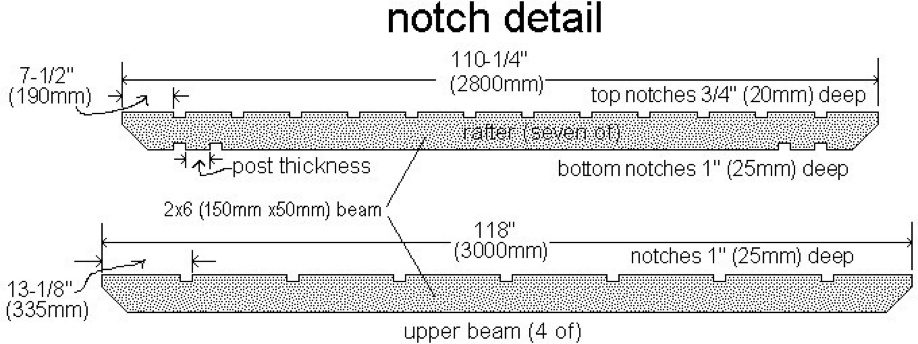
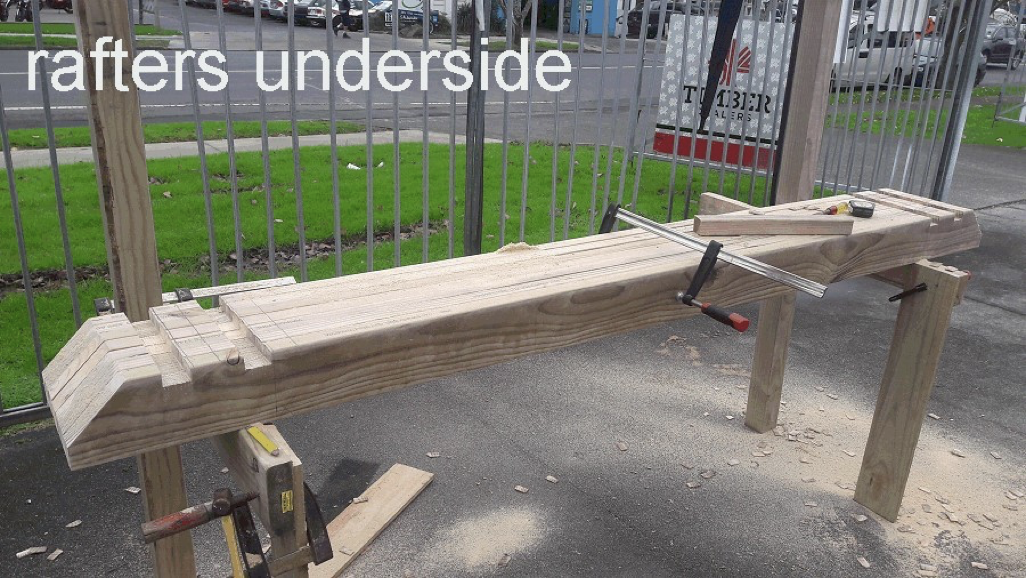
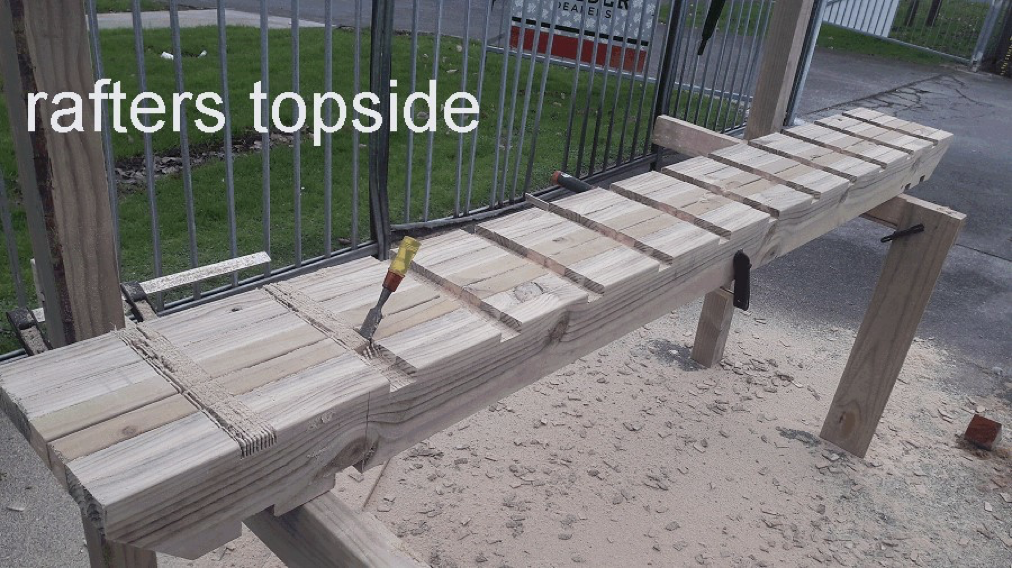
The notches
The 4 top beams and the 7 rafters will need to have a series of notches cut in them. This is not only for appearances but they also help keep the structure in alignment.
The best way to do this is to lay the 4 top beams together and hold them in place with clamps. Do the same with the 7 rafters.
Then by following the plans below, mark the cut-out (notch) area across the beams/rafters. The plan drawings below give the measurement to the first notch. That will be the same at both ends. All the intermediate notches will be spread evenly apart.
Set the blade on a circular saw to the required depth and make multiple cuts along the cut-out (notch area).
Then simply clean out with a chisel as shown in the picture below.

The notches – A couple of pictures
Assembling
Let’s start assembling!
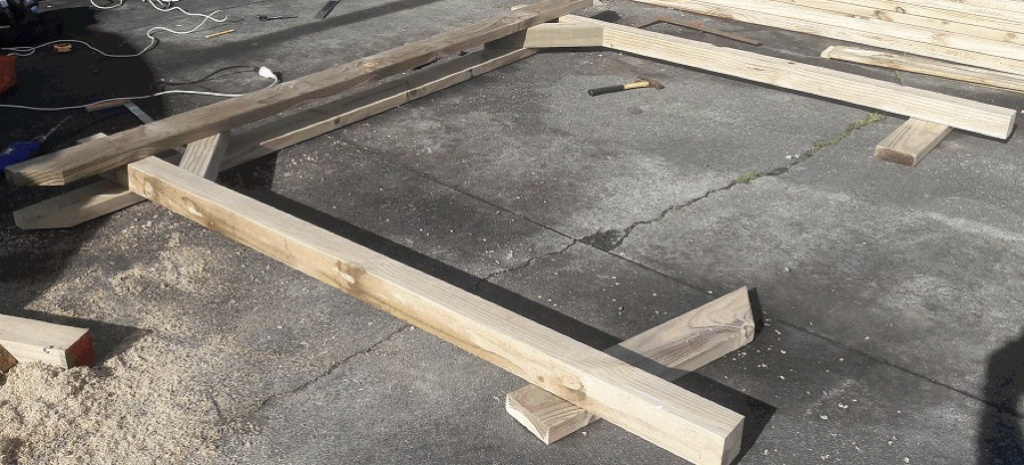
Fix a brace to each post as shown in the plan drawing and picture below.
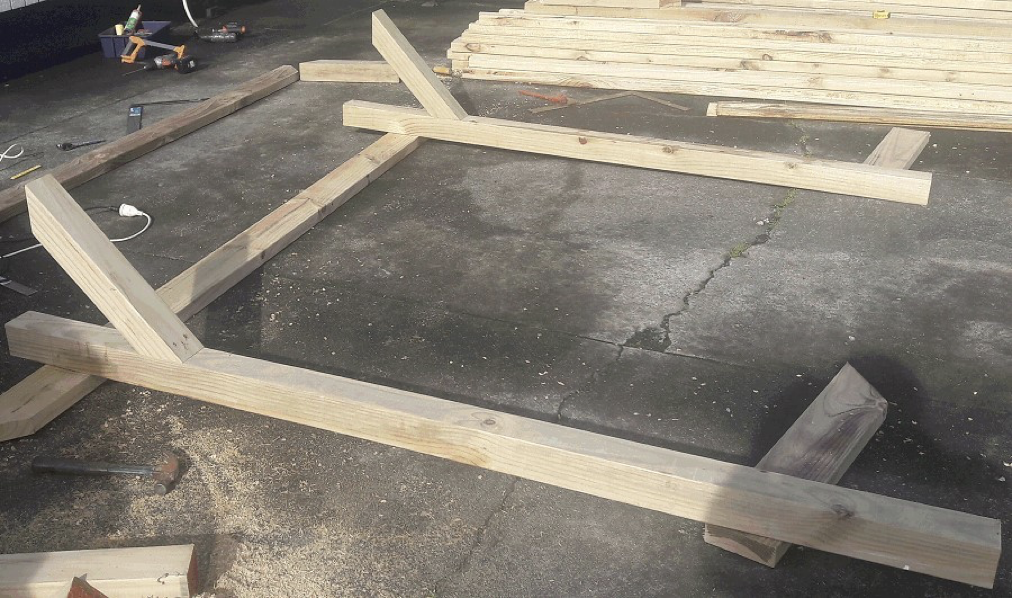
Fix the posts and braces to the lower beams as shown on the plan drawing and picture below.

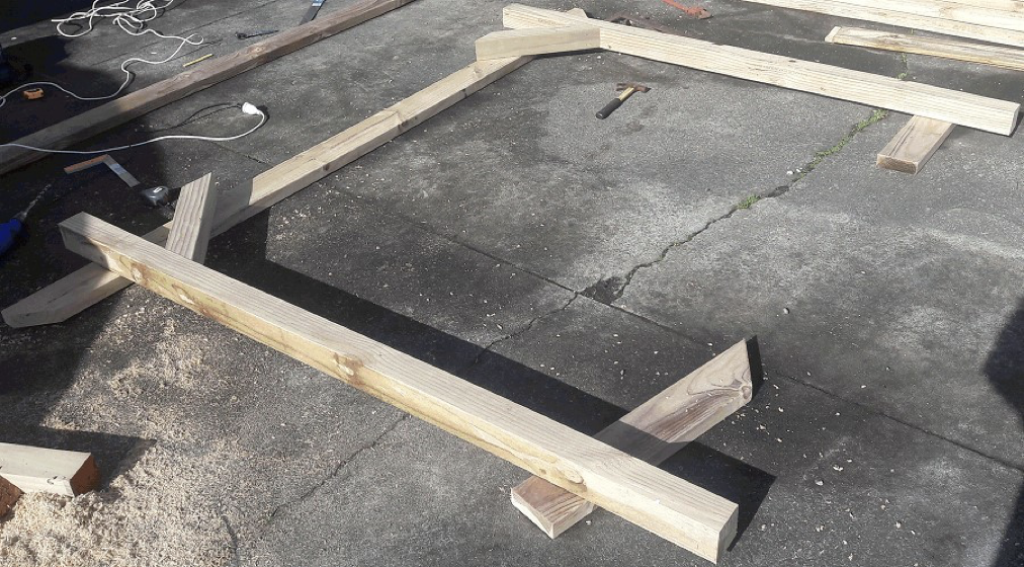
Add the second lower beam to the opposite side of the posts as shown in the picture below. Use 3-1/2″ (90mm) galvanised nails but be careful not to put any where the bolts are to go.
Stand the two sides up. Clamp a length of wood to the bottom on each post to keep the balance as shown in the picture below.
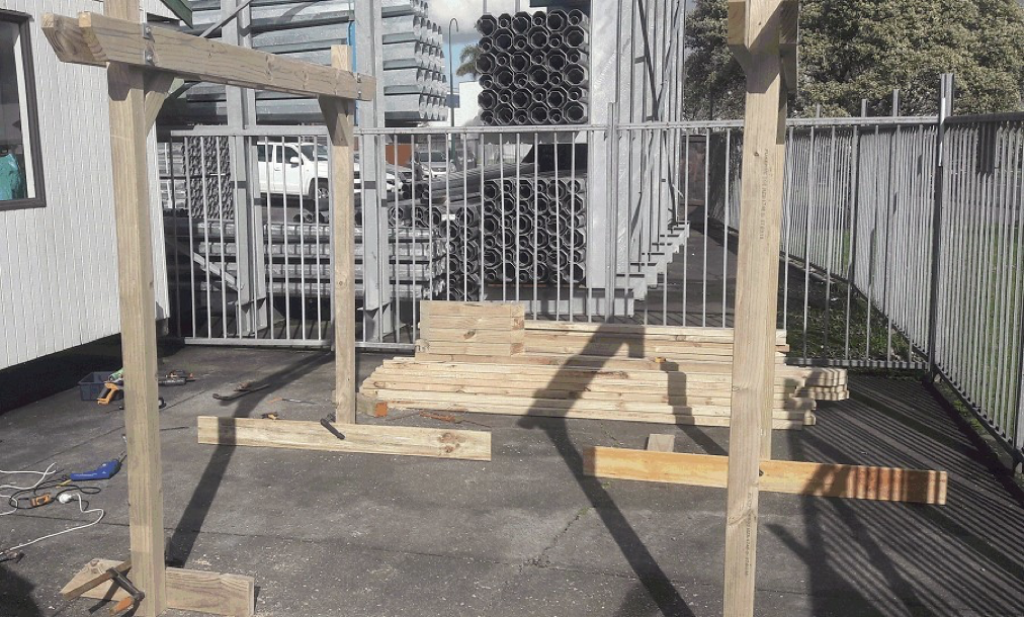
Add the upper beams as shown on the plan drawing and picture below.

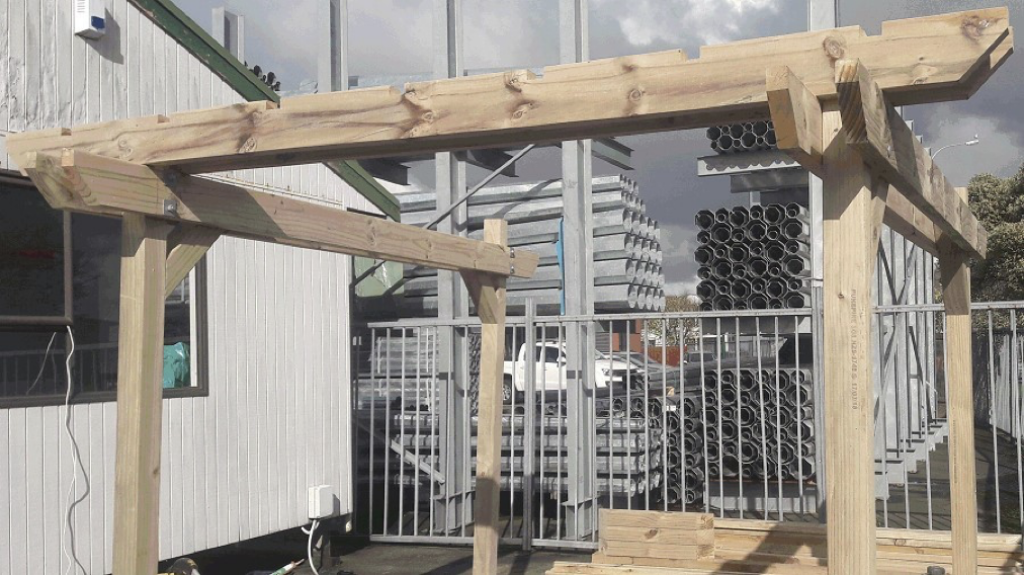
Add the remaining braces and drill and bolt the beams to the post, two bolts at each join and one bolt through the beams at the top of each brace.
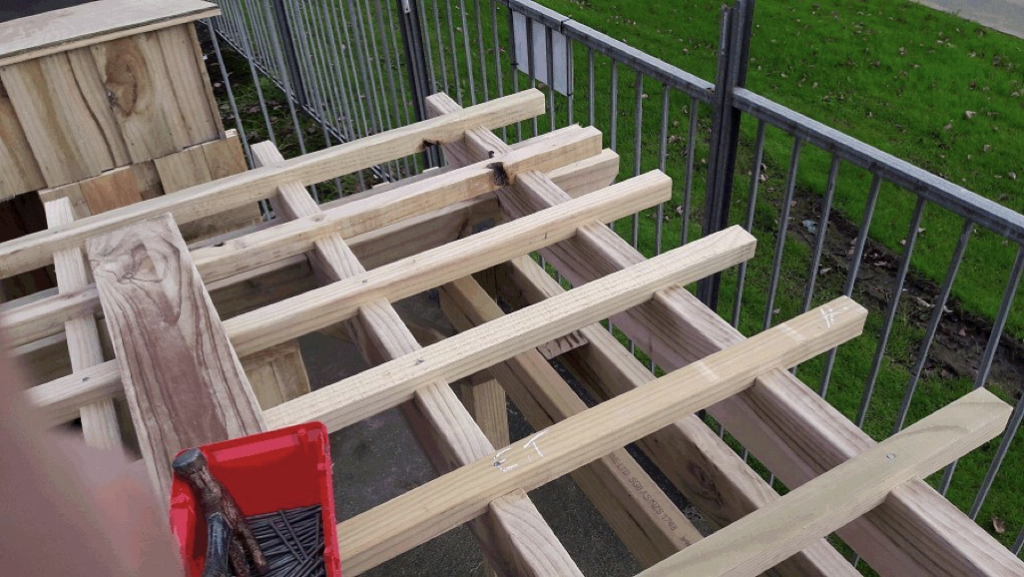
Add the rafters and the top battens. The rafters will fit into the notches in the beams and the battens will fit into the notches on top of the rafters.
Nail the top battens in place with 3-1/2″ (90mm) flat head galvanised nails. All done!
This project was originally made for Hill Lumber – a timber yard in Auckland, and that’s where it was constructed. The project has since been modified to suit a more universal audience.
Have a great day!
Copyright stuff
These plans and writings are copyright protected. In short, that means this:
These plans are for personal use only and cannot be passed on, resold, redistributed in any way without the express written permission of the copyright owner. All rights are reserved.
However you can do what you like with what you make with these plans. You can make as many of the items as you want. Keep them, give them away, sell them, do what you want with them.
It is the plan that is copyright protected – not the item that you build from the plan.
Disclaimer
Although all due care is taken, no responsibility is accepted by the author (Les Kenny) for any wrongful information, omissions, or any other irregularities regarding this article.
This project is to be undertaken at the users own risk.
There will be no responsibility accepted by the author (Les Kenny) for any injury, harm or loss to any person while using or undertaking this project, either directly or indirectly.
Work safe – have fun.
If you have never used a power tool before – do so under the supervision of a capable person.
Copyright © Les Kenny. All rights reserved. Reproduction of this content is strictly prohibited.
About the author
With a background in building, Les Kenny has had an online presence spanning over two decades designing, building, and writing about ‘How to Make’ woodworking and DIY projects.
From 2000 until 2018 (for 18 years) he wrote primarily for buildeazy.com .


