Contents
Introduction, getting started
Introduction
The bathroom/laundry downstairs was in dire need of a do-over. The floor area was 8ft x 8 1/2ft (2400mm x 2550mm). It contained a sink, washing machine, toilet and shower unit – all the worse for wear.
There was no simple way it could be tarted up. It was all or nothing.
So out with all the old – including the wall and ceiling lining, and the floor tiles – and in with the new.
This article is a general overview of the process of re-doing a bathroom/laundry. Although there are no specifics regarding material types, dimensions, or in depth explanations about anything specific, it’s meant to showcase the order of things: i.e., what needs doing when, and where. It might also be useful in helping you make up your mind whether you want to tackle such a project in the first place. And, if so, how much you might be able to do yourself, and how much would need to be undertaken by a professional, such as a plumber, electrician, tiler, plasterer, painter etc.
Basically, this is a summary of how we went about our bathroom do-over.
Stage 1. Get the plumbing and the electricity disconnected
- The first thing was to get the necessary plumbing (water) and power disconnected to allow a safe ‘wrecking area’.
- We didn’t really want to damage a water pipe and flood the place out or accidentally come into contact with a live electrical wire.
Wrecking the joint
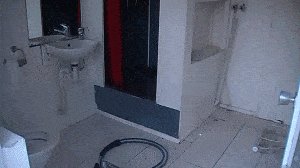
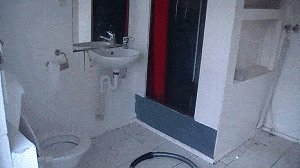
Stage 2. Start wrecking the joint
- In came the sledgehammer and crowbar, and down went the shower frame.
- It was a very old fashioned sort of shower unit, dark and dingy. The side and front walls (of the shower) will be replaced with glass panels and glass doors, making for a much lighter unit.
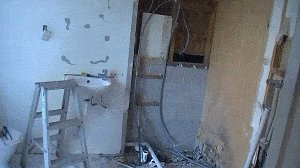
Stage 3. Down with the wall and ceiling linings
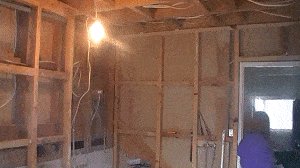
- Next we stripped all the walls and ceiling.
- This process is when you get to find out just what is behind the walls, especially in such an old house, where you’ve no prior knowledge of the structure.
- In this case, everything was in surprisingly good nick, although there was no insulation of any type.
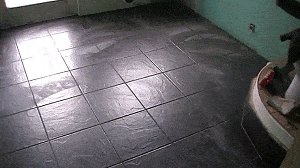
Stage 4. Up with the old floor tiles

- The ceramic floor tiles were a bit cracked and messy in places. This sent out warning signals that the floor under the tiles (albeit concrete) might not be up to scratch.
- So we thought that it would be best to completely lift the old tiles and replace them, thus we would be able to check out the floor base and make any necessary repairs.
New framing and lining
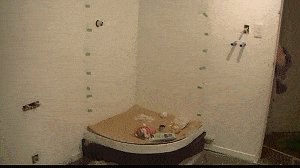
Stage 5. Make the shower stand
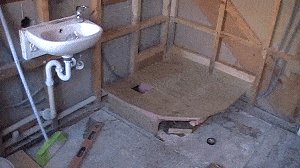
- Time to start the rebuilding.
- Because the waste pipes were in the side wall (as opposed to under the floor), we had to make a raised shower stand to accommodate the shower waste.
- The stand consisted of 6″ x 2″ (150mm 50mm) joists and a 3/4″ (20mm) thick plywood floor. The joists had to be arranged in such a way as to allow the waste pipes to be positioned to suit the shower tray.
- The stand floor was then fixed on top of the joists with a hole positioned to align over the shower waste.
- The position of the shower waste and the hole in the stand floor was determined by the hole in the shower tray.
Stage 6. Install the shower tray
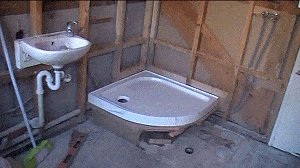
- The shower tray was glued to the stand floor and left weighted-down overnight to give the glue a chance to set.
Note: The hole in the shower tray should be aligned with the hole in the stand floor and it should be an easy task to connect the waste to the shower tray.
- Shower trays come in varying sizes, shapes, up-stands, and hole positioning.
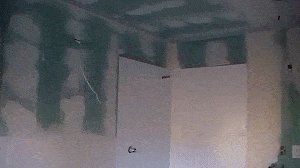
Stage 7. Insulation and up with the new wall and ceiling linings
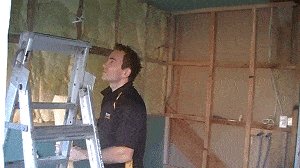
Note: Now is the time to get the electrician in to do any wiring in the framework if you need to change existing lights and/or power points, or add additional ones.
- In goes the insulation, and up goes the wall and ceiling linings.
- The lining should be suitable for a bathroom, and able to withstand the moisture it will encounter.
- In this case, it was a type of plasterboard treated for such areas.
Tiling, plastering, and painting
Stage 8. Floor smoothed and tiles down
- We found the concrete floor a bit rough and uneven once we lifted the original tiles, so we first had to level the floor.
- That was made easy with a self-levelling concrete compound. Basically it was just a matter of mixing the compound with water (as per instructions on the bag) and making a very wet mix, and then pouring it over the floor.
Note: The wet self-levelling concrete compound finds its own level. No need for any smoothing. Just pour it on top of the existing concrete and wait till it sets and dries.
- When the floor was nice and dry, we laid the ceramic tiles.
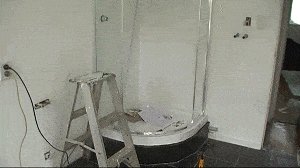
Stage 9. Shower lining fixed and walls plastered
- We then prepared the plastic shower lining, i.e., cut the holes for the fittings, and then glued the lining to the walls.
- Then the finishing trim was added.
- Then we plastered the rest of the walls and ceiling.
- Once the plaster had dried (a day or two later), a good sanding was needed in preparation for the painting.
Stage 10. Paint before everything goes in
- Time for the painting.
- We figured that it would be best to paint everything now before all the other units and shower screens were installed, which meant that we wouldn’t have to be so fussy about slopping paint everywhere.
- Basically, the only thing the needed a protective cover-sheet was the floor. The shower tray and lining already had a thin plastic film over them.
Fitting the units and finishing
Stage 11. Fit the shower screen and doors
- The shower screen and shower doors were fitted.
Note: Fitting instructions generally come with most similar type shower units.
- This particular unit comprised of two side panels and two curved doors that opened from the middle and slid in a curved motion to each side.
Stage 12. Fit the toilet and vanity
- In went the toilet and vanity.
- As all the painting had already been done, every little addition was getting closer to the finish of the bathroom.
- It’s now getting towards the most exciting stages – all the hard work coming to fruition.
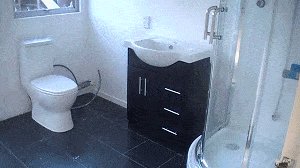
Stage 13. Have the plumber hook up the pipes
- O.K., everything’s pretty much installed.
- Now’s the time to have the plumber pop back and connect the pipes to the fittings (taps etc.) and get the water running.
- Also time to get the electrician back and get the power working.
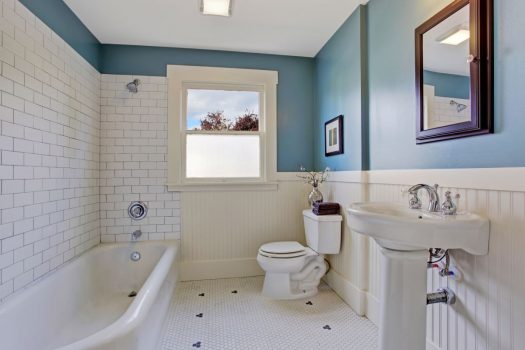
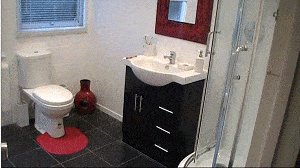
Stage 14. Done!

There you go.
A mirror, some blinds and a few personal things, and its all done.


