Contents
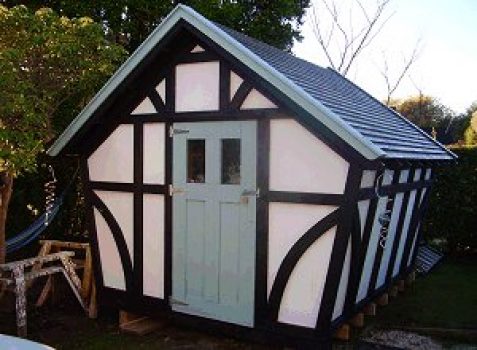
Build a shed
Introduction and quantities
The 10 x 10 shed is constructed mainly from 1 1/2″ x 3 1/2″ (90mm x 45mm) wood for the framing, 3/4″ (19mm) thick plywood for the floor and wall cladding, and 3/4″ x 6″ (150mm x 19mm) boards for the roof.
The inside floor size is 8ft (2400mm) wide x 10ft (3000mm) long.
The inside width gains another 22 inches” (550mm) at mid-height because of the sloping walls, making the overall wall size around 10ft x 10ft – hence why it is called the 10 x 10 shed.
The inside height at the highest point is around 8ft 8in (2600mm).
The overall height is 124″ (3100mm).
The instructions are in 23 parts (steps). Each part also lists the URL (web address) of a relevant video. The videos are only a quick skim through the building process, and are intended as a visual aid to help with the various project segments, not as a replacement for the plans.
This complete project (all the pages together in one handy pdf file, ad free) can be purchased online and downloaded immediately to your computer.
10×10 Tudor shed
$5.00- Pay online by credit card, debit card, or Paypal using Secure Server Paypal. You do not need a Paypal account if paying by credit or …
|
Understanding the measurements
All measurements throughout this project are given in both Standard/Imperial inches, and Metric (mm).
The measurements are given first in inches, followed by millimeters (mm) in brackets ( ).
1 1/2″ x 3 1/2″ means wood that is 1 1/2 (one and a half) inches thick by 3 1/2 (three and a half) inches wide.
And the equivalent in metric…
90mm x 45mm means wood that is 90 millimeters wide by 45 millimeters thick.
The millimeter measurements are written opposite to the standard measurements. Why?
In North America they call the smaller side first. Example: 1 1/2″ x 3 1/2″
In Australasia they call the bigger side first. Example: 90mm x 45mm
The inch sizes are not an exact match to the equivalent millimeter sizes, because for rounding-off purposes we translate 1″ as being 25mm which is not exactly right but near enough..
A shed built using the metric measurements will be approximately 1.6% smaller (hardly worth worrying about) than a shed built using the imperial (ft and in) measurements.
In other words, use one or the other but do not mix the two (for those of you who can work with both standard and metric measurements) and you should have no problems as far as the dimensions go.
The imperial measurements are more suited to North America. The metric measurements are more suited to Australasia and other countries.
Wood quantities
Plywood
- 3/4″ x 48″ x 96″ (19mm x 1200mm x 2400mm), 11 sheets.
For the sledge (under the floor frame)
- 4″ x 4″ (100mm x 100mm) runners, 4 pieces at 120″ (3000mm) long.
- 1 1/2″ x 3 1/2″ (90mm x 45mm) spacers, 3 pieces at 72″ (1800mm) long.
For the floor frame
- 1 1/2″ x 5 1/2″ (140mm x 45mm) joists, 11 pieces at 104″ (2600mm) long
- 1 1/2″ x 5 1/2″ (140mm x 45mm) blocking, 30ft (9m) in total.
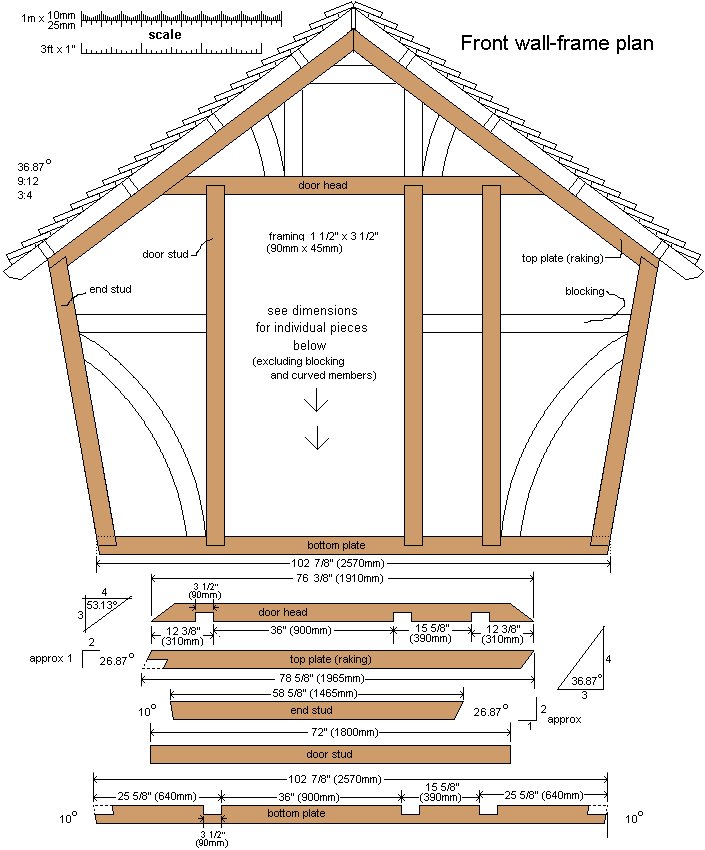
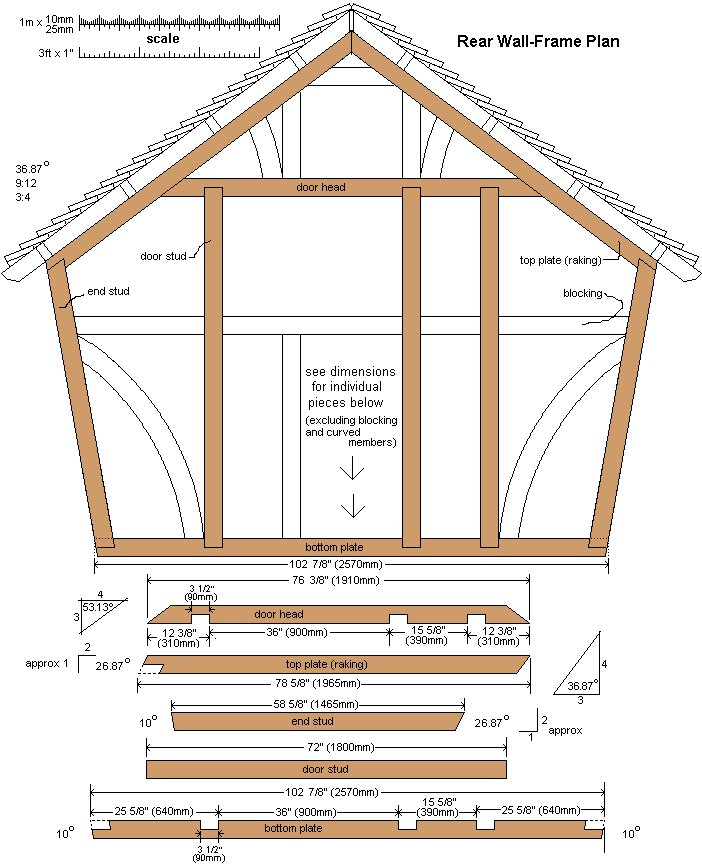
For the front and rear walls (excluding curved braces) – 1 1/2″ x 3 1/2″ (90mm x 45mm) wood.
- Bottom plates, 2 pieces at approximately 104″ (2600mm) long – check on site.
- Top plates (raking), 4 pieces at approximately 80″ (2000mm) long – check on site.
- Door/window heads, 2 pieces at approximately 80″ (2000mm) long – check on site.
- Door/common studs, 6 pieces at 72″ (1800mm) long.
- End studs, 4 pieces at approximately 60″ (1500mm) long – check on site.
- Blocking/other, 33ft (10m) in total.
Quantities – continued
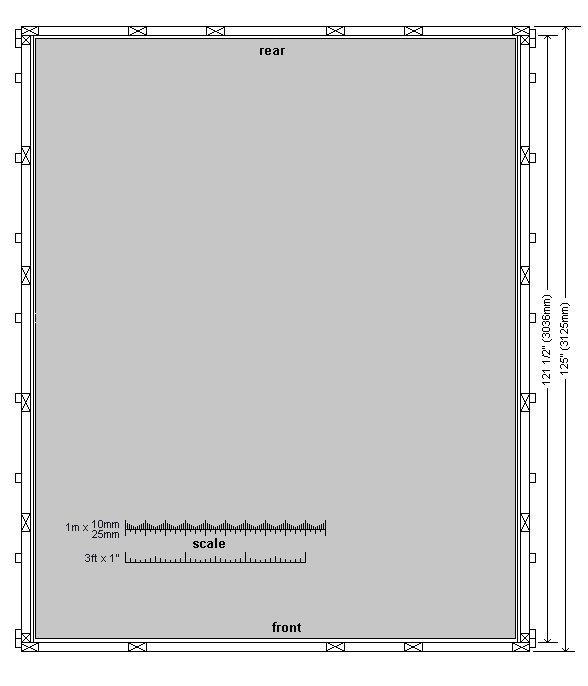
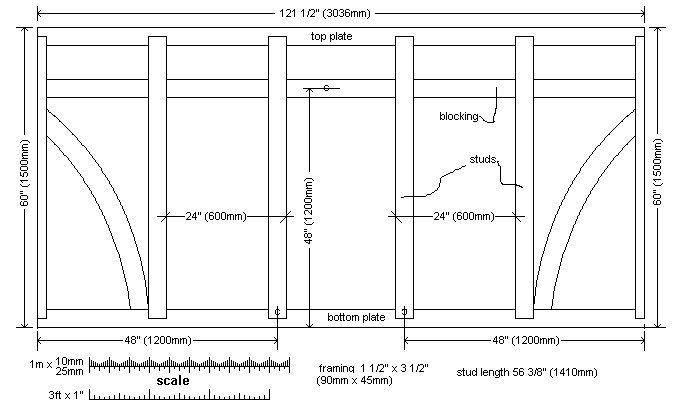
For the side walls (excluding curved braces) – 1 1/2″ x 3 1/2″ (90mm x 45mm) wood.
- Top/bottom plates, 4 pieces at 121 1/2″ (3036mm) long.
- Studs, 10 pieces at 56 3/8″ (1410mm) long.
- Blocking, 20ft (6m) in total.
For the curved bracing – 1 1/2″ x 9 1/2″ (240mm x 45mm) wood
- 8 pieces at 48″ (1200mm) long
For the roof frame
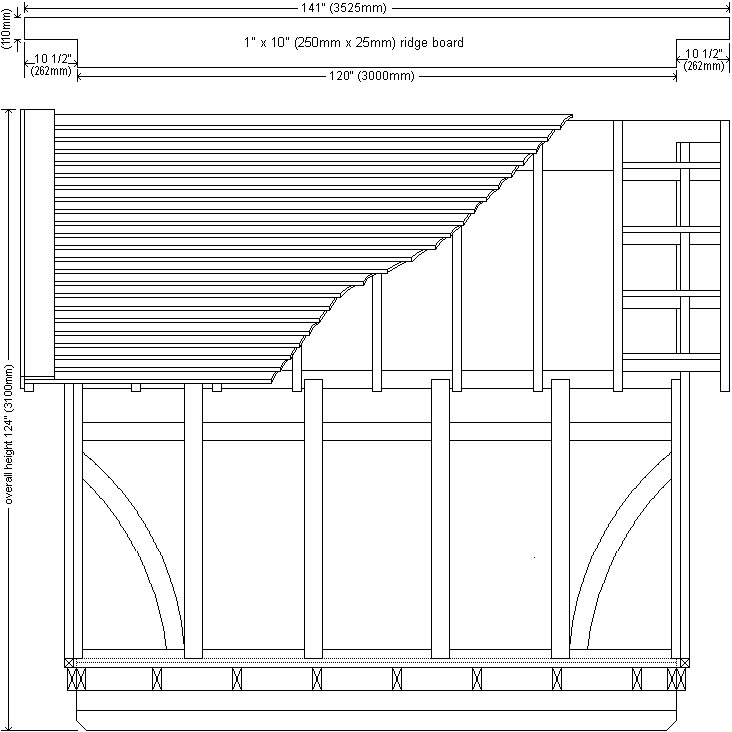
- 1″ x 10″ (250mm x 25mm) ridge board, 1 piece at 141″ (3525mm) long.
- 1 1/2″ x 3 1/2″ (90mm x 45mm) rafters, 18 pieces at approximately 88″ (2200mm) long. Check on site.
- Blocking, 54ft (16m) in total.
For the roof cover – 3/4″ x 6″ (150mm x 19mm) wood.
- Roof boards, barge board, barge cap, and door, 54 pieces at 12ft (3600mm) long.
For the door and window
- Cut out of leftovers.
TOTAL WOOD
- 3/4″ x 48″ x 96″ (19mm x 1200mm x 2400mm) plywood, 11 sheets.
- 4″ x 4″ (100mm x 100mm) runners, 4 @ 120″ (3000mm).
- 3/4″ x 6″ (150mm x 19mm) roof cover, 54 @ 12ft (3600mm) or 650ft (195m) in total.
- 1 1/2″ x 3 1/2″ (90mm x 45mm) wall/roof framing, 465ft (140m).
- 1 1/2″ x 5 1/2″ (140mm x 45mm) floor frame, 127ft (38m).
- 1 1/2″ x 9 1/2″ (240mm x 45mm) curved bracing, 34ft (10m).
- 1″ x 10″ (250mm x 25mm) ridge board, 1 @ 141″ (3525mm).
Also…
- Acrylic sheet,
- 4 @ 195mm x 345mm.
- 2 @ 250mm x 445mm.
And you will need an assortment of nails and screws and hardware of choice, plus some felt roofing underlay (or similar building wrap)
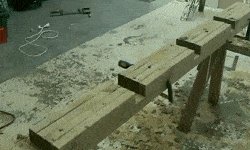
Making the sledge
Part 1: Making the sledge
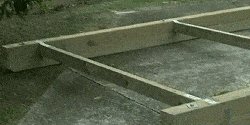
- The sledge is the base that the shed sits on.
- It is basically a couple of 4″x8″ (200mm x 100mm) runners or skids that are separated by spacers to make a type of sledge.
- The runners are 120″ (3m) long. Each runner (skid) is made up of two 4″x4″s (100mm x100mm) bolted together.
Why two 4″x4″s (100mm x100mm) bolted together?
Because 4″x4″s (100mm x100mm) are cheaper and more readily obtainable than 4″x8″s (200mm x 100mm). However, if you can source the latter, all the better.
The overall width of the sledge should be 80″ (2000mm).
Part 1 video clip Time: 2:08
Part 2: Siting the sledge
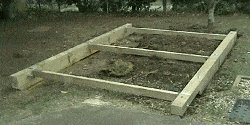
- Before you site (position) the sledge, make sure the ground where the sledge will rest is level and firm.
- Use a level or a water level to check the grade, and dig accordingly to level the ground directly beneath where the runners (skids) will sit.
For an article on ‘how to make and use an inexpensive water level’ go to here.
Part 2 video clip Time: 1:14
Part 3: Cutting the joists
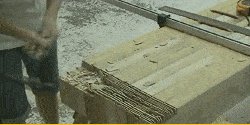
Altogether you will need eleven 1 1/2″ x 5 1/2″ (140mm x 45mm) joists that are 104″ (2600mm) long.
- The two end joists will need to have 1″ (25mm) ripped off them, so in effect they become 1 1/2″ x 4 1/2″ (115mm x 45mm). The other nine need a rebate cut at each end.
- Make the rebates 1″ (25mm) deep and 4″ (100mm) in from each end.
Helpful reference:
For a more detailed description on how to rebate the floor joists, go to here, and although the description is for a smaller shed, the method is the same – only the measurements differ.
Part 3 video clip Time: 0:41
The floor and Angle info
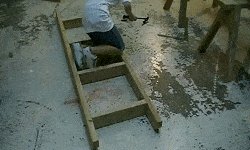
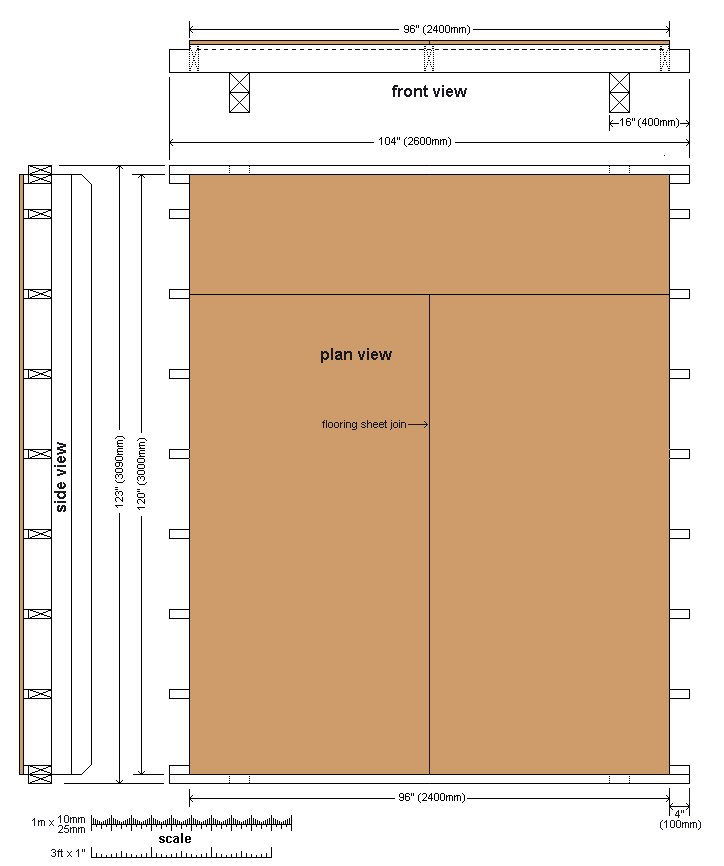
Part 4: Assembling the floor frame
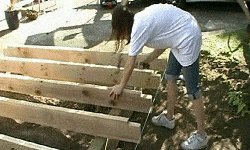
- Place the two end joists on top of the runners (one joist each end) so that they are flush with the ends (of the runners), and overhanging each side by 12″ (300mm).
- Run a taut string-line from the end of one end-joist, to the end of the other end-joist.
- Pack the string-line out from the joist ends with a nail.
- Align the intermediate joists to within a nail’s width of the string-line. Refer to the plans for the joist spacings.
- Next, fix (nail) the joists in place and fix the two ripped down joists to the outside edge of the two end joists.
- Then add three rows of blocking, one row along the middle and a row each side, 4″ (100mm) in from the ends of the joists.
Part 4 video clip Time: 1:33
Part 5: Laying and fixing the floor

- Cut, lay and fix the plywood sheets to the floor frame. There will be two 48″ x 96″ (2400mm x 1200mm) full sheets and one 24″ x 96″ (2400mm x 600mm) half sheet.
- Ensure all joins and edges are over blocking or joists.
Part 5 video clip Time: 0:44
Part 6: Getting the angles
- Because of the sloping side-walls and the pitch of the roof, there will be a few varying angles to cope with.
- Some of the angles may sound a bit daunting to figure out, but it is really quite easy once you know how.
Part 6 video clip Time: 0:34
Making the wall frames
Part 7: Cutting the wall frames
- Cut all the wall-frame members to the lengths given in the plans. The bottom and top plates all require rebates and notches to house the stud members. This can be achieved by making multiple saw cuts across the notch/rebate area with a circular saw with its blade set to the required depth. The notch/rebate area can then be cleaned out with a hammer and chisel.
Part 7 video clip Time: 1:36
Part 8: Assembling the wall frames
- Once all the wall-frame members have been cut and notched/rebated, the frames can be made up on an even surface, such as a large floor, large deck area or concrete drive. Refer to the plans for placement.
Part 8 video clip Time: 1:57
Part 9: Making the curved bracing
- The curved bracing can be cut from pieces of 1 1/2″ x 9 1/2″ (240mm x 45mm) wood that are 48″ (1200mm) long.
You will need eight altogether for each corner of the walls.
You will also need four more smaller curved pieces for the top of the front and rear frames, but they can be cut from the off-cuts.
Refer to the plans for the dimensions. - Ideally, use a band saw to cut the curves, however, there is another alternative as explained at here
Note: The curved braces are only decorative. They are not a necessary part of the structure so they can be omitted.
Part 9 video clip Time: 1:38
Cutting the wall panels
Part 10: Fixing the curved bracing

- Once the curved braces have been cut (all slightly over length at this stage), align them on the framework above position and mark where they need to be cut.
- Then cut them and fix them in place.
Part 10 video clip Time: 0:55
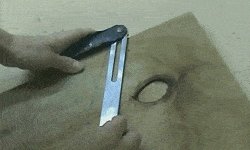
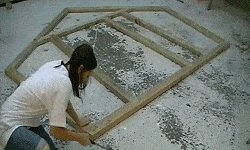
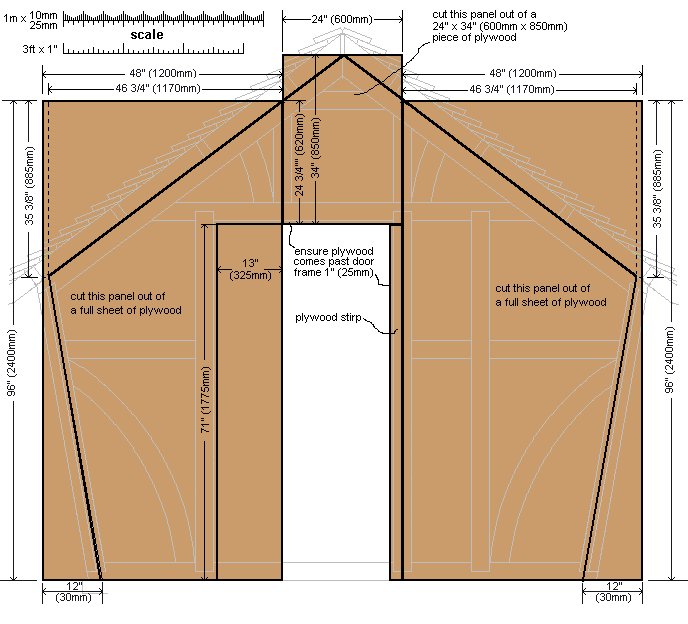
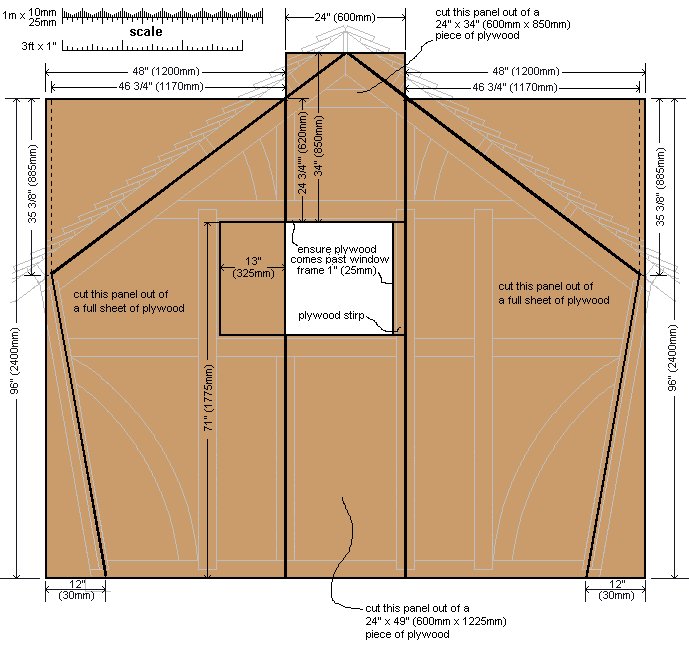
Part 11: Marking and cutting the wall panels
- Even though the dimensions and measurements are given in the plan drawings for each and every plywood wall panel, it is probably best to use the front and rear wall-frames as patterns to mark the panels for cutting.
It is not so important with the side panels, as they are rectangular shapes and can easily be marked off the plans. - To mark the front (or rear) plywood panels for cutting, place the appropriate panels in position on an even surface (refer to the ‘front/rear wall sheet plan’ for plywood panel size and placement).
- Lay the front (or rear) frame on top of the plywood panels.
- Mark around the outside of the frame (onto the plywood) with a pencil and also mark the doorway/window.
- Take the frame off the plywood.
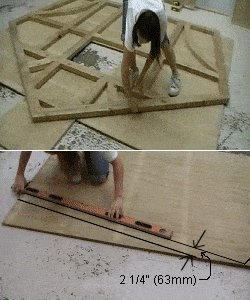
- Now mark another couple of lines, in 2 1/4″ (63mm) from the side lines. These will now become the cutting lines.
- Also make another pencil line an inch (25mm) in from the door (or window) line, all the way around. That will also become the cutting line.
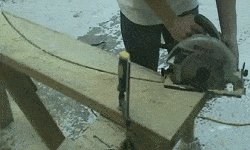
- Then place the plywood panels on saw-horses or a cutting table, and cut.
Part 11 video clip Time: 2:22
Cutting the roof rafters
Part 12: Cutting the roof rafters
- Cut 18 rafters at 87″ (2175mm) long, with an angle cut inwards at one end 36.87 degree off square, and a 45° chamfer cut at the other end.
- Once the rafters are cut, use eight of them to make up four ladder-type units, each unit consisting of two rafters separated by four blocks. Make the blocks 19 5/8″ (490mm) long.
Refer to the plans or the drawing below for block placements, and refer to the roof plan to show the position of each ladder-type unit over the front and rear walls.

Rafter/fly-rafter blocking detail
Part 12 video clip Time: 1:48
Part 13: Painting the frames and panels
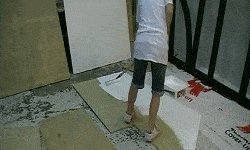
- Now’s probably the best time to paint the frames and plywood sheets.
- You can slip-slap-slop paint all over the place without having to worry about all that tedious cutting-around where two contrasting colors meet.
- The paint used for this project was a charcoal fence paint for the frame and a gloss white for the plywood.
Part 13 video clip Time: 0:44
Part 14: Fixing the wall panels
- Lay the wall-frames on a flat surface – something that will not scratch the paint work – and then put the plywood wall-panels on top of the frames and nail them in place.
- Use 2 1/2″ (60mm) galvanized flathead nails spaced at a maximum of 6″ (150mm).
- Alternatively, use screws.
Part 14 video clip Time: 1:03
Standing the walls / roof
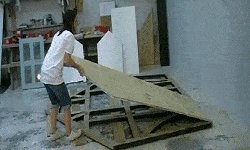
Part 15: Standing the walls
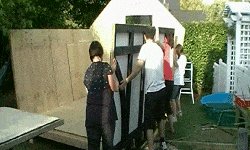
- Grab your friends and lift the rear wall into place. Have someone balance it while others position a side wall.
- Hold the rear and side walls together with a couple of clamps.
- Likewise with the other side wall and the front wall.
- Nail at the corners through the front and rear wall studs into the side wall studs using 4″ (100mm) galvanized flathead nails, four at each corner. Nail the bottom plates to the sub-floor where possible.
Part 15 video clip Time: 1:26
Part 16: Erecting the roof frame
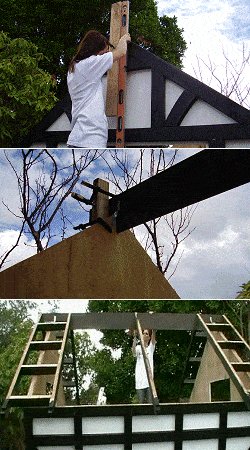
- Cut the ridge board to the dimensions given in the ‘Side elevation plan and ridge-board detail’ and fix it on top of the front and rear walls with 2 hurricane ties at each end.
- Use a couple of temporary uprights clamped to the top of both the front and rear walls to hold the ridge board in place until such time as the hurricane ties are nailed securely to both front and rear walls. The temporary uprights can then be unclamped and discarded.
- Fix the four fly-rafter and rafter ladder-type units (see part 12) in place over the rear and front wall-frame top plates. Refer to the plans for position.
You may need somebody to help hold them in place while you nail. Nail through the ridge beam into the top-ends of the rafters Then ensure the rafters are parallel with the top plates and nail (toe nail, angle nail) through the blocking into the top plates to fix. - Now add the rest of the common rafters evenly spread out along the ridge board.
First nail them to the ridge board. Then run your eye along the ridge board and the side-wall top plates.
Ensure they are straight.
Fix the lower end of the common rafters to the side wall top plate by angle nailing (toe nailing) through the side of the rafters into the top plate. Just use one nail at each meeting to hold.
Then fix hurricane ties or similar fasteners to the rafters and the inside-top of the side walls.
Part 16 video clip Time: 1:22
Fixing the roof boards
Part 17: Fixing the roof boards
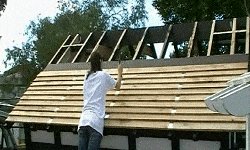
- Run some felt roofing underlay (or similar building wrap) over the rafters before fixing the roofing boards.
- Begin with the first row of boards 2″ (50mm) up from the bottom of the rafters. The first row will require a wedge packer between the roof board and the rafters. Refer to the plan for visual guidance.
- Ensure that the first row of boards are straight, as it will be used to measure and mark for the subsequent rows. Use a string-line or chalk-line to achieve this.
- If the roof boards do not run the length of the roof in one piece, then make sure that any join is over a rafter, and also that the joins are covered with a galvanized metal soaker. Also make sure all joins on subsequent rows are staggered, i.e. joins on any two consecutive boards do not line up.
- Work your way up to the top.
The top portion of each side can be fixed off scaffolding (stools and planks etc) from within the inside of the shed.
The bottom part can be fixed off scaffolding (stools and planks etc) from outside the shed. - When all the roof boards are on, fix an angled galvanized flashing along the apex.
Part 17 video clip Time: 1:07
Part 18: Fixing the roof trim
- Cut and fix the barge cap and the barge board.
- The barge cap is a piece of 3/4″ x 6″ (150mm x 19mm) board that runs up the rake of the roof, and sits over the ends of the roof boards.
- Fix the barge cap in place, overhanging the fly rafter by 2″ (50mm).
- The barge board is a piece of 3/4″ x 3″ (75mm x 19mm) board that goes under the barge cap and covers the top half of the fly rafter.
- Fix the barge board to the fly rafters directly underneath the barge cap.
Note: Rip some roof boards in half (cut down lengthwise) to make the barge boards.
Part 18 video clip Time: 0:25
Making the door / window
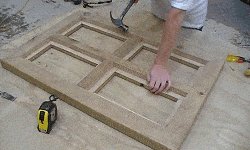
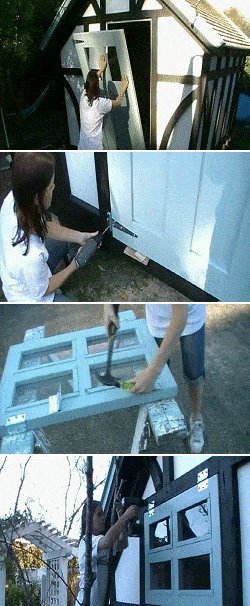
Part 19: Making the door

- The door is basically a sheet of plywood with boards (similar to the roof boards) glued and fixed to the outside for both strength and looks.
- Refer to the plans for dimensions.
- Glue and nail (or screw) the boards to the plywood.
- Ensure the boards overlap the window holes (in the plywood) by 1″ (25mm) all the way around.
- Once the glue is dry, paint the door. Once the paint is dry, fit and fix the window panes.
Part 19 video clip Time: 2:35
Part 20: Making the window
- The window is made from 1 1/2″ x 3 1/2″ (90mm x 45mm) wood, rebated.
- Refer to the plans for measurements.
Part 20 video clip Time: 3:15
Part 21: Installing the door and window
- The door opens out, and the widow opens up.
- Therefore, hinges need to be fixed to the side stile (vertical side member) of the door, and to the top rail on the window sash.
- The door uses three 6″ (150mm) T-hinges and the window uses two 3 1/2″ (90mm) butt-hinges.
- Begin fitting the hinges by laying the door and the window on saw-horses or other work platform.
- Screw three 6″ (150mm) T-hinges to the side stile of the door, one in line with the top rail, one in line with the middle rail and one in line with the bottom rail.
- Do you want the door opening out to the left or to the right? That preference will determine what side of the door you fix the hinges on.
- The window will need two 3 1/2″ (90mm) butt-hinges screwed to the top rail but they will need to be sunk 5/16″ (5mm) into the rail.
Why?
Because the window sash is the same thickness as the surrounding frame. If the hinges were not checked into the top rail, then the sash would bind or jam against the stop when being opened or closed.
By sinking the hinge into the rail, it brings the top of the sash away from the stop, thus eliminating the possibility of binding or jamming. Once the hinges are on, the door and window are ready to hang in place.
- To install-
Place the door in the door opening and pack the sides, top, and bottom (between the door and the opening) so there is even gap all the way around.
Then screw the hinges to the surrounding frame. - Take out the packers, align and fix the bolt catch.
- Hang the window following the same procedure.
Part 21 video clip Time: 1:33
Making the drip caps
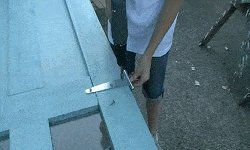
Part 22: Making and fitting the drip caps
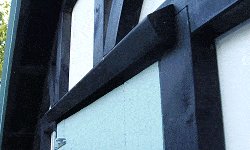
- A drip cap is a horizontal piece of wood that is fixed above the door and window to deflect water from running inside.
- This shed requires two drip caps. One to go above the door, and one to go above the window.
- Both drip caps can be shaped from a piece of 1 1/2″ x 3 1/2″ (90mm x 45mm) wood that is 40″ (1000mm) long.
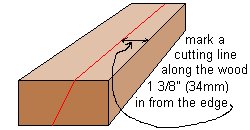
- Make a pencil line down the length of a piece of 1 1/2″ x 3 1/2″ (90mm x 45mm) wood that is at least 40″ (1000mm) long. See the drawing below for the dimensions.
Set the angle of the blade on a circular saw (or bench saw) to 26.87 degrees off square. - Then rip (cut down lengthwise) along the pencil-line.
That will make two drip caps. One for above the window and one for above the door.
Now a bit of paint.
When the paint is dry, fix one above the door and one above the window, as low as possible so as not to get in the way of the door or window opening or closing.
Part 22 video clip Time: 0:41
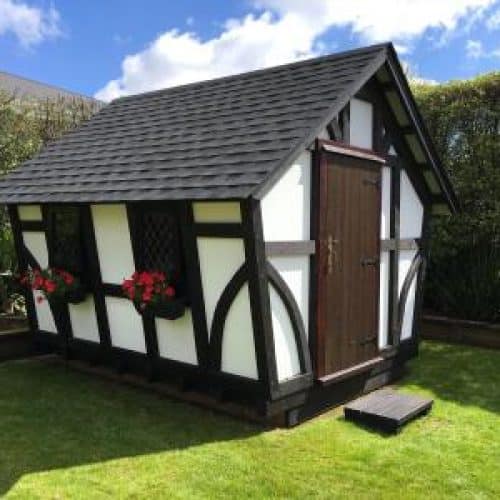
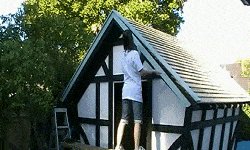
Part 23: The finished shed
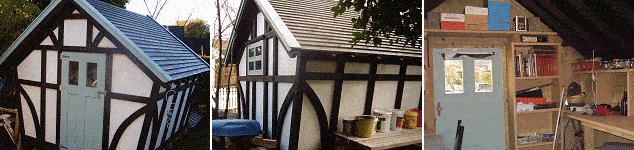
Heaps of room!
Part 23 video clip Time: 0:36
Sub-floor plan

Floor plan
Stud layout plan
Front wall-frame plan
Rear wall-frame plan
Side wall-frame plan
Front-wall siding plan
Rear-wall siding plan
Side elevation plan
Roof plan

Door and window plan

If you want a smaller shed (8×7), then there are free plans:


Hi there
This project took me about 11 months and I still have to lime plaster 3 interior walls
It’s a great setting to relax with friends, play cards and drink some wine
Best wishes for an enjoyable project building 2019
Doug