Contents
Description & About the measurements
Description
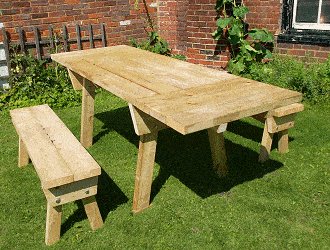
This table and bench set comprises of a sturdy stand alone rectangular shaped table and two (also stand alone) bench seats.
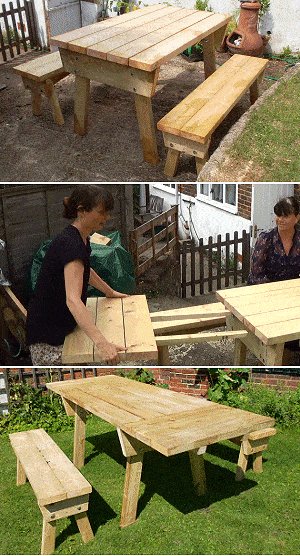
There are two extension pieces that can be slotted into the ends of the table to increase its length. The two extension pieces are separate from the table, and when not needed they can be completely removed and stored until further required. They are not permanently attached to the table.
The table and benches are made out of treated softwood. The stock sizes used are: 190 mm x 45 mm (1 1/2″ x 7 1/2″), 145 mm x 45 mm (1 1/2″ x 5 1/2″), 95 mm x 45 mm (1 1/2″ x 3 1/2″), 65 mm x 45 mm (1 1/2″ x 2 1/2″), and 45 mm x 45 mm (1 1/2″ x 1 1/2″).
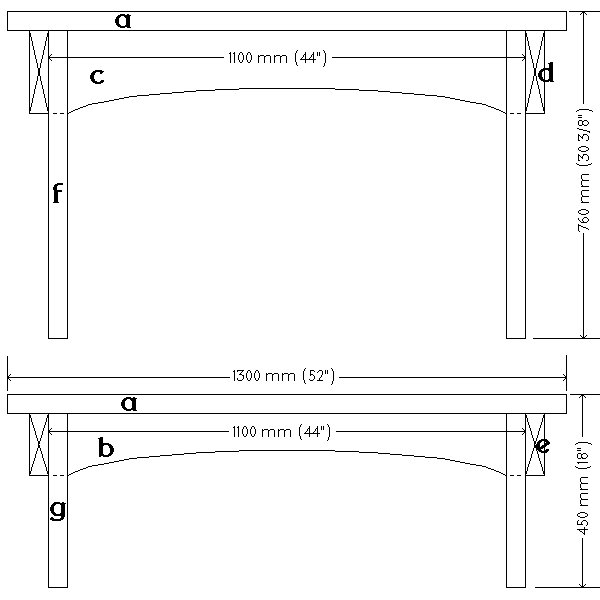
The table is 750 mm (30″) wide and 1300 mm (52″) long minimum, and extends to 2200 mm (7′ 4″) with the extension pieces added. Each bench seat is 1300 mm (52″) long and 290 mm (11 5/8″) wide.
- Pay online by credit card, debit card, or Paypal using Secure Server Paypal. You do not need a Paypal account if paying by credit or …
|
About the measurements used
Dimensions given in this project are in both Metric (mm) and Imperial (inches).
The metric measurements are given first followed by the standard measurements in brackets ( ).
For example: 95 mm x 45 mm (1 1/2″ x 3 1/2″).
The size (width and thickness) of the wood used in this project is the ‘actual’ (true) size.
That is the size of the wood after it has been dressed (surfaced, planed and/or seasoned).
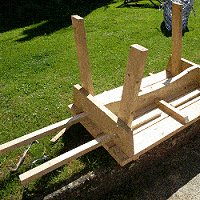
A pictorial summary
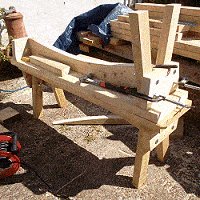
This is a pictorial summary showing the order of making (page 1 of 2).
These two pages are followed by the plan drawings, the material and shopping list, and then the clear step-by-step instructions.

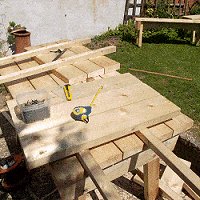
A pictorial summary continued
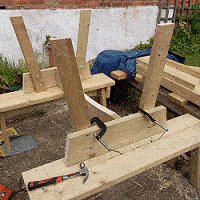
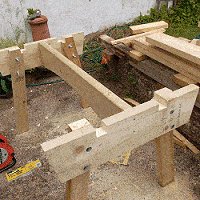
This is a pictorial summary showing the order of making (page 2 of 2).
These two pages are followed by the plan drawings, the material and shopping list, and then the clear step-by-step instructions.


Part identification & The plan drawings
Part identification
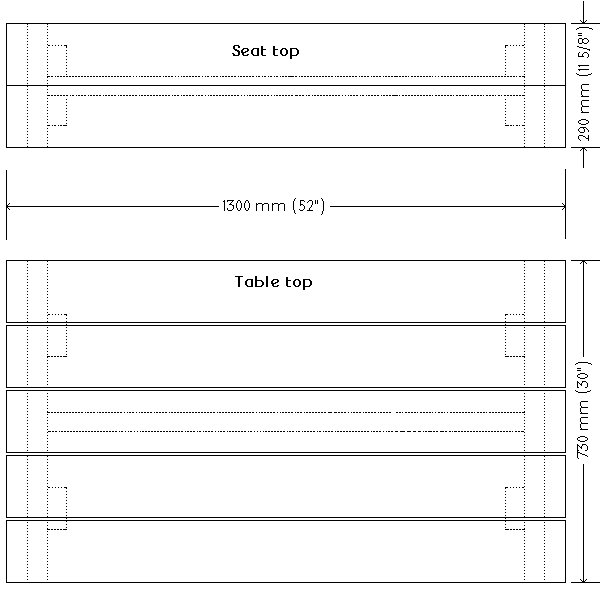
[a] Table top and seat top board, made from 145 mm x 45 mm (1 1/2″ x 5 1/2″) stock
[b] Seat brace, made from 145 mm x 45 mm (1 1/2″ x 5 1/2″) stock
[c] Table brace, made from 190 mm x 45 mm (1 1/2″ x 7 1/2″) stock
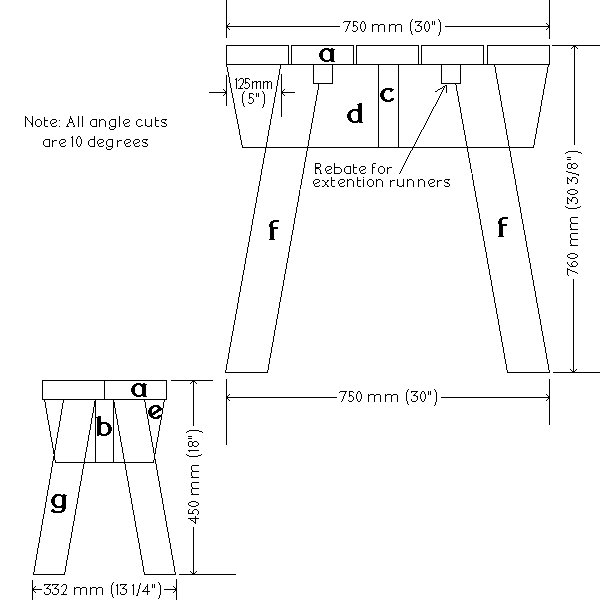
[d] Table-top support, made from 190 mm x 45 mm (1 1/2″ x 7 1/2″) stock
[e] Seat-top support, made from 145 mm x 45 mm (1 1/2″ x 5 1/2″) stock
[f] Table leg, made from 95 mm x 45 mm (1 1/2″ x 3 1/2″) stock
[g] Seat leg, made from 65 mm x 45 mm (1 1/2″ x 2 1/2″) stock
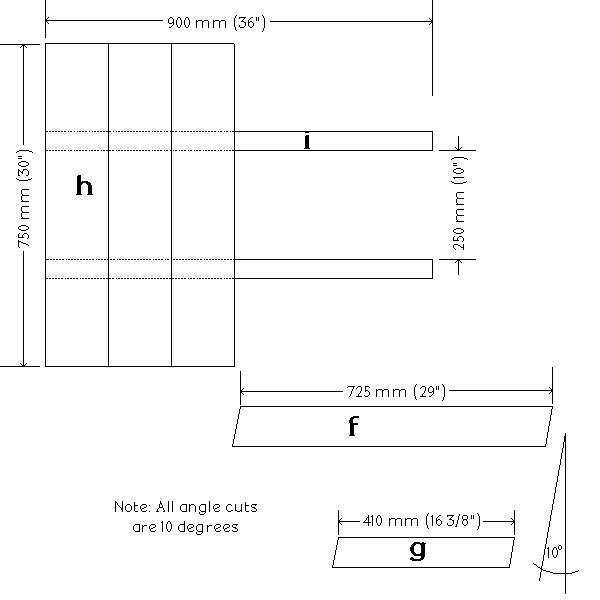
[h] Extension top, made from 145 mm x 45 mm (1 1/2″ x 5 1/2″) stock
[i] Extension runners, made from 45 mm x 45 mm (1 1/2″ x 1 1/2″) stock
The plan drawings
Shopping list and cutting list
Note: Sizes vary from place to place and so does availability. Different stock sizes (within reason) will work. Just make any necessary allowances.
When purchasing the wood ensure it is suitable for exterior use. To minimize wastage purchase the longest lengths possible, and when you are cutting the pieces as per the cutting list below, always cut the longest pieces first. The smaller pieces can be cut from the off-cuts.
The shopping list below does allow for a little bit of wastage.
Shopping list – wood
| NOMINAL SIZE | ACTUAL SIZE | AMOUNT |
| 50mm x 50mm (2″x2″) | 45 mm x 45mm (1 1/2″ x 1 1/2″) | 4 metres (14ft) |
| 75mm x 50mm (2″x3″) | 65 mm x 45 mm (1 1/2″ x 2 1/2″) | 4 metres (14ft) |
| 100mm x 50mm (2″x4″) | 95 mm x 45 mm (1 1/2″ x 3 1/2″) | 3.6 metres (12ft) |
| 150mm x 50mm (2″x6″) | 145 mm x 45 mm (1 1/2″ x 5 1/2″) | 21 metres (70ft) |
| 200mm x 50mm (2″x8″) | 190 mm x 45 mm (1 1/2″ x 7 1/2″) | 3 metres (10ft) |
Shopping list – other
You will also need: 16 of 10mm (3/8″) carriage bolts 110mm (4 1/2″) long, about 2 kg (4 1/2lb) of 90mm (3 1/2″) flat-head galvanized nails, a handful of 90mm (3 1/2″) wood screws for exterior use, some exterior type wood glue, about a metre (40″) of fixing band or strap, and a handful of 30mm (1 1/4″) flat-head galvanized nails to fix the fixing band.
Cutting list
| ID | DESCRIPTION | STOCK SIZE | LENGTH | HOW MANY |
| [a] | seat/table-top board | 145 mm x 45 mm (1 1/2″ x 5 1/2″) | 1300 mm (52″) | 9 |
| [b] | seat brace | 145 mm x 45 mm (1 1/2″ x 5 1/2″) | 1100 mm (44″) | 2 |
| [c] | table brace | 190 mm x 45 mm (1 1/2″ x 7 1/2″) | 1100 mm (44″) | 1 |
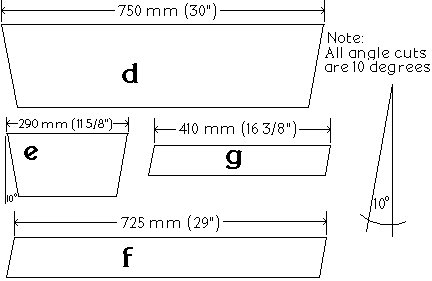
| [d] | Table-top support | 190 mm x 45 mm (1 1/2″ x 7 1/2″) | 750 mm (30″) | 2 |
| [e] | Seat-top support | 145 mm x 45 mm (1 1/2″ x 5 1/2″) | 290 mm (11 5/8″) | 4 |
| [f] | table leg | 95 mm x 45 mm (1 1/2″ x 3 1/2″) | 760 mm (30 3/8″) | 4 |
| [g] | Seat leg | 65 mm x 45 mm (1 1/2″ x 2 1/2″) | 450 mm (18″) | 8 |
| [h] | Extension top | 145 mm x 45 mm (1 1/2″ x 5 1/2″) | 750 mm (30″) | 6 |
| [i] | Extension runner | 45 mm x 45 mm (1 1/2″ x 1 1/2″) | 900 mm (36″) | 4 |
Instructions – Stacking and cutting the pieces
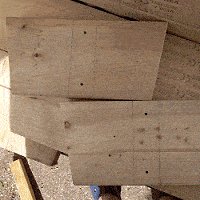
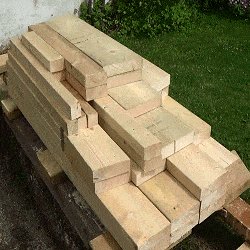
Step 1: Stack the wood
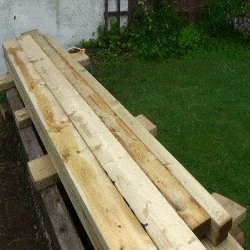
- It’s always a good idea to stack the wood neatly before commencing the job and to stack it in a way that will make the pieces that are first needed, – easily accessible. Having the wood neatly stacked helps prevent the wood from warping if left for any amount of time. The importance of this depends on factors such as the season (extreme heat can soon warp wood if not carefully checked) and also where the wood is stacked (in cover or outside). Wood should be stacked 150mm (6″) off the ground.
Step 2: Cut all the pieces
- Cut all the pieces according to the cutting list on the previous page.
- Pieces d,e,f,g. need to be angle cut 10° as shown below.
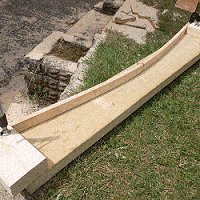
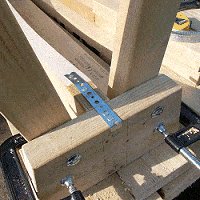
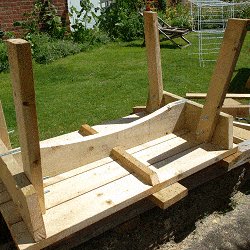
Step 3: Mark the brace curve
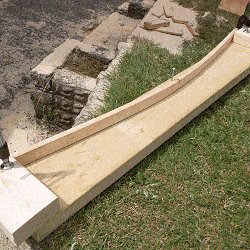
- Firstly, the curve in the brace is purely decorative. You do not need it. But…
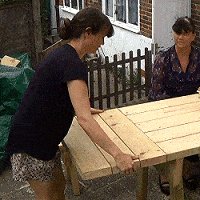
It does look good and it is easy to do – so why not do it. - Mark the curve by using a bendy stick. Clamp a couple of blocks to each end of the brace piece (see the picture). Place the bendy stick against the blocks and pull (bend) the bendy stick in at the middle. Hold it in place with a nail and then mark the curve with a pencil. The amount of bend can be as little or as much as you like.
Making the bench frame
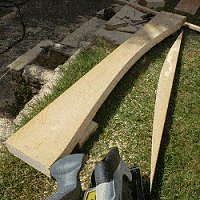
Step 4: Cut the curve
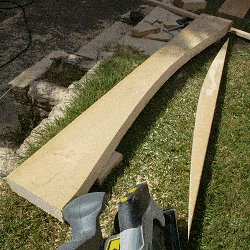
- It is possible to cut a gentle curve with an ordinary circular saw as long as the blade isn’t too fine.
- A general purpose cutting blade will usually do the trick.
- This particular curve was cut with an ordinary circular saw.
- Obviously, if you happen to have a band saw or some other tool ‘purposely’ made for the task, then all the better.
Step 5: Drill the seat-top supports
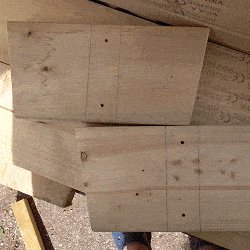
- The seat-top supports [e] are made from 145 mm x 45 mm (1 1/2″ x 5 1/2″) stock.
They are 290 mm (11 5/8″) long, angling in 10° at each end. Refer to the picture for visual guidance.
Drill two holes (for the nails) in the middle of each piece, one approximately 25 mm (1″) down from the top and one approximately 25 mm (1″) up from the bottom. - Make the hole size the same diameter or slightly smaller than the nail.
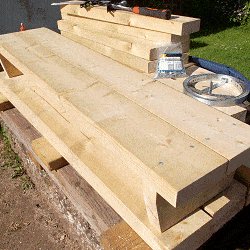
Step 6: Fix the seat-top supports to the brace

- On a flat surface, fix the seat-top supports (e) to the brace (b).
- At this stage the seat-top supports (e) and the brace (b) are in upside-down position.
- Simply nail the seat-top supports (e) to the brace (b) through the pre-drilled holes, ensuring the brace is in the center of the two end pieces (e). See the picture.
Fixing the seat boards and the legs
Step 7: Fix the seat-top boards in place
- Flip the unit (comprising (e) and (b)) over so it is upright. Sit it on an even surface and place the seat boards (a) in position.
- Ensure the overhangs at both ends are equal.
- Fix the seat boards to the support (e) with nails, but first pre drill the nail holes through the seat boards (a) to help eliminate the possibility of the wood splitting.
Step 8: Finish the first seat
- Turn the unit (comprising (a) (b) (e) – works so far) upside-down and sit it on an even surface.
- Clamp the legs (g) in place. Refer to the ‘plan drawing’ for placement.
- Drill and bolt each leg with one bolt positioned approximately 40 mm (1 1/2″) down from the narrower side of the seat-top support (e). See the picture.
- Also nail (when the unit is back in upright position) through the seat boards down into the top of each leg with one nail at each meeting.
- Fix some galvanized fixing band (metal strap) to the seat-top support (e) and the brace (b), to tie them together. Refer to the picture.
Step 9: Make up the second bench seat

- That’s the first bench done. Now lets move onto the second.
- Make up the second bench seat in the same manner as the first with one added bonus – you can use the first bench seat as a work bench to make up the second.
- That of course, is only a bonus if you don’t already have your own work bench in place.
Assembling the table frame
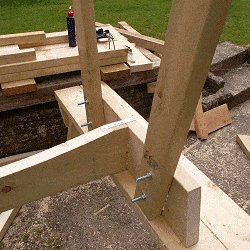
Step 10: Make the table frame
- The two bench seats can now come in handy, as they can be used as work benches to make up the table.
- Make up the table in the same way as the seats were made.
- Nail the two table-top supports [d] (one each end) to the table brace [c], glue and clamp the legs [f] in place (refer to the ‘plan drawing’ for placement), and then drill and bolt to secure. Put in two bolts at each meeting, that will be 8 bolts in all for the table legs.
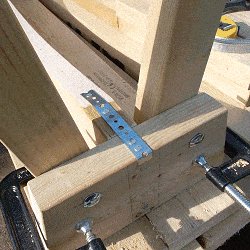
Step 11: Add some metal strap
- Fix some galvanized metal strap (fixing band) to the underside of the brace [c] (at each end) and the table-top support [d]. That will tie them in place and help prevent wobble further down the track should heavy usage take its toll.
- Also, now is a good time to cut off the ends of any over length bolts, if applicable.
Step 12: Cut notches for the extension runners

- Cut notches 45mm (1 1/2″) deep x 45mm (1 1/2″) wide in the table-top support [d] and part of the top of the legs to accommodate the extension sliding runners.
- Space the notches 250 mm (10″) apart. Refer to the drawing below.
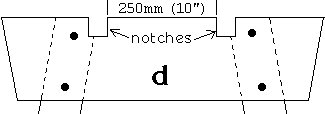
- The notches (rebates) can be cut by setting the blade of a circular saw to the required depth and making multiple cuts across the cut-out area and then by cleaning out the area with a chisel.
Fixing the table top
Step 13: Add the table-top boards

- The table-top boards [a] can now be fixed onto the table frame.
- Fix the two side boards first (one at each side of the table frame) ensuring that the overhangs are equal, then put in the three intermediate boards, evenly spaced, and fix them in place.
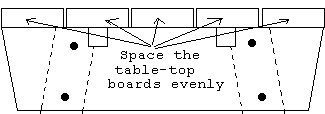
- Nailing: Fix the table-top boards [a] to the Table-top support [d] with glue and two galvanized flat-head nails at each meeting.
- Sure – you can use screws if you like, but flat nail heads look good on a rustic sort of table (I think, anyway).
Step 14: Strengthen the table-top
- Turn the table upside down and fix a couple of blocks of wood (strengtheners) across the middle of the table on the underside. Glue and nail the strengtheners in place. They can be practically any stock size, whatever is left laying around.
- The strengtheners will help prevent the top of the table from becoming uneven, i.e. keeping all of the table-top boards on the same plane.
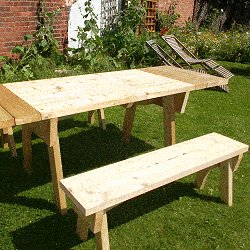
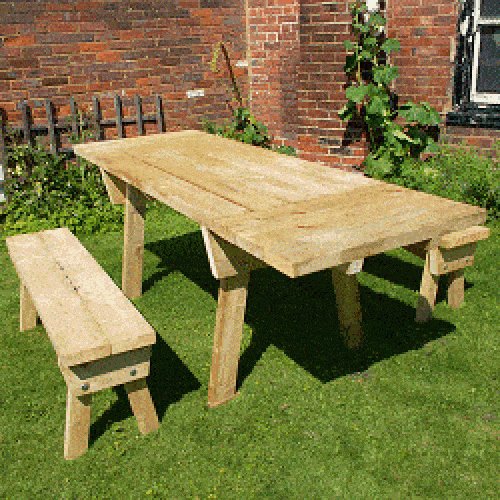
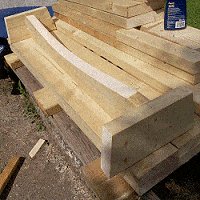
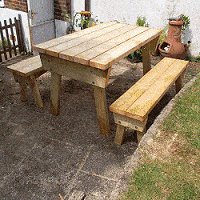
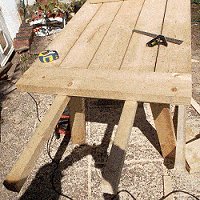
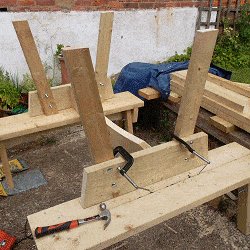
Step 15: Finished table without extensions

- Well that’s the table (without the extensions) and the two bench seats finished.
- Sometimes a stand alone picnic table with separate seats is better that an all-in-one unit, as it allows far more options as to what can be done with it (seating, positioning, one-seat or two seat, etc.)
- The table and benches came in handy for me on a following project, as three work benches. But that’s another story.
Making the extensions
Step 16: Trial the extension runners

- Taper the protruding end of each runner (i) (as shown in the drawing below) to ensure easy insertion into the notches in the table (the sliding runner holes).

- Sand, plane, or saw the taper on each runner (i) until they slide in and out with ease.
- Trial and trial again makes perfect.
Step 17: Commence the extensions

- Insert the runners (i) into the notches and ensure that they are parallel.
- Place the first extension-top board (h) in place on top of the runners. Place it up against the table and make the ends flush with each side of the table.
- Take a pencil and mark the position of the runners on the extension-top board (from underneath), and mark the position of the extension-top board on the runners (from above).
Step 18: Continue with the extensions

- Continuing from step 17, lay the other two extension-top boards in place at each end of the table.
Place them against each other and in line with one another (i.e. flush at the ends). - Now mark them in the same way as the first board was marked – as described in step 17.
- Ensure that throughout steps 17 and 18, the runners are parallel at all times while marking.
Fitting the extensions
Step 19: Finish making the extensions

- All the extension pieces are now marked, so they can be taken out.
On a work bench, turn the pieces over (upside-down) and re-align them to the marking.
Glue and screw the runners to the extension-top boards. - Pre-drill all screw holes.
- The table makes a good work bench for aligning and fixing the runners to the extension boards.
- Trim off (with a handsaw) and angle back any piece of runner that sticks out past the end of the extension.
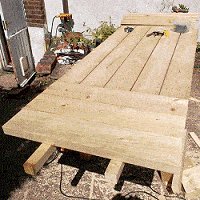
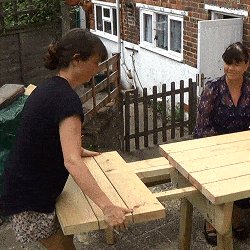
Step 20: Try for size
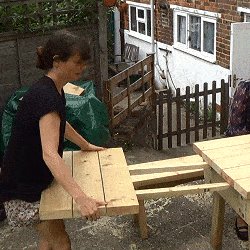
- Now the proof is in the pudding. See how well the extensions fit, and why wouldn’t they – the runners were tested for ease of sliding, the pieces were all marked for placement, and the runners were made parallel.
- And of course, the runners were tapered to make them easily fit into the notches in the table.
What could possibly go wrong.
Look at that – fits like a glove
Job finished!

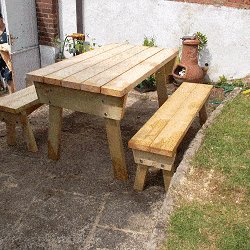
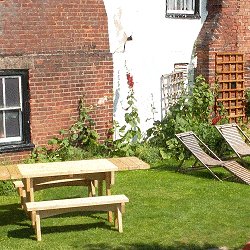
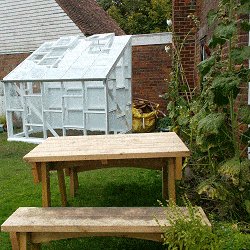
It’s a very practical table. It can be pushed against a wall and have the seats along one side, it can be out in the open with seats both side, It can be extended and more chairs brought out (grab them from your house) – or – (as I have done) it can also be used as a work bench or three.
I daresay most of the time it will probably be in ‘shortened mode’ with the extensions brought out when required for that bigger meal.
Here’s a picture or two. Enjoy the project!